In this tutorial we are going to make a weather station that will tell us temperature, humidity and heat index of a particular location. It will show these values in a web browser. You can monitor these data by entering the IP address in a mobile, computer or any other device which supports a web browser.
This project is done using Arduino Uno, ESP8266 and DHT22 sensor. DHT22 sensor will read temperature and humidity information. ESP8266 WiFi module is used to establish network communication. Arduino is the core of this project which will read data from DHT22 sensor and sending it to a browser whenever a request is received. Arduino + ESP8266 is programmed to act as a web server.
Components Required
- DHT22 Temperature and Humidity Sensor
- ESP8266 WiFi Module
- Arduino Uno
- 1KΩ resistors
- Breadboard
DHT22 Temperature and Humidity Sensor
DHT22 Temperature and Humidity Sensor
It uses digital signal collecting technique and humidity sensing technology. It’s sensing elements are connected with an 8-bit microcontroller. DHT sensors are small in size, consumes low power and has the long transmission distance using one wire bus (20m).
DHT22 sensor consists of two sections, one for humidity sensing (capacitive humidity sensor) and another for temperature sensing (thermistor). The microcontroller inside the sensor reads both relative humidity and temperature from respective sensors. Then sends it via the output pin after converting to digital format.
ESP-01 ESP8266 WiFi Module
ESP-01 ESP8266 Module
ESP-01 is the one of the most popular ESP8266 module available in the market. ESP8266 is a self contained SoC with integrated TCP/IP stack which helps any microcontroller having UART to access a wifi network. It can act as both WiFi access point as well as a WiFi client. It is pre-programmed with AT commands, so we can easily access and configure it using a microcontroller.
ESP8266 runs on 3.3V and its input pins are not 5V tolerant. So we need to reduce the 5V output of the Arduino Tx pin to 3.3V by using voltage dividing resistors to connect to Rx pin of ESP8266 module. Arduino TTL input pins will detect 3.3V as logic high, so we can directly connect 3.3V output of ESP8266 Tx to Arduino Rx pin.
Circuit Diagram and Explanation
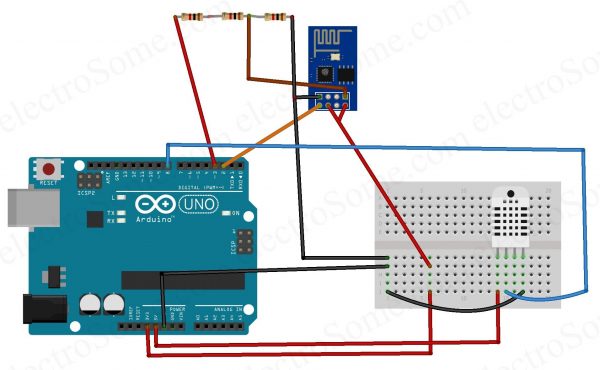
First of all we will connect DHT22 sensor with the Arduino Uno. Connect the 5V and the ground of the DHT22 to the 5V and ground output of Arduino. Then connect the data pin of the DHT22 to the pin 8 of the Arduino.
Then we will connect the ESP8266 with Arduino. Note that ESP8266 is a 3.3V device, so make sure that you are connecting 3.3V supply to it. Connect the VCC and CH_PD pin of ESP8266 with 3.3V output of Arduino and also make the ground common. Its input pins are not 5V tolerant. So we need to reduce the 5V output of the Arduino Tx pin to 3.3V by using voltage dividing resistors to connect to Rx pin of ESP8266 module. Arduino TTL input pins will detect 3.3V as logic high, so we can directly connect 3.3V output of ESP8266 Tx to Arduino Rx pin.
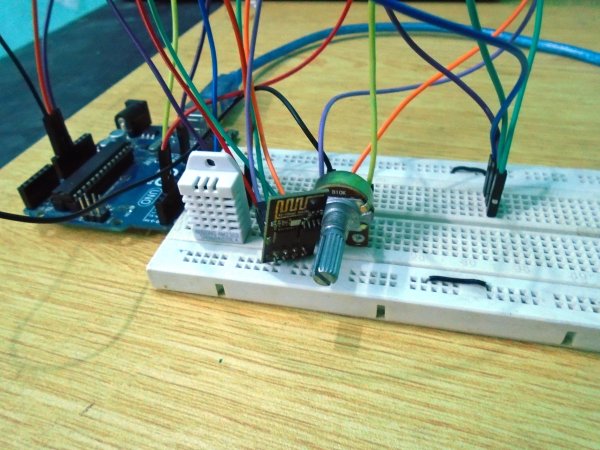
Note : I used a potentiometer to generate 3.3V from 5V instead of three 1KΩ resistors.
Read More: Arduino Weather Station Web Server