Introduction
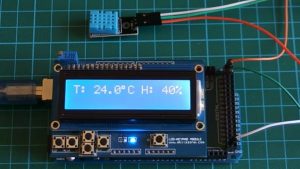
Using a display to view the temperature and humidity of your environment can be possible using the DHT11 or DHT22 sensor with the easy to use Arduino microcontroller platform and that’s the goal of this project. For this project, we will be using the 16×2 LCD display module to display the temperature and humidity readings gathered from the environment using the DHT11 temperature and humidity sensor.
Project Parts
The components/parts needed for this tutorial are:
- DHT11 Temperature and humidity sensor
- 16×2 LCD keypad shield
- Arduino Mega
- Breadboard
- Jumper wires
- Resistors
The DHT11 is a low cost temperature and humidity sensor that operates using the 1-wire protocol, costs about $2.
This sensor has three pins, the first pin is the power pin VCC, the middle pin is the signal out or DATA pin and the last pin is GND.
Although the DHT11 temperature and humidity sensor isn’t the fastest temperature and humidity sensor around, it has fair level of accuracy, +-5% for humidity readings and +-2% for temperature readings. With the DHT we will be able to measure temperature and humidity of the environment with a very fair degree of accuracy.
The LCD Keypad shield makes connecting the 16×2 LCD module to any system quite easy as it simply just plugs on the Arduino mega which is being used for this project.
An ordinary 16×2 LCD module (not shield) can also be used. Just ensure the pins are connected as described in the code and schematic below.
Schematic
Connect the LCD and the DHT11 sensor as shown in the image below.
Putting the component together is very easy if using the LCD keypad shield. All you just need to do is plug the LCD in as shown below and connect the DHT as described in the schematics above.
Read more: Arduino Weather Station using DHT11

