
Summary of Arduino SD Cards and Datalogging
This article introduces the eleventh tutorial in an advanced Arduino series, focusing on building a datalogger using an SD card shield. The project enables reading and writing data to an SD card while polling various sensors like IR distance, temperature, and light sensors. The recorded data is formatted for visualization in software like Microsoft Excel. The guide includes downloadable schematics, source code, and a detailed parts list featuring specific components required for assembly.
Parts used in the Arduino Datalogger:
- Arduino Uno
- SD Card Shield w/ Card
- USB Cable
- Arduino Software
- Breadboard
- Jumper Kit
- IR Distance Sensor (x2)
- I2C Celsius Temperature Sensor
- Photoresistor
- 12V Power Supply
- 10k ohm Resistor (x3)
This is my first in a series of more advanced Arduino tutorials.
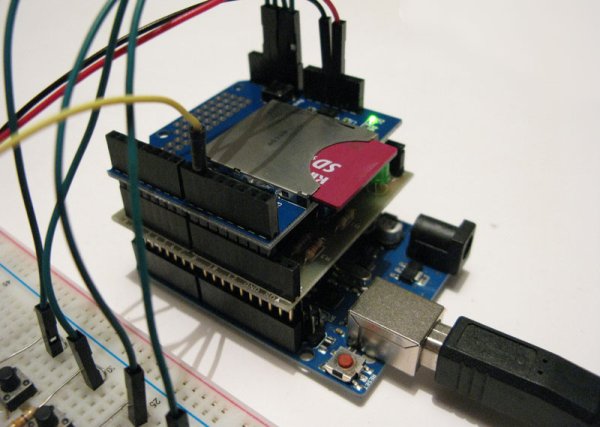
Now that we’ve covered the basics in tutorials 1-10 (you have watched them all right!?), it’s time to start pursuing some more complex projects! In this episode, we’ll utilize an SD card shield from cooking-hacks.com to create a datalogger.
First, I’ll walk you through the process of reading from, and writing to an SD card. Then, we’ll utilize some of our knowledge from tutorials 4, 6, 7, and 8 to add several sensors that we can poll periodically using our datalogger. The logger will record sensor values to its SD card in a useful format so that we can later use a computer program like Microsoft Excel to visualize the data. Download the schematics and source code first so you can reference them while you watch the video. For the first time, I’m using fritzing to draw the circuit schematics. So, take a look at them, and let me know what you think!
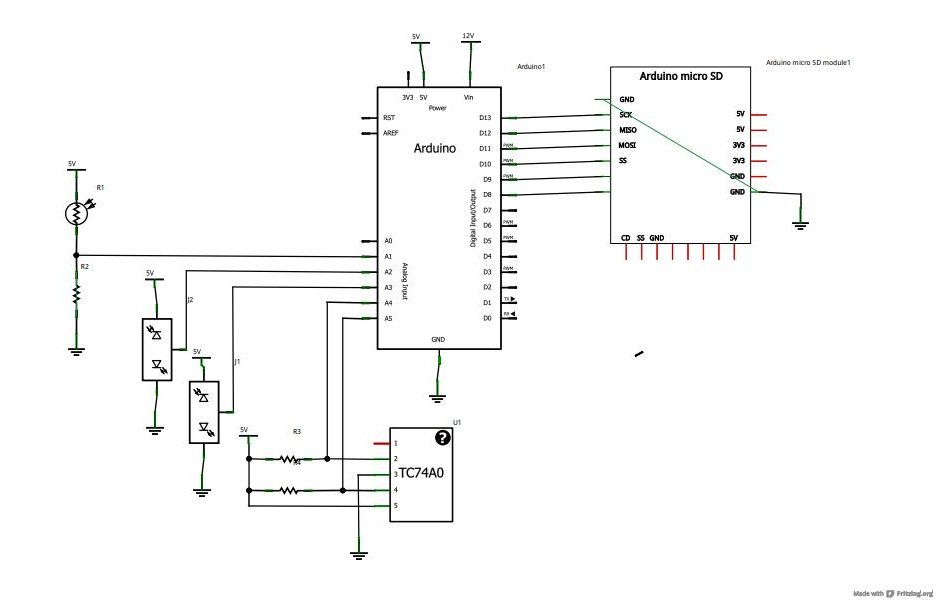
You can download the files associated with this episode here:
1. Arduino Uno: http://us.element-14.com/arduino/a000046/arduino-uno -board/dp/13T9285
2. SD Card Shield w/ Card: http://www.cooking-hacks.com/index.php/microsd-2gb -module-for-arduino.html
3. USB Cable: http://us.element- 14.com/jsp/search/productdetail.jsp?SKU=73H0884
4. Arduino Software: http://arduino.cc/en/Main/Software
5. Breadboard: http://us.element-14.com/jsp/search/productdetail.jsp?SKU=17C6965
6. Jumper Kit: http://us.element-14.com/3m/923351-i/pcb-accessories/dp/65F2290
7. IR Distance Sensor (x2) : http://us.element-14.com/sharp/gp20a41sk0f/dp/14N9318
8. I2C Celsius Temperature Sensor: http://us.element-14.com/microchip/tc74a0 -5- 0vat/ic -thermal- sensor – 2-c-to220 -5/dp/92C6554
9. Photoresistor: http://us.element-14.com/eg- g- vactec/vt90n1/ldr-200kohm -80mw – vt900-series/dp/99F4265
10. 12V Power Supply: http://www.sparkfun.com/products/9442
11. 10k ohm Resistor (x3) : http://us.element-14.com/multicomp/mccfr0w4j0103a50/resistor-carbon -film -10kohm-250mw/dp/58K5002
For more detail: Arduino SD Cards and Datalogging
- What is the main goal of this Arduino tutorial?
The goal is to create a datalogger that reads from and writes to an SD card while polling sensors. - Can I visualize the recorded sensor data later?
Yes, the logger records values in a useful format so you can use programs like Microsoft Excel to visualize them. - Which tools are used to draw the circuit schematics in this project?
Fritzing is used for the first time to draw the circuit schematics for this episode. - How often does the datalogger poll the sensors?
The datalogger polls the sensors periodically using knowledge from previous tutorials. - What type of power supply is recommended for this project?
A 12V Power Supply is listed as one of the major components for the project. - Can I download the source code for this project?
Yes, you can download the Episode 11 Arduino Programs files to reference while watching the video. - Which specific sensors are included in the parts list?
The list includes two IR Distance Sensors, one I2C Celsius Temperature Sensor, and one Photoresistor. - Where can I find the schematics and source code?
You can download the files associated with this episode from the provided links in the article.
