
Summary of Arduino Drum Man
This article details the construction of an Arduino-controlled robot drummer using a cheap toy drum kit. The project involves building a wire frame for the "drum man," attaching three servos to simulate arm and leg movements, and wiring them to an Arduino Uno via a breadboard. The author provides specific instructions on modifying toy drums, connecting servo wires (orange to digital pins, red/brown to power rails), and writing C++ code to control servo angles for basic or complex drum patterns.
Parts used in the Arduino Drum Man:
- Metal wire
- Cheap drum toy kit (Hi hat, snare and kick drum)
- Three Servo's
- Electric wire
- Duct tape
- Breadboard
- Arduino Uno
- Usb to Usb 2.0
Ingredients:
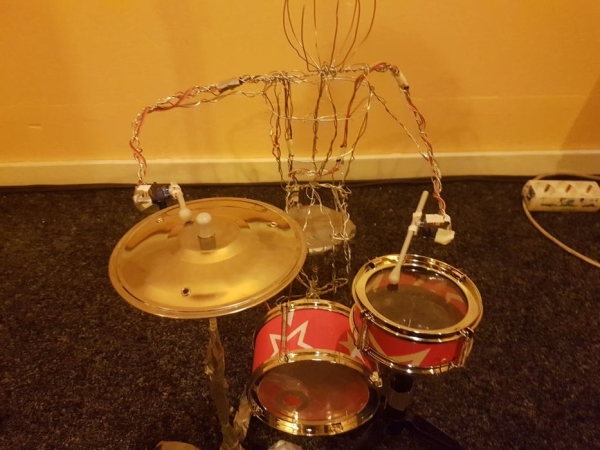
1. Metal wire
2. Cheap drum toy kit (Hi hat, snare and kick drum)
3. Three Servo’s
4. Electric wire
5. Duct tape
6. Breadboard
7. Arduino Uno
8. Usb to Usb 2.0
Step 1: How to Make the Drums:
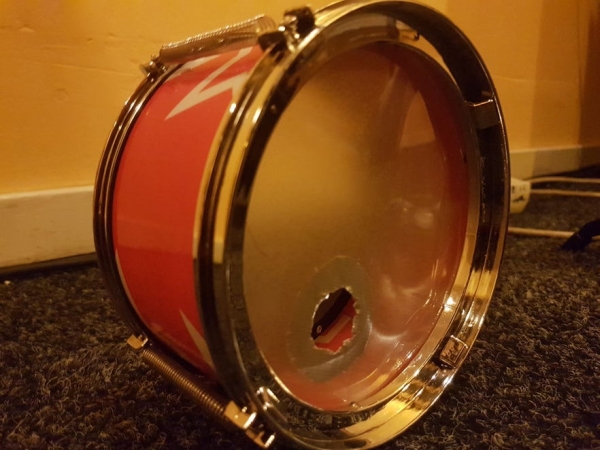
How you’re going to make the drums, is basically up to you. It totally depends on what type of drums you get, as long as it’s a toy (and not a life-size one, haha). I had to tweak mine a little, as I had only two toms, a hi hat and a snare to begin with. They were all open on one side, so I put the two closed tom parts together to form a snare. I used the snare as a kick drum. I put plastic over the open end of the kick drum and cut a hole into it. The hi hat stand was made almost entirely out of metal wire with a little bit of duct tape. It’s mostly just adjusting things that are already there, to be honest. It’s not that hard.
Step 2: How to Make the Robot:
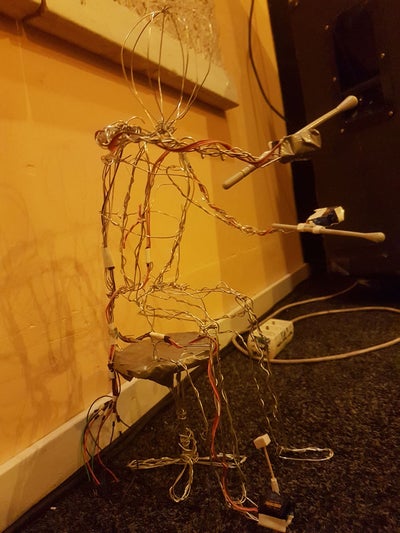
Building the robot was the hardest part. I started off by imagining myself as the tiny person playing the toy drums. I imagined how long my arms would have to be to reach the hi hat and the snare. The drum man has to be adjusted to the size of the drums, otherwise it won’t work. Start building a really basic frame, just one wire for the entire body and try to make it more 3D from there. Not because it looks good, but the arms of the man will slowly lower all the way down when you attach the servo’s (I’ve been there). After you’re finished building the frame for the drum man, attach the servo’s to the right hand, the left hand and the right leg. Wrap the wires around the frame to make sure that they won’t fall off the arms and the legs.
Step 3: The Servos:
All tiny blue servo’s have a brown, red and orange wire . The wiring is fairly simple. The servos, the breadboard and the Arduino have female openings, so you’ll want to use basic electric wire, as they have two male ends. The orange wire goes into the Arduino Uno (pick a number between 0 and 13 on the board), the red wire goes into the plus part of the Breadboard and the brown wire goes into the minus part of the Breadboard. Do this for all servos and you’re good to go. Well, sort of. Connect a wire from GND (power part of the Arduino) to the minus part on the right side of the Breadboard. Then connect a wire from 5V(also power part of the Arduino) to the plus part on the right side of the board. Now the wiring should be finished.
Step 4: The Code:
the code should be
pretty easy. I didn’t have any trouble with it, and I don’t have a clue how coding work for the most part.
The basic code is this:
#include
Servo servo1;
Servo servo2;
Servo servo3;
int servoPos = 0;
void setup() {
servo.attach(3); //The number indicates which slot I used in the Arduino Uno.
servo.attach(5);
servo.attach(6);
}
void loop() {
for(servoPos = 0; servoPos < 140; servoPos++) // This basically tells the servo to move from zero to 140 degrees. It depends on how far your robot arm is above the drums though.
{
servo1.write(servoPos); //My hi hat
servo2.write(servoPos); //My kick
servo3.write(servoPos); //My snare
delay(4); //This is the time it will take to perform a task in miliseconds. If you increase this number, your drummer will become slower.
}
for(servoPos = 140; servoPos > 0; servoPos–)
{
servo1.write(servoPos);
servo2.write(servoPos);
servo3.write(servoPos);
delay(2);
}
}
If you want to make drum patterns, just copy those for loops underneath each other, but instead of using the hi hat, the snare and the kick drum together at once (like in the code above), you can do it like this:
servo1.write(servoPos);
servo2.write(servoPos);
servo1.write(servoPos);
servo3.write(servoPos);
servo1.write(servoPos);
servo3.write(servoPos);
servo1.write(servoPos);
servo2.write(servoPos);
(All in separate for loops, of course)
Source: Arduino Drum Man
-
How do you modify the toy drums if they are open?
You can put two closed tom parts together to form a snare, use the snare as a kick drum, cover the open end of the kick drum with plastic, and cut a hole into it. -
What is the best way to build the robot frame?
Start with a basic frame made of one wire for the body and try to make it more 3D, ensuring the arms are long enough to reach the hi hat and snare before attaching servos. -
How should the servo wires be connected to the breadboard and Arduino?
The orange wire goes into a digital slot on the Arduino Uno, the red wire connects to the plus part of the Breadboard, and the brown wire connects to the minus part. -
Does the code require complex programming knowledge?
No, the author states the code is pretty easy and does not have trouble with it, even without deep knowledge of how coding works. -
Can you create different drum patterns instead of hitting all drums at once?
Yes, you can copy the for loops underneath each other and write individual commands for specific servos like the hi hat, snare, and kick drum separately. -
How do you adjust the speed of the drummer?
You can change the delay number in the milliseconds; increasing this number makes the drummer slower. -
Where do the power connections go for the breadboard?
A wire from GND on the Arduino connects to the minus part on the right side of the Breadboard, and a wire from 5V connects to the plus part.
