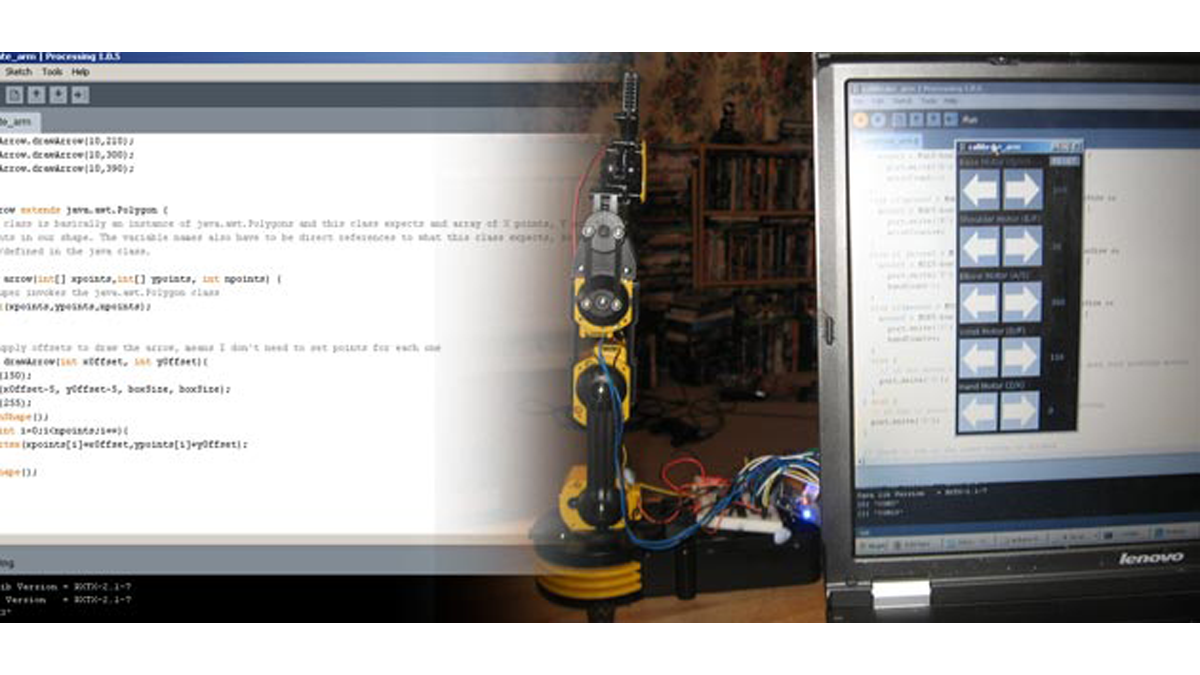
So the arm is wired into Arduino as per the previous post, Arduino: Modifying a Robot Arm and hopefully this has worked. In this next part I alter the Arduino sketch slightly and write the first Processing sketch to test control of the arm – video at the bottom.
To control the robot arm we’ll be sending a byte value over the serial port and then reading that in the Arduino code. Depending upon the value sent different motors will be activated.

For the processing sketch I’ve made a few buttons for each motor and also coded the use of the keyboard for another control method. Using either arbitrarily moves the arms motors.
This sketch is the basis for all the further work as well as testing the arm, from this I will move to inverse kinematics as well as programming repeat actions for the arm to perform. Ultimately leading to the arm responding to sensors and other stimuli – eventually! (I have a lot to write up).
For a basic example of working with controlling Arduino using Processing please read my tutorial “Using Processing to Send Values to Arduino” which explains about sending data over the serial port.
The Arduino Sketch
Nothing much has changed from the sketch in the previous post, the main difference is that now you can see we’re reading values from the serial port and acting accordingly. All the logic happens in the Processing code.
/* controls each motor in an Edge Robotic Arm using data sent from
    a Processing Sketch
    luckylarry.co.uk

*/
// set the output pins
// 14-18 are actually analog pins 0-4
int baseMotorEnablePin = 2;
int baseMotorPin1 = 3;
int baseMotorPin2 = 4;
int shoulderMotorEnablePin = 14;
int shoulderMotorPin1 = 15;
int shoulderMotorPin2 = 16;
int elbowMotorEnablePin = 8;
int elbowMotorPin1 = 9;
int elbowMotorPin2 = 10;
int wristMotorEnablePin = 5;
int wristMotorPin1 = 6;
int wristMotorPin2 = 7;
int handMotorEnablePin = 11;
int handMotorPin1 = 17;
int handMotorPin2 = 18;
// set a variable to store the byte sent from the serial port
int incomingByte;

void setup() {
  // set the SN754410 pins as outputs:
  pinMode(baseMotorPin1, OUTPUT);
  pinMode(baseMotorPin2, OUTPUT);
  pinMode(baseMotorEnablePin, OUTPUT);
  digitalWrite(baseMotorEnablePin, HIGH);
  pinMode(shoulderMotorPin1, OUTPUT);
  pinMode(shoulderMotorPin2, OUTPUT);
  pinMode(shoulderMotorEnablePin, OUTPUT);
  digitalWrite(shoulderMotorEnablePin, HIGH);
  pinMode(elbowMotorPin1, OUTPUT);
  pinMode(elbowMotorPin2, OUTPUT);
  pinMode(elbowMotorEnablePin, OUTPUT);
  digitalWrite(elbowMotorEnablePin, HIGH);
  pinMode(wristMotorPin1, OUTPUT);
  pinMode(wristMotorPin2, OUTPUT);
  pinMode(wristMotorEnablePin, OUTPUT);
  digitalWrite(wristMotorEnablePin, HIGH);
  pinMode(handMotorPin1, OUTPUT);
  pinMode(handMotorPin2, OUTPUT);
  pinMode(handMotorEnablePin, OUTPUT);
  digitalWrite(handMotorEnablePin, HIGH);
  // start sending data at 9600 baud rate
  Serial.begin(9600);
}

void loop() {
  // check that there's something in the serial buffer
  if (Serial.available() > 0) {
    // read the byte and store it in our variable
    // the byte sent is actually an ascii value
    incomingByte = Serial.read();
    // note the upper casing of each letter!
    // each letter turns a motor different way.
    if (incomingByte == 'Q') {
    digitalWrite(baseMotorPin1, LOW);
    digitalWrite(baseMotorPin2, HIGH);
    }
    if (incomingByte == 'W') {
    digitalWrite(baseMotorPin1, HIGH);
    digitalWrite(baseMotorPin2, LOW);
    }
    if (incomingByte == 'E') {
    digitalWrite(shoulderMotorPin1, LOW);
    digitalWrite(shoulderMotorPin2, HIGH);
    }
    if (incomingByte == 'R') {
    digitalWrite(shoulderMotorPin1, HIGH);
    digitalWrite(shoulderMotorPin2, LOW);
    }
    if (incomingByte == 'A') {
    digitalWrite(elbowMotorPin1, LOW);
    digitalWrite(elbowMotorPin2, HIGH);
    }
    if (incomingByte == 'S') {
    digitalWrite(elbowMotorPin1, HIGH);
    digitalWrite(elbowMotorPin2, LOW);
    }
    if (incomingByte == 'D') {
    digitalWrite(wristMotorPin1, LOW);
    digitalWrite(wristMotorPin2, HIGH);
    }
    if (incomingByte == 'F') {
    digitalWrite(wristMotorPin1, HIGH);
    digitalWrite(wristMotorPin2, LOW);
    }
    if (incomingByte == 'Z') {
    digitalWrite(handMotorPin1, LOW);
    digitalWrite(handMotorPin2, HIGH);
    }
    if (incomingByte == 'X') {
    digitalWrite(handMotorPin1, HIGH);
    digitalWrite(handMotorPin2, LOW);
    }
    // if a O is sent make sure the motors are turned off
    if (incomingByte == 'O') {
    digitalWrite(baseMotorPin1, LOW);
    digitalWrite(baseMotorPin2, LOW);
    digitalWrite(shoulderMotorPin1, LOW);
    digitalWrite(shoulderMotorPin2, LOW);
    digitalWrite(elbowMotorPin1, LOW);
    digitalWrite(elbowMotorPin2, LOW);
    digitalWrite(wristMotorPin1, LOW);
    digitalWrite(wristMotorPin2, LOW);
    digitalWrite(handMotorPin1, LOW);
    digitalWrite(handMotorPin2, LOW);
    }
  }
}
The Processing Sketch
I’ve drawn some fancy arrows for my buttons in this sketch but otherwise the code is pretty simple – if I press Q or q on the keyboard or if I press an arrow button then send the ascii value of Q (note the uppercase) over the serial port for the Arduino to pick up and turn the motor on. There is nothing here really complicated just a fair few lines of code for the user interface.
For more detail: Arduino: Controlling the Robot Arm
