Summary of Arduino Control via a Web Service with Teleduino
Teleduino transforms an Arduino into a web-controlled device by connecting it to a server via the internet. This setup requires no firewall changes or complex network configuration if DHCP is supported. The platform enables remote management of pins, shift registers, serial ports, EEPROM, and servos, along with system monitoring like uptime and memory usage. This tutorial specifically guides users through creating a status LED project using an Ethernet-enabled Arduino Uno.
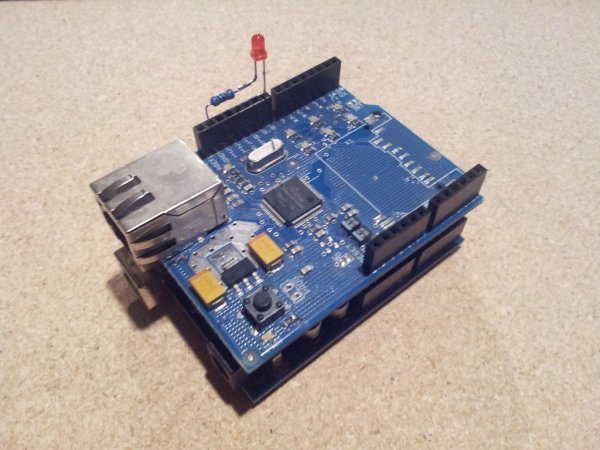
Parts used in the Teleduino Status LED Project:
- Arduino Uno / Mega (or equivalent)
- Ethernet Shield (Wiznet based)
- LED
- 1K Resistor (or similar)
Teleduino is both a product and a service. Once the Teleduino sketch has been loaded on your Arduino (the ‘product’), it then connects to the Teleduino server awaiting your instruction from anywhere in the world via the internet (the ‘service’).
Typically there are no firewall changes required, and if your network supports DHCP then no network configuration is needed on the device. Easy!
The Teleduino platform allows you to perform the following with your Arduino, all via the internet:
- Reset, ping, get version, get uptime, get free memory.
- Define pin modes, set digital outputs, set analog outputs, read digital inputs, read analog inputs, or read all inputs with a single API call.
- Define up to 2 ‘banks’ (4 for the Mega) of shift registers. Each ‘bank’ can contain up to 32 cascaded shift registers, giving a total of 512 digital outputs (1024 for the Mega).
- Shift register outputs can be set, or merged, and expire times can be set on merges (you could set an output(s) high for X number of milliseconds).
- Define, and read and write from serial port (4 for the Mega).
- Read and write from EEPROM.
- Define and position up to 6 servos (48 for the Mega).
- Set preset values for the above functions, which get set during boot. Preset values are stored in the first 178 bytes of the EEPROM (413 for the Mega).
Just imagine what you can do. The possibilities are endless. What makes it even better? The process is quick and easy.
This tutorial will guide you through creating a Status LED for your device, then obtaining and uploading the Teleduino library/sketch to your ethernet enabled Arduino Uno (or equivalent).
To complete this tutorial you need:
- Arduino Uno / Mega (or equivalent)
- Ethernet Sheild (Wiznet based)
- LED
- 1K Resistor (or similar)
This is our first tutorial and will be adding neat project tutorials for achieving specific tasks.
If you get stuck on any of the steps, or if you feel that there is a step that could be explained better, please leave a comment so that we can improve things.
Enjoy!
Step 1: Obtain Unique API Key
This API key needs to be loaded into the Arduino sketch (explained in Step 4).
Your key will be sent to you by email within a few minutes of being requested.
To request a key, hop over to https://www.teleduino.org/tools/request_key.php (please bear with us while the nice looking site is being built!)
Cheers!
The different status codes are:
1 flash – Initialising
2 flashes – Starting network
3 flashes – Connecting to server
4 flashes – Authenticated
5 flashes – Session already exists for supplied key (sometimes happens after a quick restart – will work on next auto-restart)
6 flashes – Invalid or unauthorised key
10 flashes – Connection dropped
- What does the Teleduino platform allow you to do with your Arduino?
It allows you to reset, ping, get version, set pin modes, read inputs, control shift registers, use serial ports, manage EEPROM, and position servos via the internet. - How do I obtain a unique API key for my device?
You request the key at https://www.teleduino.org/tools/request_key.php and receive it via email within a few minutes. - Does this project require firewall changes or network configuration?
No, typically there are no firewall changes required, and no network configuration is needed on the device if it supports DHCP. - What happens if the LED flashes 6 times during boot?
It indicates that the API key provided is invalid or unauthorized. - Can I define preset values for functions during boot?
Yes, preset values are stored in the first 178 bytes of the EEPROM for standard Arduinos or 413 bytes for the Mega. - What is the maximum number of shift register banks I can define?
You can define up to 2 banks on standard models or 4 banks on the Mega. - How many servos can be defined and positioned using this platform?
You can define and position up to 6 servos on standard models or 48 on the Mega. - What is the purpose of the status LED flashing codes?
The codes help you monitor the boot process and troubleshoot connection issues by showing initialization, network starting, server connection, and authentication status.