Summary of Arduino 8 Key Tinfoil Piano
This Instructables tutorial shows how to build a simple 8-key capacitive piano using an Arduino, tinfoil keys on cardboard, resistors as sensors, and a mini speaker. It covers cutting foil keys, wiring them to Arduino digital pins with resistors, connecting a speaker, uploading code, adjusting touch thresholds, and optionally building a cardboard enclosure.
Parts used in the Arduino 8 Key Tinfoil Piano:
- Arduino Board
- Breadboard
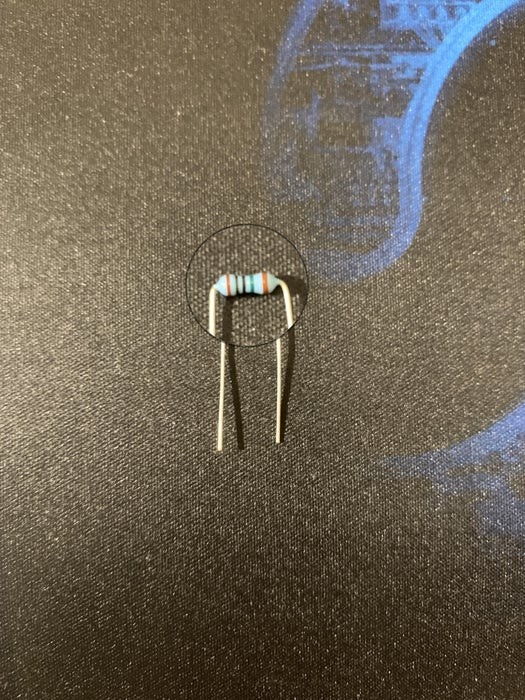
- 10MΩ Resistor ×8 (1MΩ acceptable)
- Arduino mini speaker
- Wires/Jumpers
- Double-sided tape
- Cardboard
- Tinfoil
- Optional: Hot glue gun
In this Instructables tutorial, I will teach you how to make a simple 8 key piano with your Arduino.
Supplies:
- Arduino Board
- Breadboard
- 10MΩ Resistor*8
- Arduino mini box speaker
- Wires/Jumpers
- Tape
- Cardboard
- Tinfoil
- (optional) Hot glue gun
Step 1: Gather Supplies
Here is what you’ll need:
- Arduino Board
- Breadboard
- 10MΩ Resistor*8 (1MΩ Resistors work too)
- Arduino Mini Speaker
- Wires/Jumpers
- Double-sided tape
- Carboard
- Tinfoil
- (optional) Hot Glue Gun
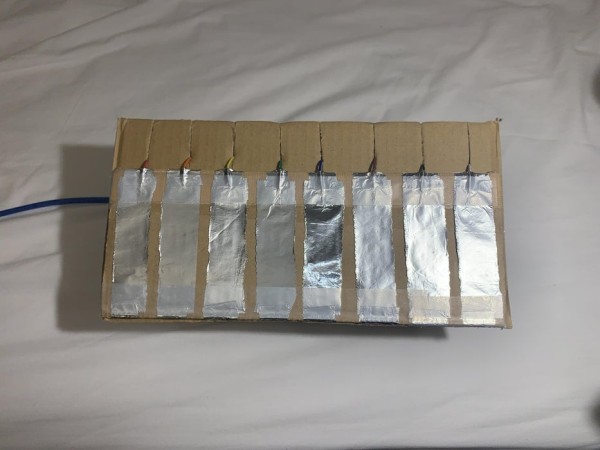
Step 2: Making the Keys
To make the main keyboard, carefully cut out 8 pieces of tinfoil (Mine is approximately 2cm) and cut out a piece of cardboard that could fit these strips of foil. (Making the keys too big may affect its sensitivity and not activate upon press)
IMPORTANT: Do not let the keys touch each other, short-curciting the keyboard
Step 3: Making the Board + Connections
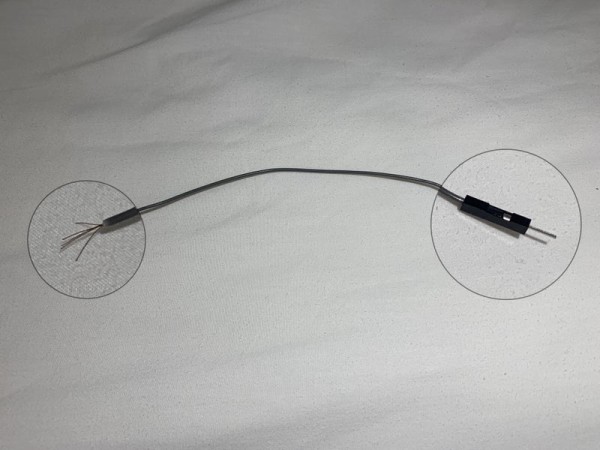
Use a wire and rip off one end of the connection, exposing about 1cm of the copper wires, spread out these thin strands of wires (shown above) to help ensure a better connection when taped to the foil.
Use some double-sided tape and secure the foil strips onto the cardboard, don’t forget to sandwich the copper wires in between (shown above) (Optional) I made cuts into the cardboard to manage the 8 pieces of wires better, however, this is completely based on your preference (does not affect the instrument)
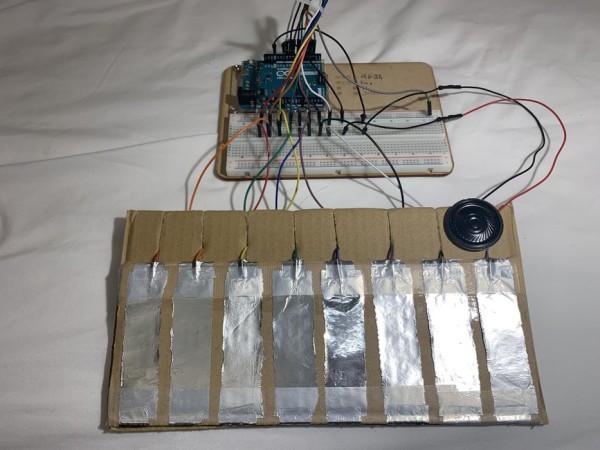
Step 4: Assemble the Circuit
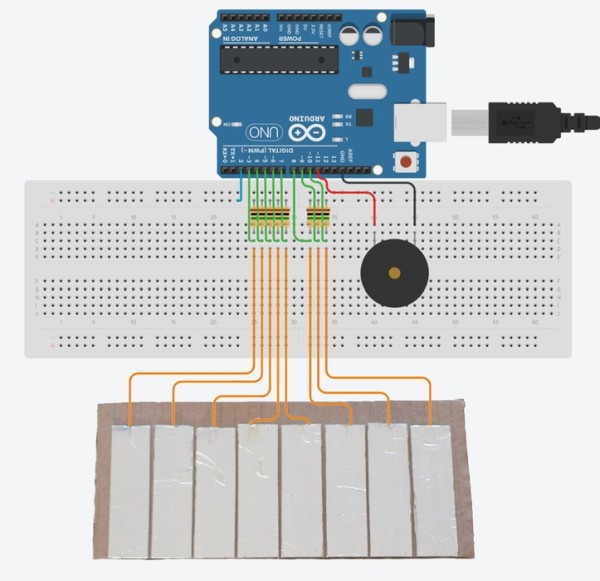
Populate your breadboard and Arduino following the diagram and pictures above:
D2: Captive Sensor (More on that later)
D3~D10: Piano Keys (I used rainbow colours to better clarify each key
D11: Speaker
Gnd: Speaker
Make sure the resistors are plugged into the D2 Bus, in between the wires coming from the Arduino and the wires from the tinfoil.
If you would like to learn more about Captive Sensors: (a method used to detect human touches)
Step 5: Upload Code + Tweaking
Upload the Following Code to Arduino, if your speaker isn’t making sounds when pressed, play around with the threshold level on this line of code
Sometimes the keys are extremely sensitive (playing lots of random noises not pressed) …In that case move the number closer to the 5 digit range
int treshold = (10~30000);
Personally, using the 10MΩ resistors. Values around 5000~7000 all work well.
Import Code:
https://create.arduino.cc/editor/alany222/0c78e092…
Import Library:
https://playground.arduino.cc/Main/CapacitiveSenso…
Step 6: Optional: Making a Cardboard Enclosure
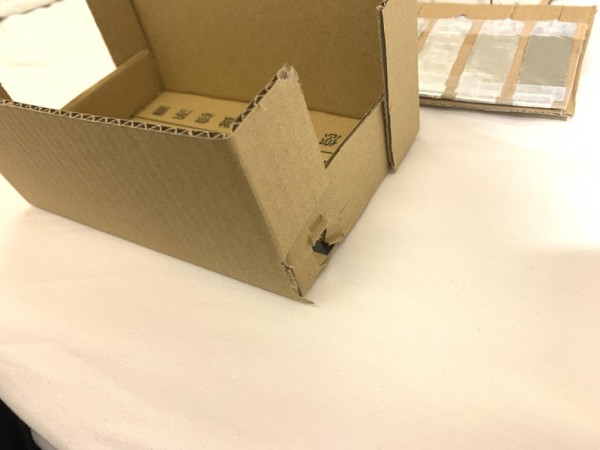
If you have extra cardboard & time left, consider making an enclosure for your creation!
I’m using cardboard but feel free to use anything else other than conductive materials (may affect the keys)
Source: Arduino 8 Key Tinfoil Piano
- What resistor values are used for the capacitive keys?
The tutorial uses 10MΩ resistors and notes 1MΩ resistors also work. - Which Arduino pins are used for the piano keys?
Digital pins D3 through D10 are used for the piano keys and D2 is used as the captive sensor. - Where is the speaker connected?
The speaker is connected to D11 with the speaker ground on Gnd. - How are the tinfoil keys attached to the board?
Cut foil strips, tape them to cardboard with double-sided tape, and sandwich exposed wire strands between foil and tape. - What should I do if keys are too sensitive?
Adjust the threshold value in the code toward the 5-digit range; the tutorial suggests values around 5000–7000 with 10MΩ resistors. - What causes keys to short-circuit and how to avoid it?
If foil keys touch each other they can short; ensure keys do not touch when placing them on the cardboard. - Can I enclose the project, and what materials should I avoid?
Yes, an enclosure can be made from cardboard or other non-conductive materials; avoid conductive materials that may affect the keys. - Where can I get the code and library used?
The tutorial provides links to the Arduino project code and the CapacitiveSensor library on the Arduino Create and Arduino Playground sites.