
Summary of Arduino 7-Segment Thermometer
This article describes building a digital thermometer using an Arduino, a DS18B20 temperature sensor, and dual 7-segment displays controlled by shift registers. The project reduces pin usage from 16 to 3 via shift registers while accurately reading temperature in Celsius or Fahrenheit using the Dallas_Temperature library.
Parts used in the Digital Thermometer:
- Arduino
- DS18B20 temperature sensor
- Dual 7-segment display
- Two shift registers
- 4.7k resistor
- OneWire library
- Dallas_Temperature library
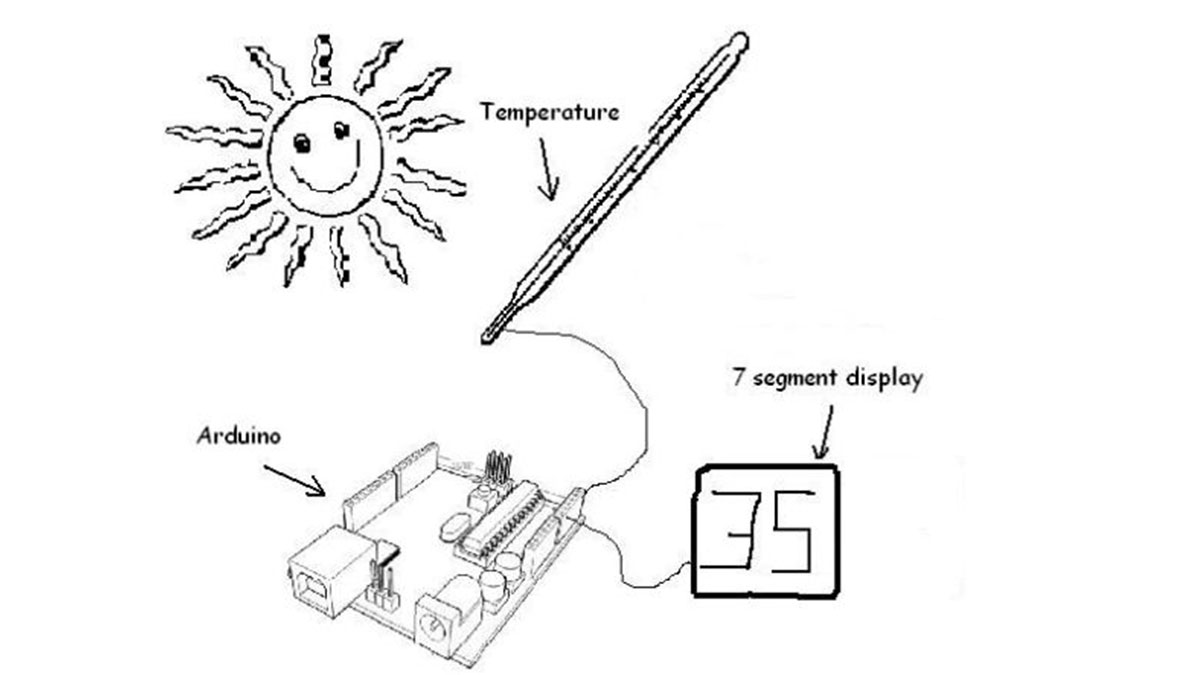
Using a dual 7-segment display, a DS18B20 temperature sensor and a couple of shift registers I figured that I could build a digital thermometer.
Step 1: Temperature Sensor
The sensor I’m using is the DS18B20, it’s a 3pin sensor that just requires a single input pin from the arduino. Multiple sensors can be hooked together, however I’m just using one for this project. As with a lot of different sensors there’s a handy library that makes it particularly easy to get the temperature in centigrade or fahrenheit, it’s the Dallas_Temperature library available here and a spec sheet for the sensor available from maxim.
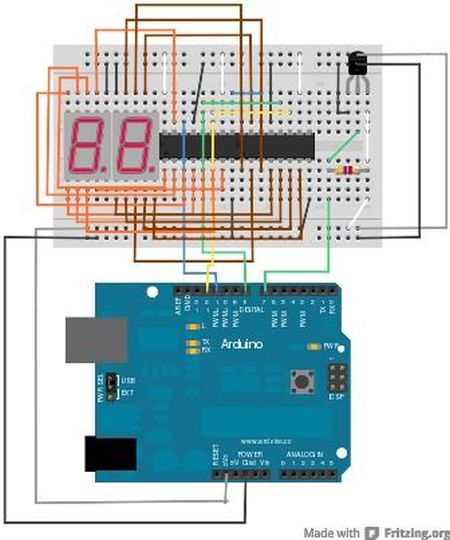
To connect it to the arduino connect the ground pin on the sensor to a ground pin on the arduino, put a 4.7k resistor between pin 2 and pin 3 on the sensor, connect pin 3 to 3.3v from the arduino and then connect pin 2 to digital input on the arduino. Once this is done, we’re ready to read the temperature!
Step 2: Controlling the Display
I chose to use a dual 7-segment , it didn’t take long to figure out the pin outs, however an issue was the number of pins this would require from the arduino if I hooked it up directly, a massive 16. With two shift registers hooked up together this could reduce the number of pins required to only 3, as the two shift registers require only 3 pins and with being hooked together provide 16 parallel outputs.
Step 3: Putting it Together
The code I’ve put together is at the end of this post. It basically sets up the temperature libraries, reads the temp, and then puts this into the shift registers.
#include OneWire.h
#include DallasTemperature.h
// pin setups
int latchPin = 8;
int clockPin = 12;
int dataPin = 11;
int tempPin = 7;
// librraries for connecting to sensor
OneWire oneWire(tempPin);
DallasTemperature tempSens(&oneWire);
// characters for displaying on 7-seg display 0-9
byte numberSet[10] = {
B01111011, B01000001, B00110111, B01100111, // 0,1,2,3
B01001101, B01101110, B01111110, B01000011, // 4,5,6,7
B01111111, B01101111 // 8,9
};
void setup() {
// init serial
Serial.begin(9600);
// init temp sensor
tempSens.begin();
// set pin modes for shift registors
pinMode(latchPin, OUTPUT);
pinMode(myClockPin, OUTPUT);
pinMode(myDataPin, OUTPUT);
}
Arduino
For more detail: Arduino 7-Segment Thermometer
- What sensor is used for temperature measurement?
The project uses the DS18B20, a 3-pin sensor. - How many pins does the sensor require on the Arduino?
The sensor requires only a single input pin from the Arduino. - Why are shift registers used in this project?
Shift registers reduce the required pins from 16 down to just 3 for the display. - Which libraries are needed for the code?
The project requires the OneWire and Dallas_Temperature libraries. - Can multiple sensors be connected together?
Yes, multiple sensors can be hooked together, though only one is used here. - What is the purpose of the 4.7k resistor?
The 4.7k resistor connects pin 2 and pin 3 on the sensor. - How are the shift register pins configured?
Pins 8, 12, and 11 are used for latch, clock, and data respectively. - Does the code support different temperature units?
Yes, the library allows getting temperature in centigrade or fahrenheit.
