Amazon Dash Replenishment Service Automatic coffee ordering robot using Arduino MKR1000. Never miss another coffee break again!
Things used in this project
Story
Coffee fuels our nation, according to this Gallup article
- Just under two-thirds of U.S. adults drink at least one cup a day
- Coffee drinkers average 2.7 cups per day, unchanged from 1999
- A quarter say they’re addicted, but only 10% want to cut back
We all love our coffee. We want constant supply of it – at home, in the office, the gym, everywhere these days. Some people have it for breakfast, morning breaks, lunch, afternoon snacks, after dinner, midnight snacks. Just about anytime of the day.
This led me to experiment on new Amazon Dash Replenishment Services. Coffee is something we use everyday and a great use case for Amazon DRS.
Demonstration
Setup Instructions
This is based from following instructions from this github Repo from Brian Carbonette. https://github.com/andium/AmazonDRS
The instructions are easy to follow. Fit for Hackster devs like us. I used the same library and followed the steps to create an Arduino MKR1000.
SNS Simple Notification Service
Create a developer account with amazon web services
Create SNS Simple Notifications Service. Set up the SNS Topic for Dash Replenishment! You can find those here.
LWA Login With Amazon
Create a login with amazon security profile. Create a security profile to authorize the device to make purchases and log in with Amazon. Fill out the required fields, Security Profile Name,Security Profile Description,Consent Privacy Notice URL,Consent Logo Image
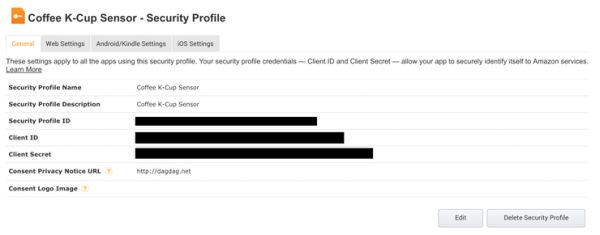

Don’t forget to setup Allowed Origins and Allowed Return URLs. Take note of Client ID and Client Secret.
Dash Replenishment Device
Create a Dash Replenishment Device. Follow this device creation wizard. It’s simple. You need Device Name, Model ID, Image. Then create Slots. You would need to know how to get the Amazon Standard Identification Number (ASIN). Currently only items that are “Shipped and Sold by Amazon” are eligible for DRS.
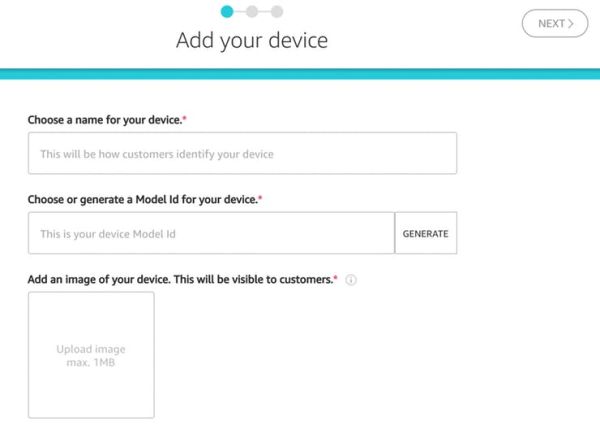
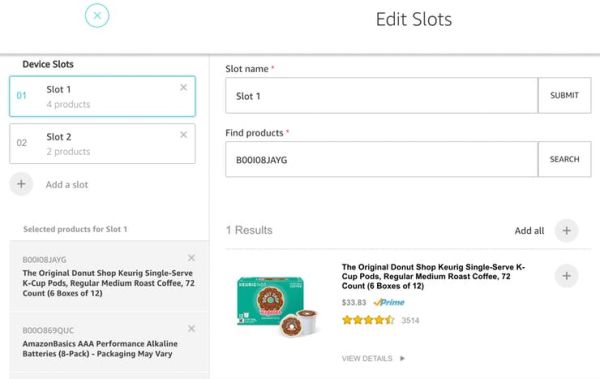
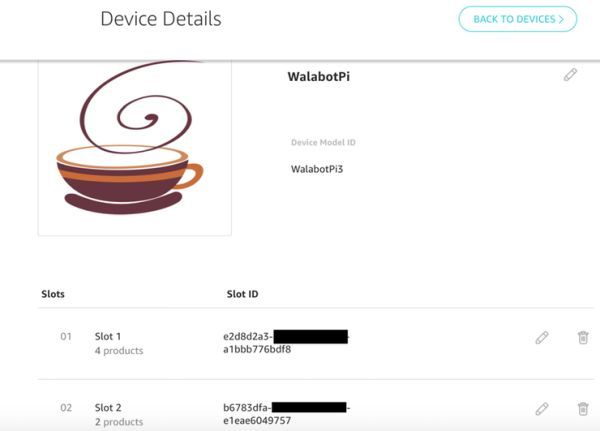
Take note of your devices Model ID as well as the associated Slot IDs.
Login With Amazon and Authorization Code Grant
To simplify the process, we’re skipping the customer facing app and just hack our registration. Make sure you install postman.
here’s the message to send
https://www.amazon.com/ap/oa?client_id=<CLIENTID>&scope=dash%3Areplenish&scope_data=%7B%22dash%3Areplenish%22%3A%7B%22device_model%22%3A%22<DEVICEMODEL>%22%2C%22serial%22%3A%22<DEVICENAME>%22%2C%20%22is_test_device%22%3A%22true%22%7D%7Dtest&response_type=code&redirect_uri=https%3A%2F%2Fwww.getpostman.com%2Foauth2%2Fcallback
replace these:
<CLIENTID> : amazon Client ID like
<DEVICEMODEL> is the device model, in my case I named it WalabotPi3
<DEVICENAME> is the name of device, I named it arduino123.
It’s currently setup as a test device so it won’t order. Go thru the process of selecting items for each slots. Complete it.
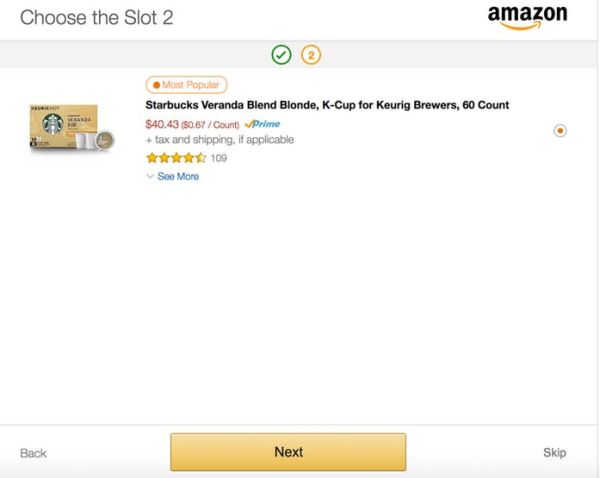
After that, In the address bar it would look something like this.
https://app.getpostman.com/oauth2/callback?code=<CODE>&scope=dash%3Areplenish
jot down the code, you will use it to setup device. code looks something like “ANdNAVhyhqirUelHGEHA”
Authorization
I cloned this repo, modified AmazonTokens.h file
#define client_id "amzn1.application-oa2-client.c0a2100c1af289b1bf4011c71f6029b3"
#define client_secret "ec48483c54c34a23a71aa8ccb2742902f7d3d00c2dd78fc5ac404eef0111e485"
#define redirect_uri "https%3A%2F%2Fwww.getpostman.com%2Foauth2%2Fcallback"
Zipped up the folder then installed the library in Arduino
Then open this example File>>Examples>>AmazonDRS>>authCodeGran and modify auth_code
#define auth_code "ANNnZjoWYoEIhEJrtLqL";
After running the authCodeGrant, look at the output on serial port. It will return something like this
refresh token = "Atzr|IwEBILdfysz66E9sRHsUobHgfh1X_h-esnBfcCdYjdcCfhGRkZqXujzXSN_3a8yqj5btX1B6NgbrmEX6wax_wmJ7Sgaaa39GbR-6hjDt_tHpKsFXPGwnIhy-14CWuE4oeYDWG4pCvQ4JEMKk2DiAsuwlUtoOVwaEOif1gWErh5rswCJ8mRhaXQ7SJhZB0CWYHm_ZA_PY8xTTVTUcZFqP7iz8kBw5QGDePyOb8NvJvSuBYYkwRQTj-qrytfdcHwMWOJc5QdoyPFpmchSfsMUpMqjDmwVPBfFzb0xZWYKxdUerSeKV1VVlS4Bwl2j-4gHnjHGohUsxau4Bn9SfG9McP-7RqD9Vmk3g--rsfACQ-uVLCJSJ29sBEMNkA5sxh9E9fpTwEw166WY-xBfYa_XB9aAU3n6Fn2yFM0I7ZpPIY1fy0gkdYkFOFD0uAOdoTFDxGXwbBWE";
Which is the refresh token for your device. Now go back and edit AmazonTokens.h at the Arduino Library Folder and change refresh token and authorization_grant_code
static String refresh_token = "Atzr|IwEBIIKDkzgMa5g7O0R1mLZZ6YZo-A1Ae5Ffj6wmV_rPbmAI0oixxTff8g3PN6MrOIEQpB9o_6BlDjiR6gkfRS_82Wp_0GWWvTrtYehcFJ8iKjuqf8n1ff9OrdHQU1_5nW_5Hf5loeIQ88TGazK2wy18UmOXOz1lbl9FDvWVQZl4t_6ggzDfMTVupvNr_ZtDrPm72auzoJIkGmGIM4S1RUw-Ru8X4q-UlzzYYfvRSJnPLAUTM3tTOEkv5e33SzExAaHl0tF22drRqvR1dEVlR_Zzw_IZ-1hzhIAvHrJs22K5dSEmkJKN7g8sD1tUKkn-ErMJhJrMehmvjwanF_O141Z5bVokmOLwiQKq_AYKGz8mJ0WPjBNQ3TbZ1g-3Xp-LqeMcKViNImcl1-_K89K5rupwAh-OmIPP5VhBArvhdeqEnreNU7LVLNoHvvyFB5ypwKQsHLe8";
static String authorization_grant_code = "ANNnZjoWYoEIhEJrtLqL";
Hardware
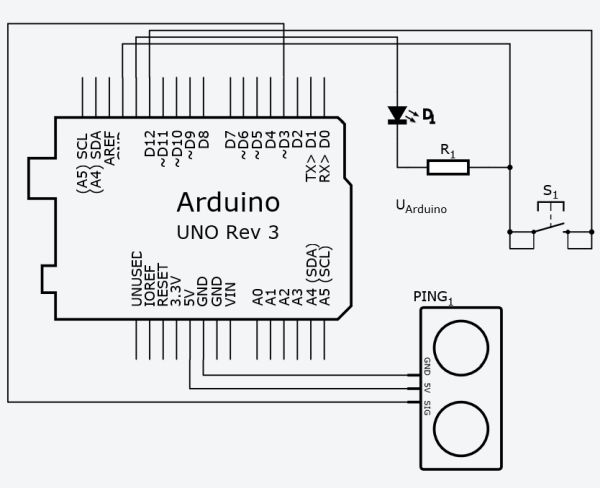
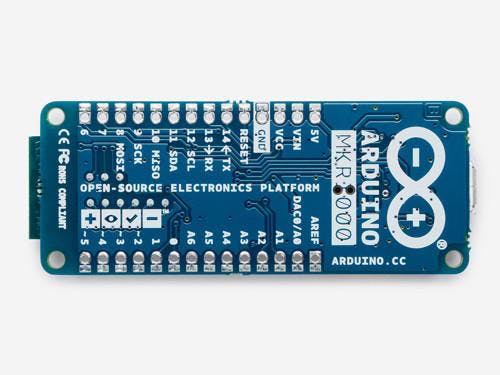
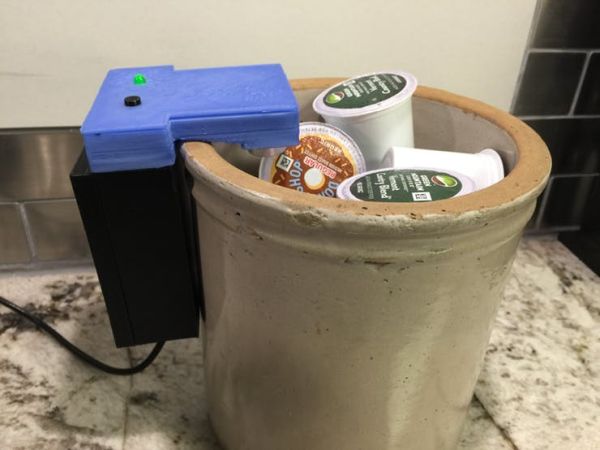
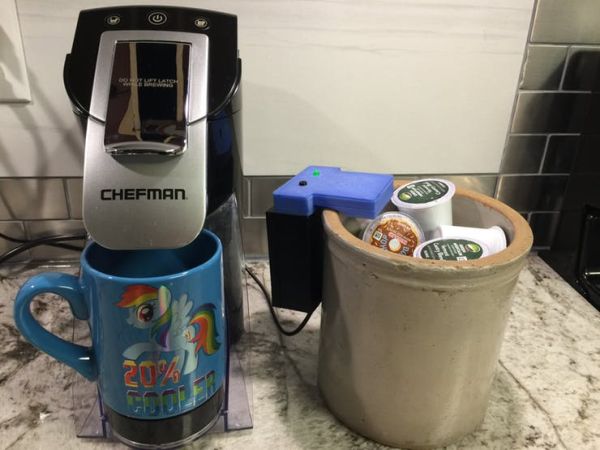
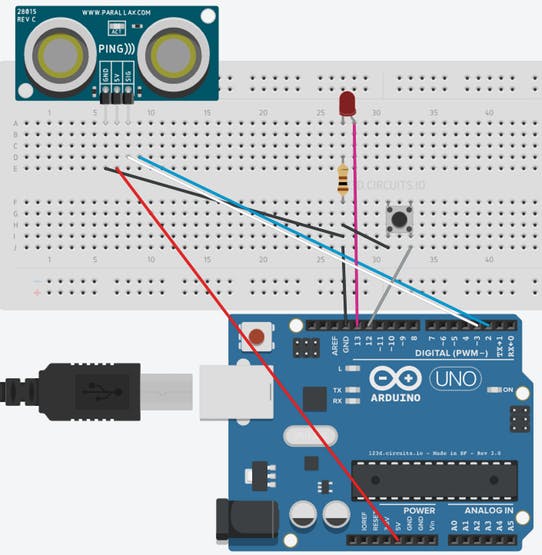
The hardware is enclosed in a 3D printed enclosure big enough to fit an Arduino Uno sized microcontroller with Wifi Shield. Lots of different hardware can be used. In this case we powered the device with a MKR1000 Arduino microcontroller. The MKR1000 has built in WiFi.
The enclosure is 3d printed, the STL and SketchUp files can be found below for download.
Firmware
Here’s the code. Assign your wifi credentials.
char ssid[] = "XXXXXXXX"; //  your network SSID (name)
char pass[] = "XXXXXXXX";    // your network password (use for WPA, or use as key for WEP)
Assign the SlotID and Slot Number
#define slotNumber 1 //This will vary for multi slot devices - dash buttons typically only serve one product/slot
static String slotStatus = "true"; //boolean which depicts if slot is available for replenishment
static String slotId = "e2d8d2a3-ecf3-4532-bc02-a1bbb776bdf8";     //unique slot id ex: 0a5038b7-7609-4b81-b87e-3e291f386324
Push the code to the Device. Watch the serial monitor, you’ll see something like this…
Placing Order
Requesting Replenishment for slotId b6783dfa-838f-838f-838f-e1eae6049757
HTTP/1.1 200 OK
Server: Server
Date: Sun, 26 Feb 2017 13:32:52 GMT
Content-Type: application/json
Content-Length: 170
Connection: close
x-amzn-RequestId: 127cd13d-fc28-11e6-ad46-a75ded86f73a
x-amzn-type-version: com.amazon.dash.replenishment.DrsReplenishResult@1.0
Vary: Accept-Encoding,User-Agent
{"detailCode":"ORDER_INPROGRESS","eventInstanceId":"amzn1.dash.v2.o.ci5hNTc5MzlkMC1lZjRkLTQ4MjYtYTNhZC1iZjI3ODIzOGYxYzcuM2IyZjY0ZjItOWE4My00OWI0LTgyOGMtODA5ZTc2ODBhNTRl"}cm: 148
Average cm: 24
cm: 148
That’s it. You’ll receive an email something like this…
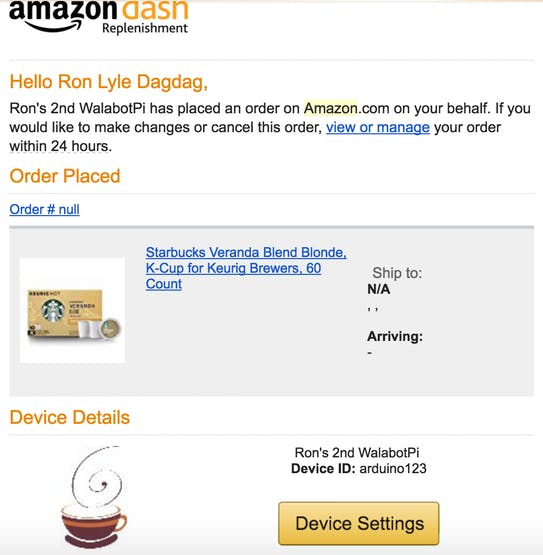
It won’t order because we specified that this is a test device during the registration, change this is_test_device%22%3A%22false for production.
https://www.amazon.com/ap/oa?client_id=<CLIENTID>&scope=dash%3Areplenish&scope_data=%7B%22dash%3Areplenish%22%3A%7B%22device_model%22%3A%22<DEVICEMODEL>%22%2C%22serial%22%3A%22<DEVICENAME>%22%2C%20%22
Feel free to contact us. If this project made you interested in Amazon Dash Replenishment Services, Everything MKR1000, or made you want another cup of coffee; Follow us and push the respect project.


