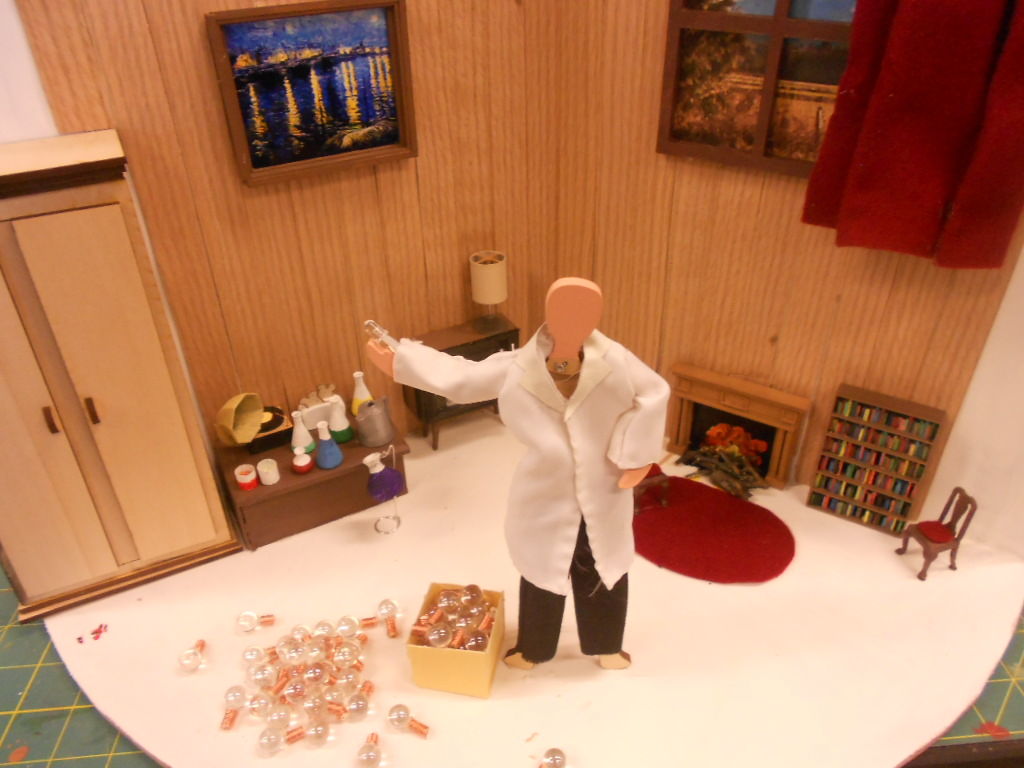
Summary of The Adventure of Electricity: An interactive light diorama
The article describes "The Adventure of Electricity," an interactive educational diorama with three scenes: Benjamin Franklin's kite experiment, Thomas Edison's light bulb invention, and an illuminated Paris cityscape. It details the construction process, including base assembly using wood boards and tools like buzz saws and protractors. The project utilizes LEDs for lighting effects and Flexinol muscle wire to animate Franklin's hair when buttons are pressed.
Parts used in The Adventure of Electricity:
- 2 boards at least 24 * 48 inch
- wood glue
- buzz saw
- ruler
- pencil
- compass
- protractor
- string
- thin dowels of wood
- 1' x 1' chicken wire
- wire
- white felt
- paint
- brown fabric
- faux model set grass
- fake miniature trees
- drill
- pliers
- paintbrush
- scissors
- hot glue
- ping pong ball
- Flexinol 0.006" muscle wire
- nylon thread
- copper wire
- plastic cup
- scrap wood
- LEDs
- spray adhesive
Where does electricity come from? Who invented the light bulb? How do cities use this technology today?
These are just a few questions that we hope to address in this interactive diorama, The Adventure of Electricity!
This project was designed for educational purposes so that younger generations can experience a more hands on approach to learning. In this project, we show the history of electricity through three scenes. The first scene shows legendary tale of Benjamin Franklin using a kite in order to decipher the characteristics of electricity and where it is found in nature. The second scene shows Thomas Edison and his trials to create a light bulb to produce light through harnessing electricity. The last scene shows the city of Paris, in all its illuminated glory.
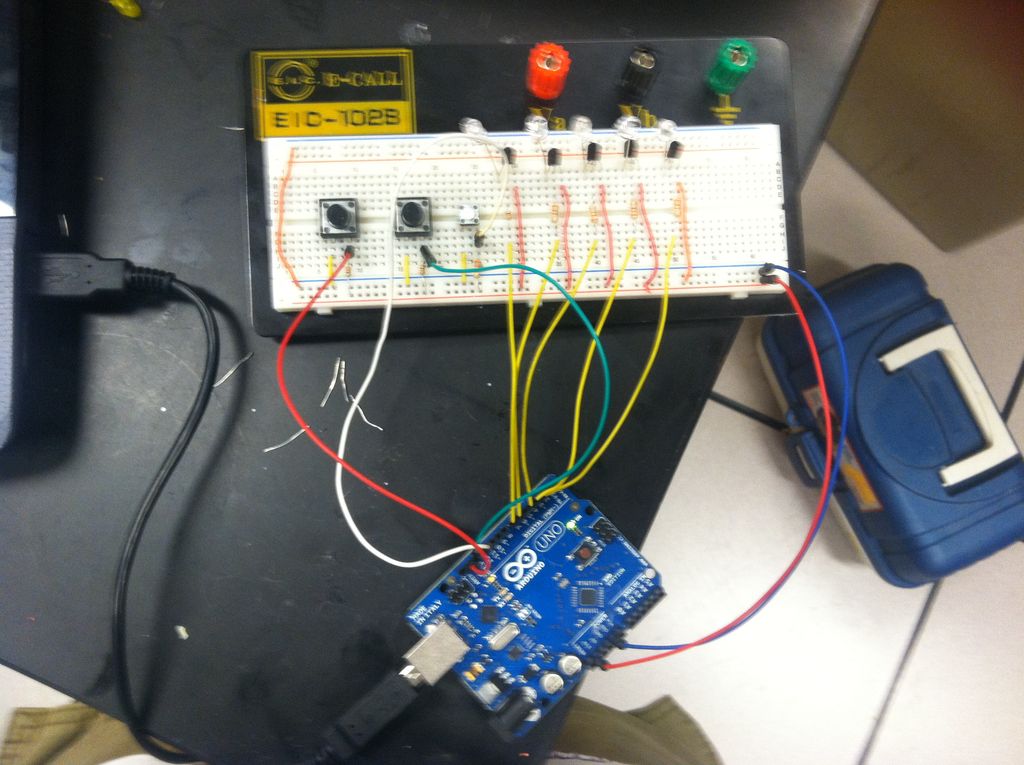
* For Thomas Edison’s scene pressing the button will light up a representation of the first light bulb ever in history.
* In the last scene, the viewer can light up Paris one sector at a time until the entire city is illuminated.
This was a fun project to work on but also tedious so we recommend allowing yourself plenty of time to build this 3 scene diorama.
 Remove these ads by Signing Up
Step 1: Building the Bases
The creation of the base is composed of marking, cutting, and assembly. It will hold all the objects from each scenery.
Materials:
2 boards at least 24 * 48 inch
wood glue
Tools:
buzz saw
ruler
pencil
compass
protractor
string
thin dowels of wood
Steps:
mark:
1.)
width = short edge
length = long edge
mark the circle near one of the edges of the board so we can use as much board space as possible using a pencil
the diameter of the circle is 24 inches. measure 24 inches from the length edge of the board and mark on both edges. then mark the center by measuring 12 inches from one end length wise on both edges of the board and 12 inches width wise on both edges. Then draw a line across using a straight edge on the length wise marks. then draw a line straight down the middle of the long part of the board using the width wise marks. draw a line on the 24 inch marks you made earlier. Now, with the center marked at the cross points you just made at the 12 inch mark point. tie a string (12 inch) to the pencil and put one end at the center point and the pencil end at the edge of the board. While keeping the string tight draw a circle around the middle.
2.) The circle now drawn use the protractor to mark divide the circle into 3 120 degree zones.
3.) The leftover part of the board should be 24 *24 inch. You should divide that into two 12 * 16 inch boards.
4.) The other 24 * 48 inch board should be divided into 4 12 * 16 inch boards which should be divide the same way as the leftovers part. (optional) to make these more aesthetically pleasing one can round off one of the corners using a protractor.
Cut:
5) cut the circle out using the buzz saw and then cut out each of the 120 degree divisions
6) cut the other 12*16 inch boards out throwing away the leftovers
7) you should now have 3 pieces of a pie and 6 12*16 inch boards
Assemble:
8.) start gluing each of the 16*12 inch boards to each of edge of the pie using the 12 inch edge as the bottom.
9.) glue the corners where the 1wo 16*12 inch boards meet. If there is too big of space in between each board then use the dowels as a medium in between each board and then glue.
10.) At the end of this step you should have 3 scenes which look exactly alike.
Step 2: Benjamin Franklin’s Kite Experiment
The first scene in our Adventure of Electricity diorama is Benjamin Franklin’s Kite experiment.
This is a simplified (and somewhat stylized) version of the experiment that Benjamin Franklin conducted in 1752 to determine how lightning is related to electricity.
Our scene features Benjamin Franklin atop a grassy hill where he holds the string to a kite that is stuck by lightning at the push of the viewer’s button. When the lightning strikes, Ben’s hair raises on end!
The flash of lightning is achieved by a strand of LEDs. The raising of Ben’s hair is achieved by using muscle wire, a type of shape memory alloy.
The first step of the Kite Experiment scene was to make sure that using the muscle wire to lift the hair would actually work. We had never worked with muscle wire before, so we started by building a rudimentary Franklin Head + Hair prototype.
Step 3: Franklin – The scenery
1′ x 1′ chicken wire
wire
white felt
paint
brown fabric
faux model set grass
fake miniature trees
spray adhesiveTools:
drill
pliers
paintbrush
scissors
hot glue
Benjamin Franklin will be standing on a hill in this scene, so we need to give the setting some dimension.
Use the 1’x1′ piece of chicken wire to form a hill. Mark on the board several places where you can drill holes to secure wire that will keep the chicken wire in place.
Drill the holes and cut lengths of wire to secure the chicken wire to the board. Twist the wire on the bottom of the structure to keep in place.
Use black, silver, and gray/white paint to create a stormy background. This can be rather abstract looking, since the sky is supposed to be stormy and unpredictable.
Cut elongated cloud shapes from the felt and glue to the background. We used sticky-sided felt but using regular felt and hot glue is fine.
Place your brown fabric over the hill and cut to size. Do not secure the edges yet– you will need to get back into the chicken wire when you place Benjamin Franklin and his wires. Use spray adhesive to attach the faux grass to the fabric. It’s OK if this looks a little mottled. You can enhance the look by using another shade of faux grass or faux moss on the upper layer.
The trees that we have in our scene we found at the local dollar store. (Intended for miniature Christmas scenes.) The bases were originally white, so we painted them forest green. Place your trees in the scene but not on the hill. We want the small trees to give a sense of depth for our diorama.
Step 4: Franklin – Muscle Wire + Hair prototype
For the head we needed something spherical and hollow. The first easy choice was a ping pong ball. It can be easily drilled and cut, so we began fabricating the prototype. You may bypass this step if you do not wish to test the muscle wire setup before creating the actual model.
Materials:
ping pong ball
wire (for hair)
Flexinol 0.006″ muscle wire
nylon thread
copper wire
plastic cup
scrap wood
Tools:
drill
pliers
hot glue
scissors
power source
tape
Steps:
Drill two holes about 3mm apart from each other on one side of the ping pong ball. (Funnily enough, the ping pong balls that we happened to buy were the Franklin brand. How fitting.) Also drill one large hole at the bottom of the ball. Cut the ping pong ball in half, making sure that the two holes are aligned horizontally in the center of the hemisphere.
Create two strands of hair by making a small loop at the end of 2-inch pieces of insulated wire. Tie a piece of the nylon onto one loop of wire and string it through one hole. Loop the free end back through the other hole and secure to the other wire hair. Make sure the loop of nylon thread is shorter than the cup.
The idea for this setup is you will string the muscle wire through the nylon loop and that it will cause the hairs to lift up. See the video below for a visual description.
Read more: The Adventure of Electricity: An interactive light diorama
- How does the Benjamin Franklin scene demonstrate electricity?
A button press lights up a lightning bolt made of LEDs which causes Ben's hair to raise using muscle wire. - What material is used to create the movement of Franklin's hair?
The project uses Flexinol muscle wire, a type of shape memory alloy, to lift the hair. - How is the base of the diorama constructed?
The base is created by marking, cutting, and assembling two 24 by 48 inch boards into three pie-shaped scenes. - Can you describe the third scene in the diorama?
The last scene depicts the city of Paris where viewers can light it up sector by sector until the entire city is illuminated. - What tools are required to build the wooden base?
You need a buzz saw, ruler, pencil, compass, protractor, string, and thin dowels of wood. - How did the creators test the muscle wire functionality?
They built a rudimentary prototype using a ping pong ball, wire, nylon thread, and a plastic cup before making the final model. - What materials are used to create the stormy background?
The background is painted with black, silver, and gray or white paint, and elongated cloud shapes are cut from white felt. - Where did the miniature trees for the scene come from?
The creators found the fake miniature trees at a local dollar store, originally intended for miniature Christmas scenes.