Summary of Mini BillBoard using Arduino
Designing a Mini BillBoard using LED Lights, Arduino and Bread Board Summary (under 100 words): A mini billboard project uses an Arduino Uno, two breadboards, multicolor LEDs, 220Ω resistors, jumper wires, and a 5V power source to spell and blink a name (example: Josh). LEDs are arranged on the breadboard in letter shapes, resistors are placed per LED, and jumper wires link each LED row to Arduino digital pins and GND. A cardboard backing is optional. The billboard is programmed to blink the name repeatedly like a larger sign.
Parts used in the Mini BillBoard:
- Two breadboards
- LED lights with different colors
- 220Ω resistors
- Jumper wires
- Card board (optional)
- Arduino Uno
- Power source (Laptop or 5V adapter)
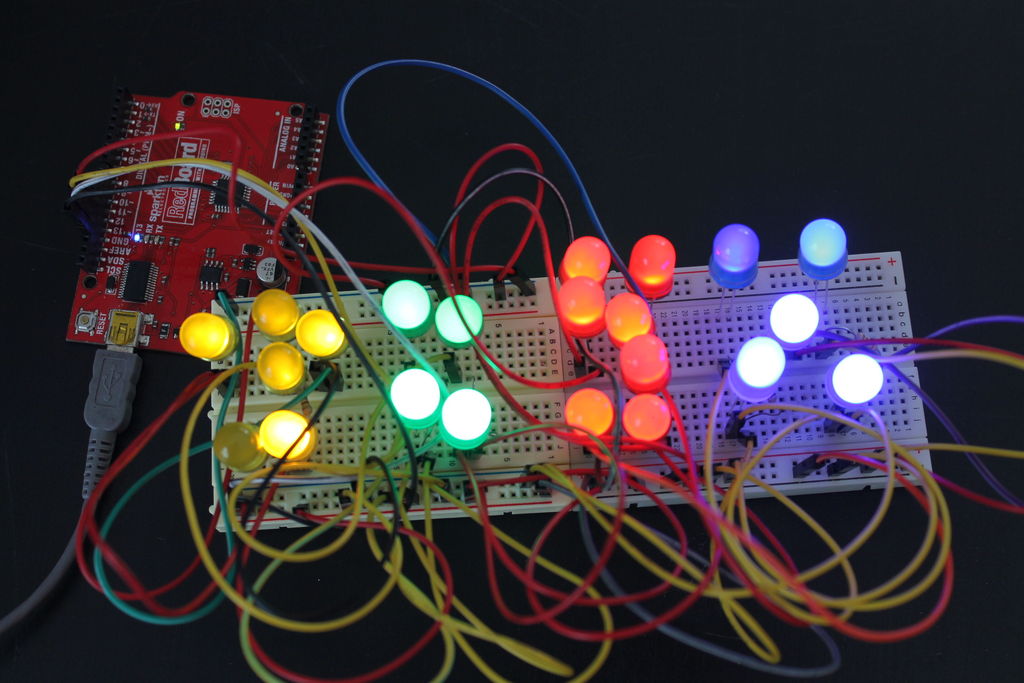
Designing a Mini BillBoard using LED Lights(different colors) , Arduino and Bread Board. Thought of creating a mini billboard, that could display my name (“Josh”) . This is for one of the build nights (required us to use LED lights). This billboard would blink in out josh several times just like any big billboard. Here is a link to the video of the project Mini BillBoard . Follow me on twitter @SJTGs
Step 1: Tools needed for this project
Tools needed for this project :
- Two Bread Boards
- LED lights with different Colors
- 220Ω Resistors
- Jumper Wires
- Card Box optional
- Arduino uno
- Power source (Laptop or 5v adapter)
All the mentioned tools are basic need for the project to work.
Step 2: Connecting the Dots
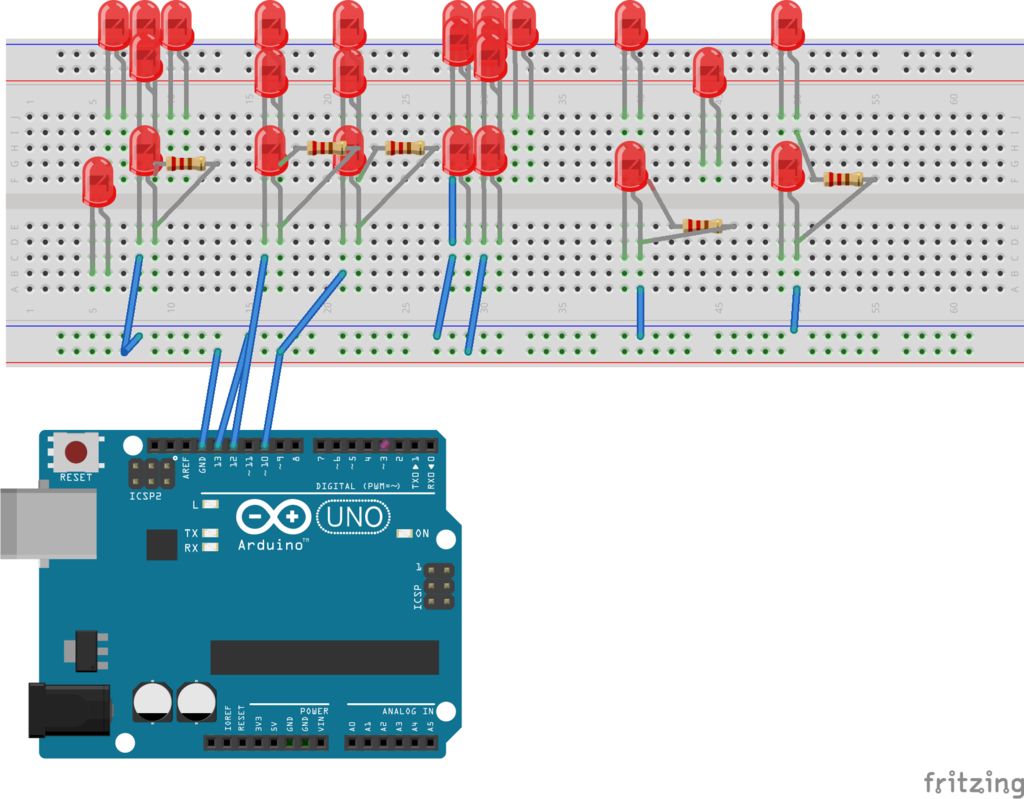
- This step will require you to connect the LED lights to the board. I connect mine in form of letters.
- Next connect the 220Ω Resistors as shown in the above image.
- Connecting the jumper wires to the board. This will provide connection between the Arduino to the bread board.
- Connect one of the jumper wires to the GND (negative) and the one of the positive like that in the diagram
The above diagram shows how the cables and tools need to be connected. If you are unclear ask!!!!!!!
For more detail: Mini BillBoard using Arduino
- What components are required to build the mini billboard?
The article lists two breadboards, multicolor LEDs, 220Ω resistors, jumper wires, optional cardboard, an Arduino Uno, and a power source (laptop or 5V adapter). - How are the LEDs arranged for the display?
The LEDs are arranged on the breadboard in the form of letters to spell the name (example: Josh). - Where do the resistors go in the circuit?
220Ω resistors are connected in series with the LEDs as shown in the project images and description. - How is the Arduino connected to the breadboard?
Jumper wires connect Arduino digital pins to the LED rows on the breadboard, and one jumper connects GND to the breadboard ground. - What power sources can be used for the project?
The project can be powered by a laptop USB connection or a 5V adapter. - Is cardboard required for the billboard?
Cardboard is optional and can be used as a backing for the mini billboard. - Can the billboard blink the name multiple times?
Yes, the design and Arduino code are intended to blink the name repeatedly like a large billboard. - What should I do if the wiring diagram is unclear?
The article advises asking for clarification if the connection diagram is unclear.