
Summary of Gas detector / indicator (USB powered) with arduino
This article details a DIY gas detector project using an Arduino Nano. The device is USB-powered, features a functional reset button, and displays detected gas levels on an LED screen. Construction involves mounting components in a housing made of cardboard or 3D-printed parts, secured with hot glue. Total costs range from €25 to €65 depending on component quality.
Parts used in the ArduSniffer Gas Detector:
- Arduino Nano
- USB cable
- USB powerplug (optional)
- Gas sensor (MQ-4)
- LED display (red)
- Cardboard or 3D printed exterior housing
- Hot glue gun
- Sharp knife
- Metal ruler
- Drawing tools
ArduSniffer
This Instructable shows how to build a gas detector / indicator using an arduino.
The finished product is USB powered and displays the amount of detected gas on a led display.
In this design the reset button on the arduino is also working.
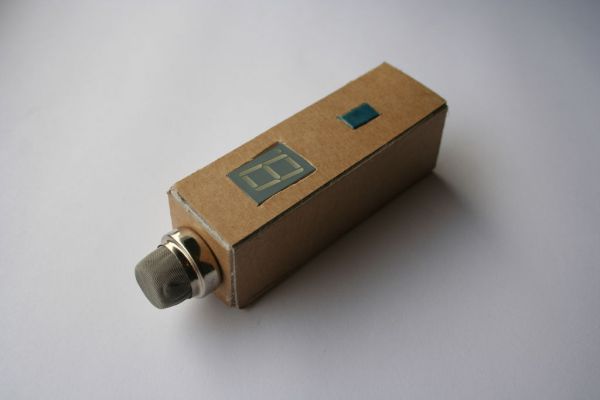
This project will cost you between €25,- and €65,- depending on the quality of the parts you want to use, the links to order the parts are included in step one.
Luckily, the arduino (which is the biggest investment here) can be easily reused for other projects.
The 3D printed exterior is now available: http://www.shapeways.com/model/603805/ardusniffer-exterior-housing.html?modelId=603805&materialId=6#
Step 1: Materials & Tools
The first thing you need to do is gathering the required materials,
for starters it is advised to use the electronics described here.
Ofcourse when you are more experienced you could display the data in a completely diffent way,
the arduino has great oppertunities for this.
Tools
– hot glue gun
– sharp knife
– metal ruler
– some drawing tools
(depending on your personal preference)
Materials
– arduino nano
€39,95 http://iprototype.nl/products/arduino/boards/nano
or €11,44 http://www.dealextreme.com/p/nano-v3-0-avr-atmega328-p-20au-module-board-usb-cable-for-arduino-118037?item=92 (this includes cable!)
– usb cable
€3,95 http://iprototype.nl/products/accessoires/cables-wires/mini-usb-cable
– usb powerplug (optional)
€8,95 http://iprototype.nl/products/accessoires/power/usbadapter
– gas sensor
€5,95 http://iprototype.nl/products/components/sensors/methane-CNG-gas-sensor-MQ-4
– led display
€1,39 http://iprototype.nl/products/components/led-lcd/led-display-red
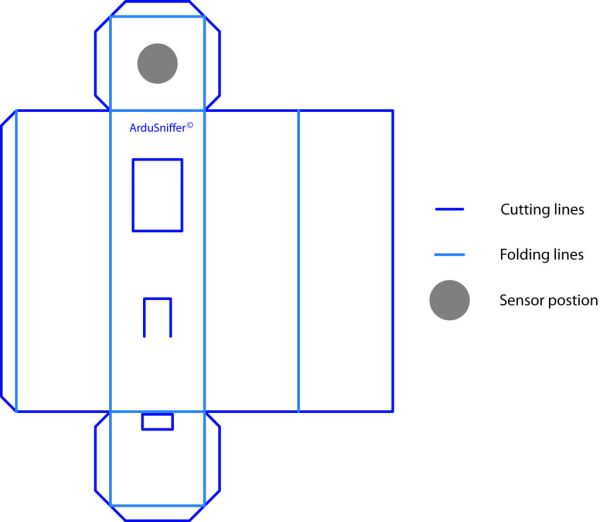
– cardboard or other material for the exterior (you can use the included drawing and print it on thick paper)
or order the 3D printed exterior
* parts are also available at sparkfun.com *
Step 2: Mounting the parts
Next, you have to mount the parts into the housing.
Use the drawing provided in the previous step or create something yourself,
The 3D printed exterior has a mounting clip for the arduino built in.
The pictures illustrate how to mount the parts using the hot glue gun.
As you can see I used some small pieces of cardboard glued together for spacers and mounting supports,
this is particularly important if you want the reset button on the arduino to work properly.
Make sure to securely glue the parts into place but still keep the electronic contact points and button clean.
€39,95 http://iprototype.nl/products/arduino/boards/nano
or €11,44 http://www.dealextreme.com/p/nano-v3-0-avr-atmega328-p-20au-module-board-usb-cable-for-arduino-118037?item=92 (this includes cable!)
– usb cable
€3,95 http://iprototype.nl/products/accessoires/cables-wires/mini-usb-cable
– usb powerplug (optional)
€8,95 http://iprototype.nl/products/accessoires/power/usbadapter
– gas sensor
€5,95 http://iprototype.nl/products/components/sensors/methane-CNG-gas-sensor-MQ-4
– led display
€1,39 http://iprototype.nl/products/components/led-lcd/led-display-red
– cardboard or other material for the exterior (you can use the included drawing and print it on thick paper)
or order the 3D printed exterior
* parts are also available at sparkfun.com *
For more detail: Gas detector / indicator (USB powered) with arduino
-
What is the primary function of the ArduSniffer project?
The finished product acts as a USB powered gas detector that displays the amount of detected gas on an LED display. -
Does the reset button on the Arduino work in this design?
Yes, the design ensures the reset button on the Arduino also works properly. -
How much does it cost to build this gas detector?
The project will cost between €25 and €65 depending on the quality of the parts used. -
Can the Arduino be reused for other projects?
Yes, the Arduino is noted as being easily reusable for other projects after completion. -
What materials can be used for the exterior housing?
You can use cardboard or other materials with a provided drawing, or order a 3D printed exterior. -
How are the parts mounted inside the housing?
Parts are mounted using a hot glue gun, often with small pieces of cardboard glued together for spacers. -
Where can I purchase the components for this project?
Parts are available at suppliers like iprototype.nl, dealExtreme, and sparkfun.com. -
Is the USB power plug mandatory for the project?
No, the USB power plug is listed as optional in the materials list.
