Using an Arduino microcontroller, an Adafruit motor shield, and a Wii Nunchuk, you can create a intuitive, programmable, model train controller to run your layout. Amaze your friends. Entertain your kids. Not quite DC, not quite DCC. You’re headed for the hacker lands of PWM (pulse-width modulation).
Why do this?
– Pulse-width modulation allows smooth operation at slow speeds.
– Set realistic rates of acceleration and braking.
– Set maximum speed to avoid derailments.
– Program operational responses to meet your operating style.
– Control train based on sensors, auto reversing, whatever.
– Because you can, and it is cool.
Step 1: Beg, Borrow, or Build
You will need to beg, borrow, or build a couple of things, all well documented. Don’t be afraid.
1. Wii Nunchuk. – The only part of this that isn’t “open source” or completely hackable. It is, luckly, relatively inexpensive, easy to obtain (you may already have one on hand), and incredibly versatile. For $20 you are getting:
2-axis joystick
3-axis accelerometer
2 pushbuttons
Countless hours of Nintendo product engineering (priceless)
2. WiiChuck Adapter. – While you can cut your cable to access the wires, your kids will hate you when they go to play Lego StarWars next time. A couple of bucks will get you an adapter and guilt-free access to a software library written by the guy that came up with it (www.sparkfun.com/commerce/product_info.php), or your could build your own using this Instructable.
3. Arduino Microcontroller – You can buy or build one of these. They are easy and fun to use, and with the shields, can be put to a number of uses, repeatedly. They come in a number of variants. I like the newer Duemilanove since it has USB built in. Here is one source: www.adafruit.com/index.php
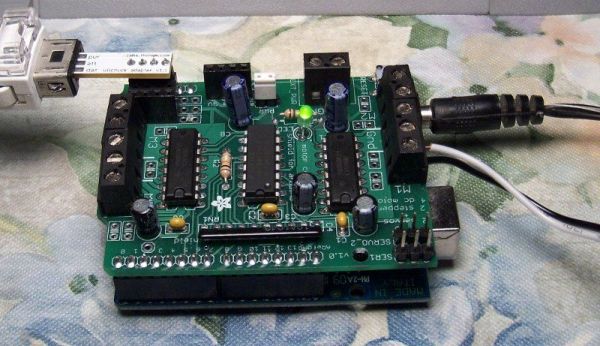
4. Motor Controller – As versatile as the Arduino is, it can’t drive a DC motor on it’s own. You can breadboard something together using a H-Bridge chip like the SN754410, as shown here, or buy a shield kit that fits right on the Arduino and comes with software libraries and examples. I’m using one I built from Adafruit shown here.
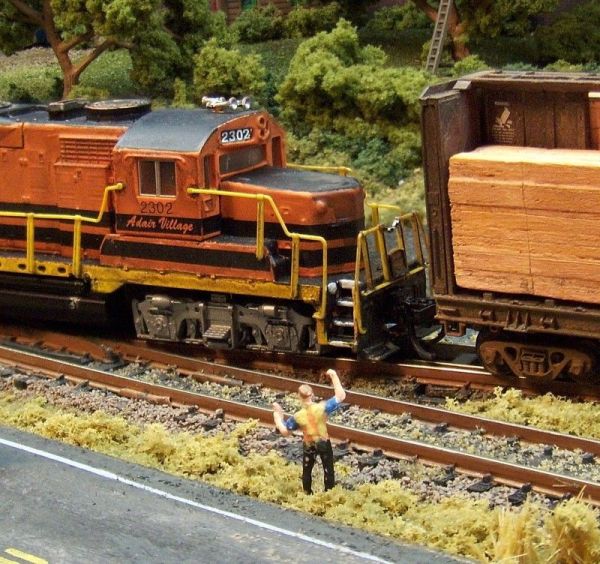
5. Model Train – (Sold separately). Or any small DC motor you might want to drive. I’m actually doing this for a small “switching puzzle” layout I’ve got built. It is only 1′ x 4′, and I want it to be easily (and safely) operated by children. It involves a lot of slow-speed back-and-forth, unlike the typical full-throttle round-and-round stuff. You can learn more about the layout on the last page.
Step 2: Putting the Hardware Together
In assembling the hardware, I’m assuming you are going the easy route like I did. Hacking is fun, but I certainly don’t want to reinvent the wheel. Stray from the path at your own risk.
The connections are as follows:
Arduino: 12V power supply plugged into the 2.1mm jack. The board can get power from the USB connected to program it, but USB cannot supply enough power to run the train. Trust me, I’ve accidentally tried more than once.
Motor Shield: The two leads from the train track go to the motor shield instead of that cheap plastic transformer made in China. I’ve got them hooked into the “M1” terminals. Change this, and you will have to change in your program. Certainly not hard to do, just one more got-cha. Another little detail: the white jumper on the “PWR” leads tells the board to get power from the Arduino, which as we saw earlier, is coming from a 12V wall wart. See the website if that confuses you. It did me. Alternatively, you can wire power right into the shield. The voltage doesn’t need to be exact. You could even run the wires from your original transformer into the shield and just set it to full power. I think they put out 16VDC or so.
WiiAdapter: Confusingly, this can go into the chuk in either of two ways. The correct way is for the contact on the adapter marked “NC” to go where there is no contact on the Wii. I’ve got the connector pins going to the Arduino analog pins A2, A3, A4, A5. Again, not set in stone, but will have to match the program. There are some good diagrams and such at todbot’s website.
Step 3: Software or Firmware?
The difference between “firmware” or “software” is slight. Your “sketch”, or the program you load on to the Arduino could be considered “firmware”, but the program you use to get it loaded is “software”. To make it worse, people start calling the latter a “programming environment”. Confusing, eh? Let’s not start talking about “bootloaders”, because I don’t know squat.
Setting up an Arduino programming environment could be a whole Instructable by itself (I don’t see one, so feel free to write it). For now, I’ll point you to the “horse’s mouth”, Getting Started at the Arduino site.
With an Arduino “environment” in place, you are going to need a couple of extra’s.
– The motor shield comes with a library called “AFMotor “. You need to down load it from LadyAda’s website and place it in the “Arduino/hardware/library ” folder. If you breadboarded your own controller, you know enough to write your own functions for it.
WiiChuck Adapter
Arduino
Motor Controller
For more detail: Wii Nunchuk Controlled Model Train using Arduino