
Summary of Automatic Toilet Flusher (Reduce Touch, Reduce COVID-19 Infection)
This article provides a DIY tutorial for building an automatic, hands-free toilet flusher using an Arduino Nano, a servo motor, and an ultrasonic sensor. The project aims to reduce infection risks in public restrooms or at home by automating the flushing process. It details the necessary components, circuit assembly options for both AA batteries and Li-ion cells, 3D printing instructions for custom parts, and the logic for detecting user presence to trigger a flush after 30 seconds of occupancy.
Parts used in the Automatic Toilet Flusher:
- Arduino Nano
- TowerPro MG995 metal gear servo motor
- HC-SR04 Ultrasonic Distance sensor
- Battery Case (for 2 AA batteries or 18650 Li-ion)
- Boost converter
- Power bank circuit (optional for Li-ion)
- Perfboard
- PCB jumper wire
- Soldering Iron
- Wirecutter
- 3D printer
- M3 screws
- Hot glue
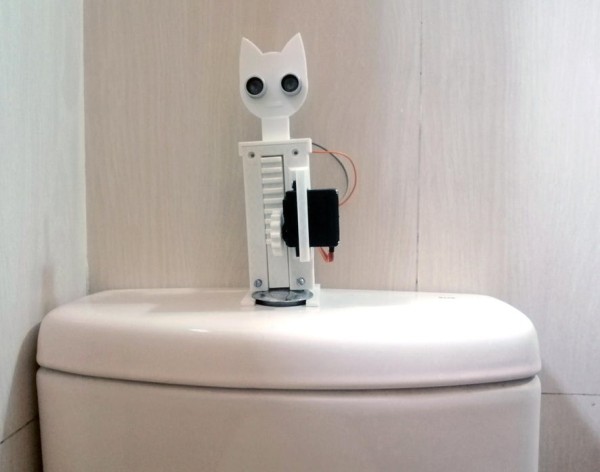
The place most of us like to see a hands-free toilet flusher is in public washrooms. It will be a welcome convenience – no-one wants to touch a public toilet! In this COVID-19 pandemic touching the flush button in a public toilet is risky also and can be a cause of infection. But do you know you can make an automatic flusher for your toilets in your home?
In this tutorial, I will show you how I made an automatic flusher for my toilet very easily using an Arduino and some 3D printed parts. Though you will find some automatic flushers on the internet those are expensive. Besides, the installation is also not easy. Following my tutorial, you will be able to make your own flusher just by spending a few pennies. Placing it on your toilet is also super easy.
Follow the steps, make one by yourself, stay safe.
Supplies:
For making one by yourself you will be required the following materials:
Components
1. Arduino Nano (1 piece) (buy one from aliexpress.com)
2. TowerPro MG995 metal gear servo motor (1 piece) (buy one from aliexpress.com)
3. HC-SR04 Ultrasonic Distance sensor (1 piece) (buy one from aliexpress.com)
4. Battery and Battery Case
i. 2 AA Battery with battery case (aliexpress.com) + Boost converter (aliexpress.com)
OR
ii. 1 18650 Li-ion battery (buy from aliexpress.com) + power bank circuit (buy from aliexpress.com)
5. Perfboard (buy from aliexpress.com)
6. PCB jumper wire (buy from aliexpress.com)
Tools
1. Soldering Iron (buy one from gearbest.com)
2. Wirecutter (buy from gearbest.com)
3. And access to a 3D printer (buy a quality 3D printer only at $220)
Step 1: 3D Printing
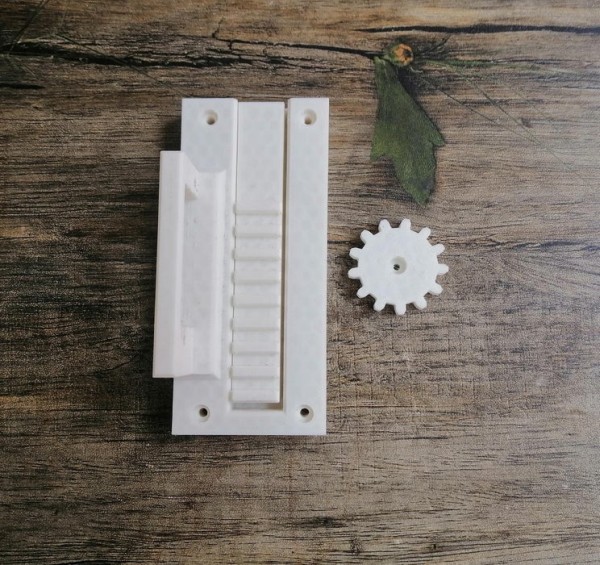
All the files are designed and modified by Tinkercad. The actuator is actually a door lock model downloaded from Thingiverse.com. I slightly modified the model to fit with my project. 3D design files for all the parts are attached below. 20% infill is enough for all parts without the base. The base part infill should be at least 70%. This part also required support for proper printing.
Step 2: Making Circuit Connection
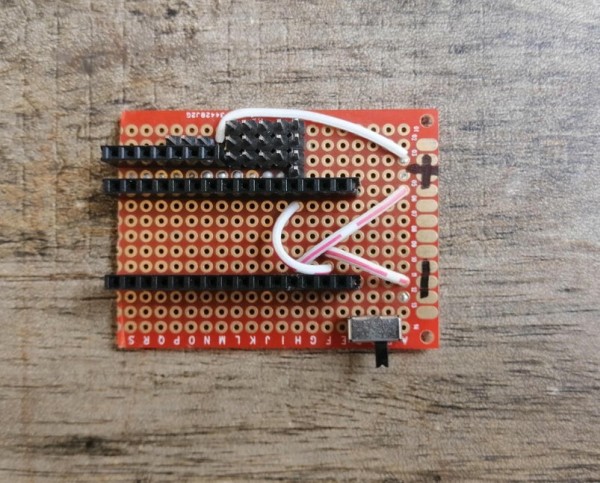
Take a 2 inch x 3 inch perf board and solder two female header rail according to nano. Connect the output of the battery case to the input of the boost converter. Boost converter output should be soldered to the perf board through an SPDT switch. Use jumper wires to connect all the ground together. The board can also be powered up through a rechargeable Li-ion battery. Follow the next step if you want to use Li-ion battery or ignore the next step.
Step 3: Connecting Li-ion Battery & Power Bank Circuit
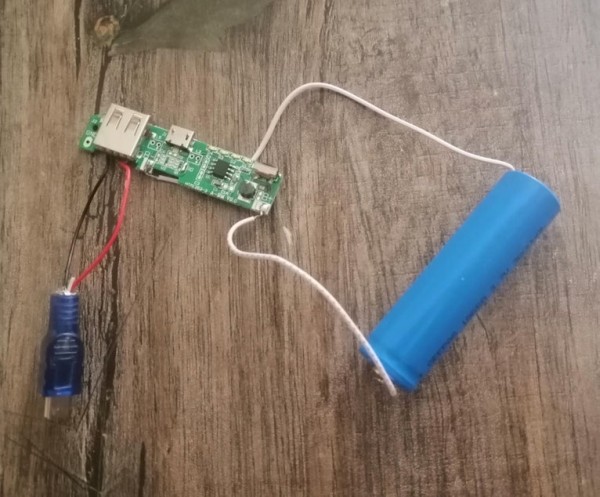
A Li-ion battery required a sophisticated charger circuit to protect the cell from overcharger and deep discharge. Otherwise, the battery may be damaged. The output of the Li-ion battery is 3.7V which is not enough to drive a servo motor directly. So a boost converter is required to convert 3.7V to 5V.
Powerbank circuit is a circuit that includes both a Li-ion charger circuit and a boost converter circuit which is exactly required for our purpose. I soldered a single Li-ion cell to the power bank circuit using jumper wires. Then I used insulating tape to tightly attach the cell to the circuit. It will also protect the connection.
If you like to use non-rechargeable AA cells then you can follow the next step otherwise ignore it.
Step 4: Using AA Cells
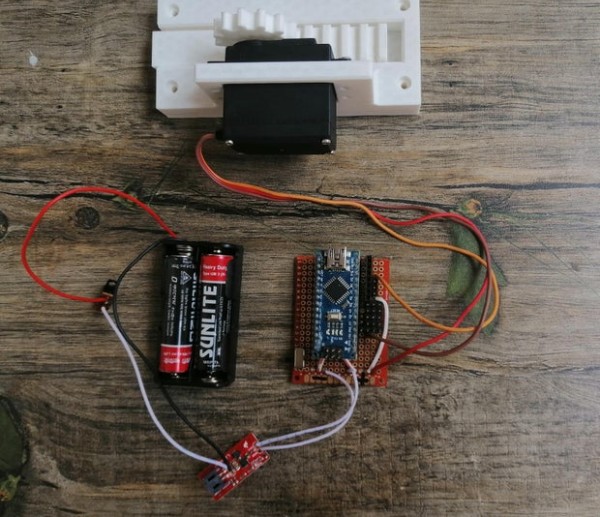
Two non-rechargeable AA cells may also be used instead of a single Li-ion cell. In that case, you don’t need a charger circuit. You only need a boost converter circuit that is capable to produce 5V from a 2V source. The boost converter circuit must have the capability to provide at least 600mA. Implementing the slipping mechanism in the Arduino 2 Alcaline AA cell can run for more than a month. For using AA battery you must use a dual cell AA battery case.
Step 5: Connecting Motor & Sensor
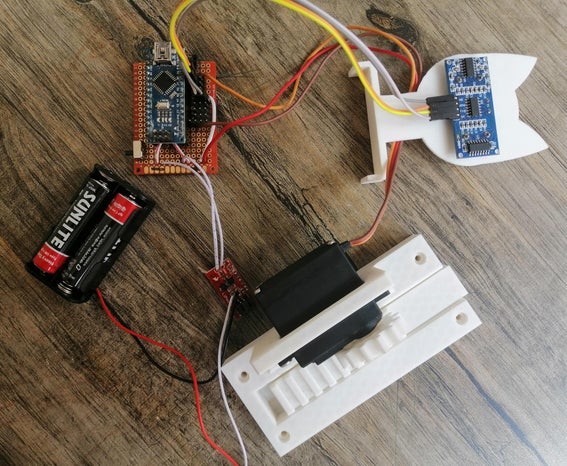
We are going to use an ultrasonic sensor for detecting the user of the toilet. A standard SR04 ultrasonic sensor can detect objects up to 400cm witch is good enough for our purpose. We are calculating distance and making decisions either someone is using the toilet or not. If it detects an object for more than 30 seconds in front of it then it considered the toilet is using. Flushing is performed immediately after the user moves from the toilet. SO for successful flushing, a user must use the toilet for at least 30 seconds. It protects the system from accidental flushing. The time may be increase or decrease as your requirement.
For automatically pressing the flush button a linear actuator is required. I am using a 3D printed door lock model with some modification from the thingiverse.com for serving the purpose. The modified model is attached in a previous step.
For driving the actuator a TowerPro MG995 metal gear servo motor is required. I used Arduino pin 10 for the servo motor. The trigger pin of the ultrasonic sensor is used pin 11 and the echo pin is used pin 12 of the Arduino.
Step 6: Attaching the 3D Printed Parts
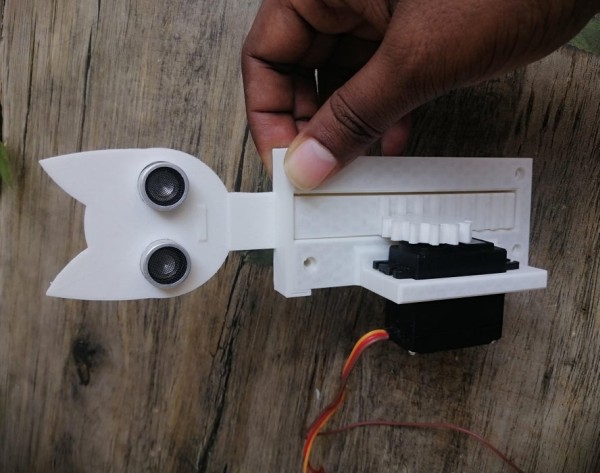
A base according to the toilet flush button is required for placing the actuator with the button. The base part was attached to the actuator by two M3 screws. A base for the ultrasonic sensor was also designed. I attached this part at the top of the actuator using hot glue.
Source: Automatic Toilet Flusher (Reduce Touch, Reduce COVID-19 Infection)
- What is the main benefit of making this automatic flusher?
It reduces the risk of infection by eliminating the need to touch public toilet buttons. - How does the system detect if someone is using the toilet?
It uses an ultrasonic sensor to calculate distance and detects an object for more than 30 seconds. - Can I use AA batteries instead of a Li-ion battery?
Yes, two non-rechargeable AA cells can be used with a dual cell case and a boost converter. - What is the minimum time required before the toilet flushes?
The system requires the user to remain in front of the sensor for at least 30 seconds to prevent accidental flushing. - Which servo motor is recommended for the actuator?
A TowerPro MG995 metal gear servo motor is used to drive the linear actuator. - How is the base part printed compared to other components?
The base requires at least 70% infill and support structures, while other parts only need 20% infill. - Why is a boost converter necessary when using a single Li-ion battery?
A single Li-ion battery outputs 3.7V, which is insufficient to drive the servo motor directly without boosting to 5V. - Where did the original 3D design files come from?
The actuator model was downloaded from Thingiverse.com and modified using Tinkercad.
