
Summary of 3D Printed Prosthetic Hand With Capacitive Touch Sensing
This article details a prototype project converting the e-NABLE Phoenix 3D-printed prosthetic hand into an electrically powered device using Arduino and capacitive touch sensing. The system utilizes TTP223 sensors to trigger MG996R servos, allowing finger actuation via touch. While the design improves upon body-powered models, it currently lacks individual finger control and requires further development for weight capacity.
Parts used in the 3D Printed Prosthetic Hand With Capacitive Touch Sensing:
- Arduino Uno
- TTP223 Touch Sensor
- MG996R Servomotor
- Fishing line (Flexor)
- Rubber bands (Extensor)
- Flsun 3D Printer
- Glue gun
- e-NABLE Phoenix hand STL files (Fingers, Palm, Snap Pins)
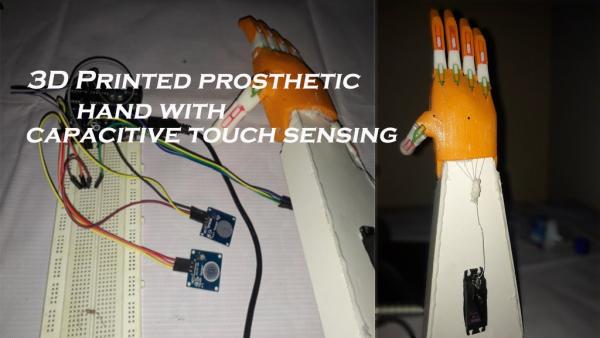
In this Instructables I’ve come with an idea that can be implemented to existing 3d printed prosthetic hands. In existing electrically powered prosthesis I Couldn’t find the use of capacitive touch sensing technology for the actuation of fingers. This project combines two very cool things, Arduino with Capacitive touch sensing for the actuation and remix of e-NABLE Phoenix hand design.
Basically the phoenix hand is a body powered hand, What I’ve done on this project is that I converted it into an electrically powered prosthesis by choosing required part design.
The advantage of capacitive touch sensing is, through touch you can actuate the fingers easily. Currently this model cannot control individual fingers and more development is required in weight carrying capacity and grasping capacity.
**Note: It is a prototype model, more improvements are required
Step 1: Gather the Parts:
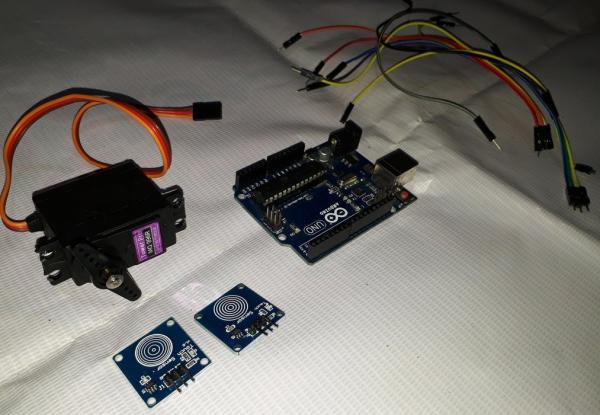
Electronics Parts:
- Arduino Uno
- TTP223 Touch Sensor 2
- MG996R Servomotor
Assembly of Phoenix hand:
The Assembly details of phoenix hand is mentioned below steps
I have used flexor as fishing line and extensor as rubber bands
Tools:
- 3d printer
- Glue gun
Step 2: Printing the Hand :
This project uses previously designed e-NABLE Phoenix hand .
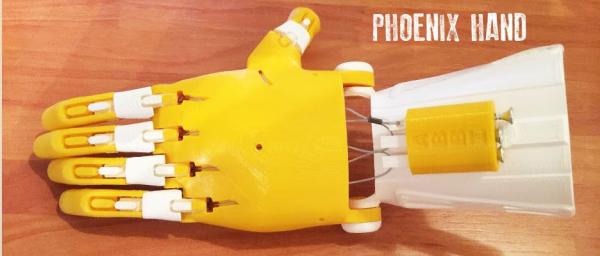
As per my requirements I have printed only the following parts
Fingers
- finger_phalanx.stl -4 pieces
- fingertip_long.stl -2 pieces
- fingertip_short.stl -2 pieces
- thumb_phalanx.stl -1 piece
- thumbtip.stl -1 piece
Palm
- palm_right_new_supports.stl -1 piece
Snap Pins
- fingertip_pin.stl – 4 pieces
- knuckle_pin_long.stl -1 piece
- knuckle_pin_short.stl -2 pieces
- thumb_knuckle_pin.stl – 1 piece
- thumbtip_pin.stl – 1 piece
Since there are already detailed instructions on how to build this ,I won’t go into detail
For printing I used a Flsun 3d printer. In total, it took 10-12 hours to print
(note:these parts are for a right hand)
Step 3: Assembly of Hand :
The build process of phoenix hand is already available
So I won’t go into too much detail,If you have any doubt please leave a comment
I have used flexor as fishing line and extensor as rubber band.
**some smoothing may be required for smooth fit
Step 4: Electronics Part:
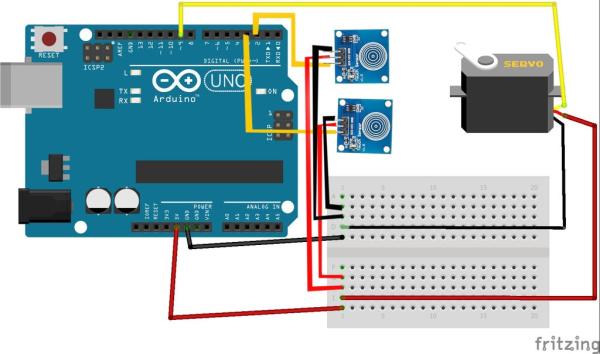
The actuation is controlled through 2 touch sensors(TTP223) ,The input from touch sensor opens and closes the fingers through servo motor.
Circuit Diagram:
Code:
You can get code from my Github page
Step 5: Watch Video!
Source: 3D Printed Prosthetic Hand With Capacitive Touch Sensing
-
How does the hand get actuated?
The fingers are actuated through touch input detected by two TTP223 capacitive touch sensors which control the servo motors. -
Can this model control individual fingers separately?
No, the current model cannot control individual fingers and requires more development. -
What materials are used for the flexor and extensor mechanisms?
Fishing line is used as the flexor and rubber bands are used as the extensor. -
Which 3D printer was used for this project?
A Flsun 3D printer was used to print the required parts. -
Does the design support both left and right hands?
The specific parts listed in the article are designed for a right hand. -
How long did it take to print the hand components?
It took a total of 10-12 hours to print all the necessary parts. -
Is this a finished commercial product?
No, it is noted as a prototype model that requires more improvements. -
Where can I find the code for this project?
The code is available on the author's Github page.
