
Summary of EASY FREQUENCY COUNTER LOOKS GOOD, READS TO 6.5 MHZ
The article reviews a retro-styled Arduino-based frequency counter by mircemk, capable of measuring up to 6.5 MHz. It highlights the use of an Arduino Nano for processing, a Max7219-driven LED display for a vintage aesthetic, and a simple shaping circuit to handle irregular waveforms. The project is noted for its simplicity, featuring minimal wiring thanks to the SPI interface of the display module and compact code utilizing a GitHub library.
Parts used in the Frequency Counter:
- Arduino Nano
- LED Display (Max7219 board)
- Shaping Circuit
- Op-amp (suggested alternative)
- SPI Interface components
- Frequency counter component from GitHub
We were struck by how attractive [mircemk’s] Arduino-based frequency counter looks. It also is a reasonably simple build. It can count up to 6.5 MHz which isn’t that much, but there’s a lot you can do even with that limitation.
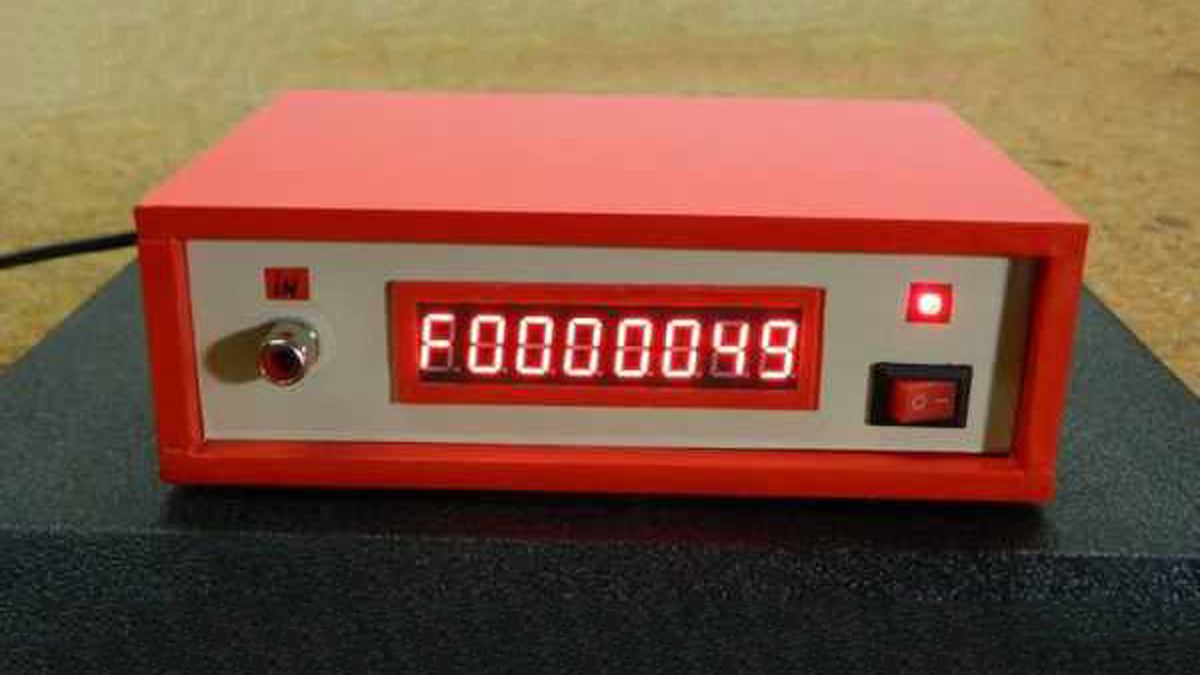
The LED display is decidedly retro. Inside a very modern Arduino Nano does most of the work. There is a simple shaping circuit to improve the response to irregular-shaped input waveforms. We’d have probably used a single op-amp as a zero-crossing detector. Admittedly, that’s a bit more complex, but not much more and it should give better results.
There was a time when a display like this would have meant some time wiring, but with cheap Max 7219 board available, it is easy to add a display like this to nearly anything. An SPI interface takes a few wires and all the hard work and wiring is done on the module.
The code is short and sweet. There are fewer than 30 lines of code thanks to LED drivers and a frequency counter component borrowed from GitHub.
If you add a bit more hardware, 100 MHz is an easy target. There are at least three methods commonly used to measure frequency. Each has its pros and cons.
Source: EASY FREQUENCY COUNTER LOOKS GOOD, READS TO 6.5 MHZ
-
What is the maximum frequency this Arduino-based counter can measure?
The device can count up to 6.5 MHz. -
How does the project achieve a retro look with modern technology?
It uses a retro LED display driven by a modern Arduino Nano inside the case. -
What interface connects the LED display to the microcontroller?
An SPI interface is used to connect the Max7219 board, reducing wiring complexity. -
Why was a shaping circuit included instead of a zero-crossing detector?
A simple shaping circuit was used to improve response to irregular-shaped input waveforms, though an op-amp could offer better results. -
How many lines of code are required for this project?
The code is short and sweet, containing fewer than 30 lines. -
Where did the author obtain the frequency counter component?
The component was borrowed from GitHub. -
Can the frequency measurement range be extended beyond 6.5 MHz?
Yes, adding more hardware makes 100 MHz an easy target. -
Are there other methods to measure frequency mentioned?
Yes, there are at least three methods commonly used to measure frequency, each with pros and cons.
