HRV Arduino Controller with Air Economizer
So my history with this project is I live in Minnesota and my circuit board fried on my LifeBreath 155Max HRV. I didn’t want to pay the $200 for a new one.
I always wanted something with an air economizer since our springs and falls here are perfect times to take in cool low humidity outside air and condition the house rather than turning on the air conditioner or opening windows. This is where this project fits in.
I wrote up a detailed description of operation for all the modes, setpoint control, etc can be found here “HRV Control Narrative.docx“
All source code, photos, wiring schematics and documentation can be found on my GitHub page.
Step 1: HARDWARE
(1) Arduino ESP32 – Used due to the amount of GPIO required for this project. ESP8266 just wasn’t enough GPIO.
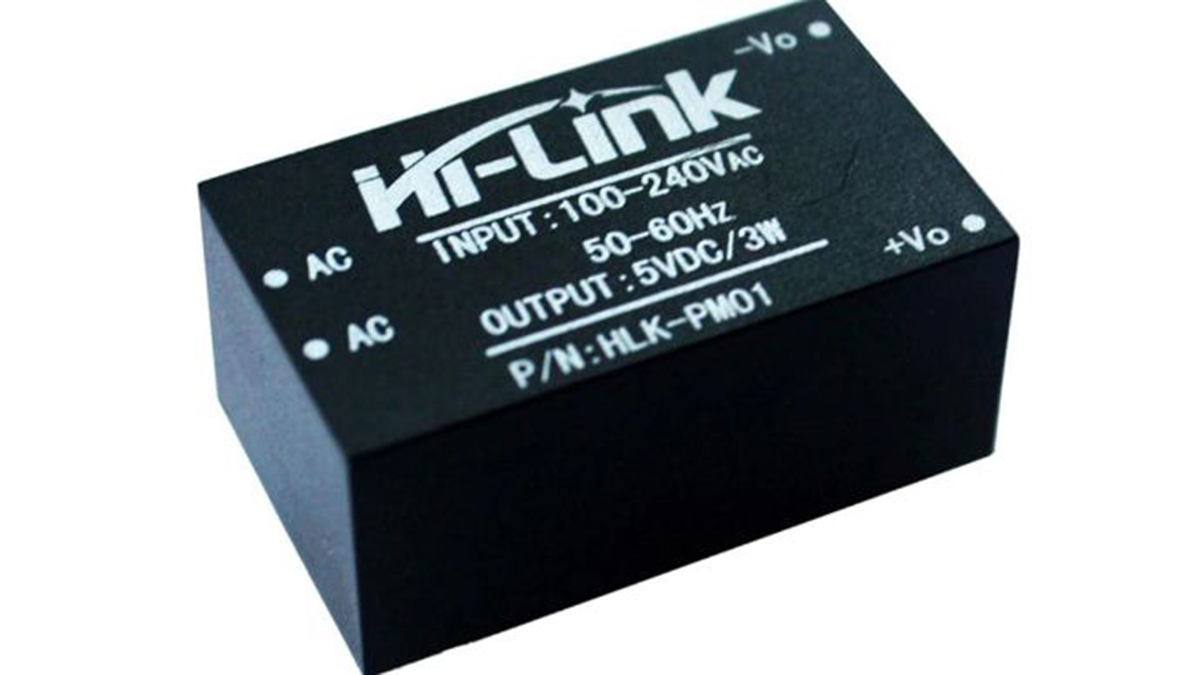
(1) 120V to 5V step down power supply – Don’t use the cheap power supply PCB’s. I went through two other types before I found out that this was the most stable.
(2) DHT 22 temperature sensors – Inside sensor & Outside Remote Sensor. Measure inside and outside temperature and humidity.
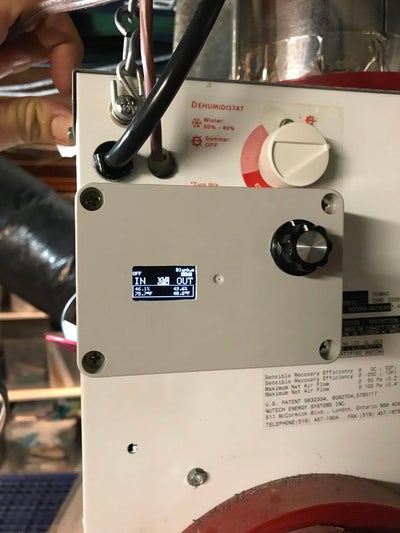
(1) 0.96″ OLED display for local indication of the mode it is operating and for temp/humidity indication. Be sure you desolder and solder pins so that board is configured for I2C communication. Instructions for SPI and I2C can be found here.
(1) 8-Channel SSR 5 Volt High Level trigger relay board
(1) LM1117 Linear Voltage regulator to power ESP32 at 3.3V
(1) Rotary Encoder KY-040 & Knob used as a push button. Future functionality to include a menu and be able to select modes of operation and control setpoints.
(1) Enclosure to house the OLED display and encloder. Get the large one. Dimensions are 100mmx68mmx50mm.
Step 2: Principal of Operation
The way this HRV is programmed is in 4 modes.
Off – Self explanatory
Continuous– On 20 / Off 40 with variable run times.
High Occupancy – 100% blower speed for a timed off delay setpoint. Imagine thanksgiving dinner with 20 guests.
Air Economizer – When air is cooler and more desirable outside then pull it in to the house. You control the indoor temperature/humidity set points for only when it is safe based on a outdoor/indoor conditions.
Step 3: SOFTWARE
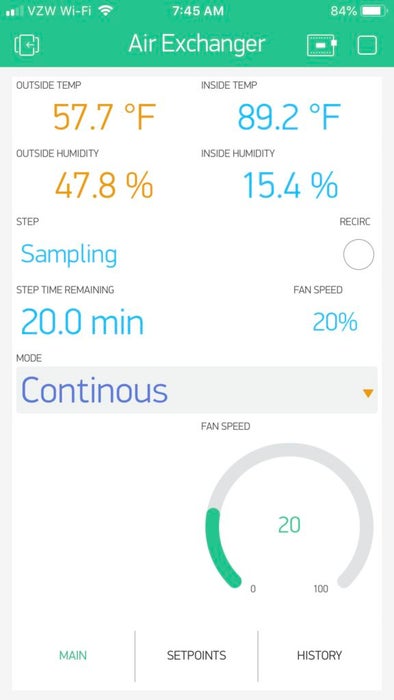
Blynk App for iOS is used to control and monitor the status of the HRV.
The arduino writes the temps, humidity and equipment running status to blynk and reads the setpoints and run commands from the blynk server. All you need to do is sign up for an account and get an auth token. There are plenty of tutorials online how to do this.
Once you have your auth token for your project scan this QR code from your phone in the blynk app and it will download the project already configured and ready for your arduino.
Source: HRV (Home Air Exchanger) Arduino Controller With Air Economizer