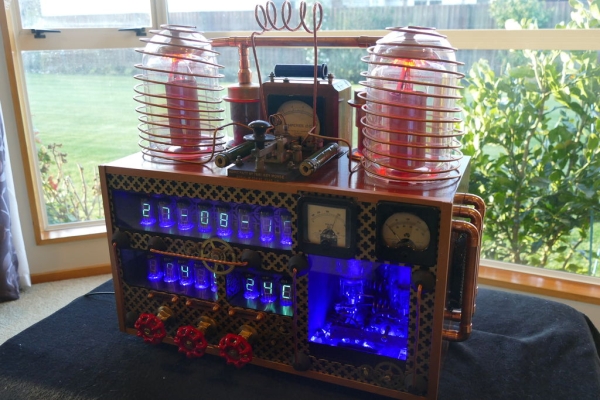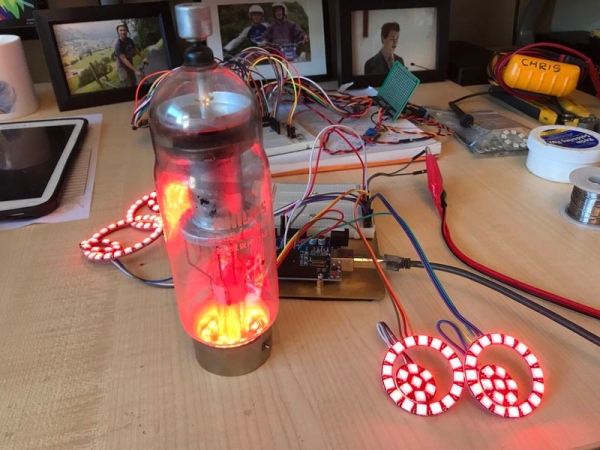
This project is without doubt the most complex I have undertaken, with sixteen IV-11 VFD tubes, two Arduino Mega cards, ten LED Neon light circuits, a servo, an electromagnet, two MAX6921AWI IC Chips, five DC power supplies, a HV power supply, two DC Volt meters, a DC Amp meter, FM stereo radio, 3W power amplifier, LCD screen, and keyboard. Apart from the above parts list, two software programs had to developed from scratch and finally the construction of the entire radio required about 200 hours of work.
I decided to include this project onto the Instructables site not expecting members to reproduce this project in its entirety but rather to cherry pick the elements that where of interest to them. Two areas of particular interest to the site members may be the control of the 16 IV-11 VDF tubes using two MAX6921AWI chips and its associated wiring, and the communications between two Mega 2650 cards.
The various components included into this project have been sourced locally, except the IV-11 tubes, and the MAX6921AWI chips both obtained on EBay. I wanted to bring back to life various items that would otherwise languish in boxes for years. All of the HF valves where sourced with the understanding that all where failed units.
Step 1: PARTS LIST

1. 2 x Arduino Mega 2560 R3
2. RDA5807M FM radio
3. PAM8403 3W amplifier
4. 2 x 20W speakers
5. Di-pole FM Ariel
6. 16 X IV-11 VDF tubes
7. 2 x MAX6921AWI IC Chip
8. 2 x MT3608 2A Max DC-DC Step Up Power Module Booster Power Module
9. 2 x XL6009 400KHz Automatic Buck module
10. 1 Channel Module, 5V Low Level Trigger for Arduino ARM PIC AVR DSP
11. 2 Channel 5V 2-Channel Module Shield for Arduino ARM PIC AVR DSP
12. Electric Magnet Lifting 2.5KG/25N Solenoid Sucker Electromagnet DC 6V
13. 4 phase stepper motor can be driven by ULN2003 chip
14. 20*4 LCD 20X4 5V Blue screen LCD2004 display LCD module
15. IIC/I2C Serial Interface Module
16. 6 x Bits 7 X WS2812 5050 RGB LED Ring Lamp Light with Integrated Drivers Neo Pixel
17. 3 x LED Ring 12 x WS2812 5050 RGB LED with Integrated Drivers Neo Pixel
18. 2 x LED Ring 16 x WS2812 5050 RGB LED with Integrated Drivers Neo Pixel
19. LED Strip Flexible RGB 5m Length
20. 12 Key Membrane Switch Keypad 4 x 3 Matrix Array Matrix keyboard switch keypad
21. BMP280 Digital Barometric Pressure Altitude Sensor 3.3V or 5V for Arduino
22. DS3231 AT24C32 IIC Module Precision RTC Real Time Clock Module
23. 2 x Knurled Shaft Linear Rotary Potentiometer 50K
24. 12V 1 Amp Power Adapter
Step 2: IV-11 VDF TUBES AND MAX6921AWI IC CHIP

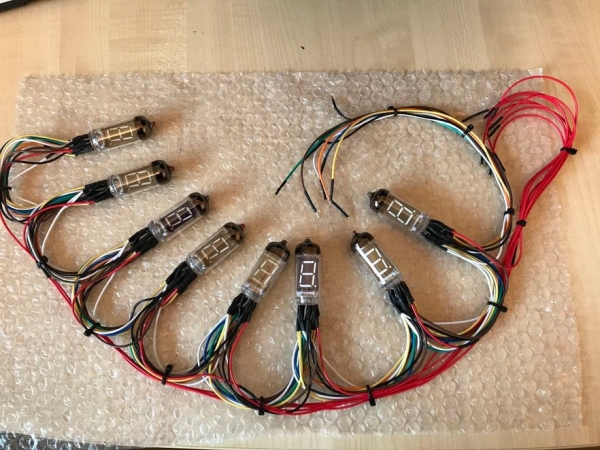
This projects’ use of the MAX6921AWI chip builds on my previous Alarm Clock project. Each set of eight IV-11 tubes are controlled via a single MAX6921AWI chip using the Multiplex method of control. The two attached PDFs show the wiring of the eight-tube set and how the MAX6921AWI chip is wired to the tube set and, in its turn, wired to the Arduino Mega 2560. Strict colour coding of the wiring is required to ensure that segment and Grid voltage lines are kept separate. It is very important to identify the tube outputs, see attached PDF, this includes the 1.5V heater pins 1 and 11, the 24v anode pin (2), and finally the eight segment and “dp” pins, 3 – 10. At this time, it is also worth testing each segment and “dp” using a simple test rig before starting to wire the tube set. Each tube pin is wired in series with the next down the line of tubes till the last tube where extra wiring is added to allow remote connection to the MAX6921AWI chip. This same process is continued for the two heater supply lines pins 1 and 11. I used coloured wire for each of the 11 lines, when I ran out of colours I started the colour sequence again but added a black band around each end of the wire using heat shrink. The exception to the above wiring sequence is for pin 2, the 24-anode supply which has an individual wire wired between pin 2 and the anode power outputs on the MAX6921 chip. See the attached PDF for details of the chip and its connections. It cannot be overemphasized that at no time during the operation of the chip should the chip get hot, warm after a few hours use yes, but never hot. The chip wiring diagram shows the three connections to the Mega, pins 27, 16, and 15, the 3.5V-5V supply from the Mega pin 27, its GND to the Mega pin 14, and the 24V supply pin1. Never exceed 5V supply and keep the anode power range to between 24V and 30V maximum. Before continuing use a continuity tester to test each wire between its most distance points.
I used the AWI version of this chip as it was the smallest format, I was willing to work with. Fabricating the chip and its carrier starts with two sets of 14 PCB pins placed on a bread board, the chip carrier placed over the pins with pin 1 top left. Using flux and solder, solder the pins and “tin” each of the 28 chip leg pads. Once complete place the chip of the chip carrier taking great care to line up the chip’s legs with the leg pads and ensuring that the notch in the chip is facing towards pin 1. I found using a piece of sellotape over one side of the chip helped steady the chip prior to soldering. When soldering ensure flux has been applied to the leg pads and the soldering iron is clean. Press generally down onto each chip leg, this will bend it slightly onto the leg pad and you should see the solder run. Repeat this for all 28 legs, you should not need to add any solder to the soldering iron during this process.
Once complete clean the chip carrier of flux and then using a continuity tester test each leg placing one probe onto the chip leg and the other on the PCB pin. Finally, always ensure that all connections have been made to the chip carrier before any actual power is applied, if the chip starts to get hot switch off immediately and check all connections.
Read more: SteamPunk Radio
