Summary of How to Make Your Own Professional Arduino Sheld
This article guides users through designing a custom Arduino shield using Eagle CAD, verifying the design with Viewplot, and ordering the PCB from manufacturers like Seeed or PCBBatch. It covers schematic creation, component placement, routing options (auto or manual), and Gerber file generation for production.
Parts used in the Arduino Shield Project:
- Eagle CAD software
- Arduino Software
- Viewplot software
- SparkFun Eagle Library
- Schematic components
- PCB manufacturing services (Seeed, PCBBatch)
- Physical parts for the shield
In this instructable I will show you how to make your own professional looking arduino shield. In the proses of designing the arduino shield I will use eagle.cad, arduino software & viewplot.
First step in making a arduino shield is thinking of what you want it to be. depending on what your shield is going to be will vary the parts that you will need for it.
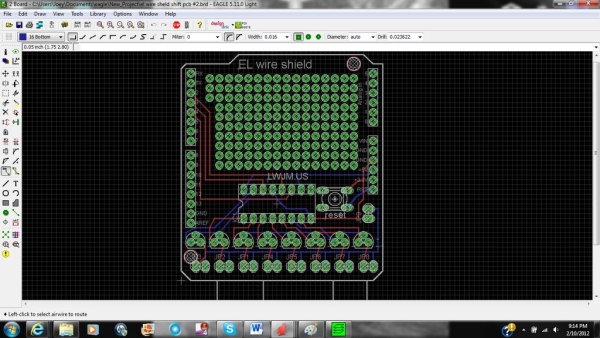
PS: the picture is a sneek peek on my new arduino shield. 🙂
Step 1: Designing

We will be designing the shield in a software called eagle.cad. If you don’t have the software already downloaded then here is a link to the website http://www.cadsoftusa.com/ .
In eagle.cad you first design your shield with a schematics. If you don’t know what a schematics is there is a really good video on it by Collin http://www.youtube.com/watch?v=9cps7Q_IrX0 . I use sparkfuns eagle library for the arduino shield. https://github.com/sparkfun/SparkFun-Eagle-Library .
Ones you have that all done you can start making your schematics in eagle.cad. To add a part in eagle.cad you click on the button on the left that looks like a plug and should say add if you hover over it. Then find your component and make your schematics. After you have completed your schematics you have to press the board it is located on the top row of buttons and to the right of the button that looks like film. After you press that another window should pop up and you should see your components. Just move your components were you want them on the shield, there should be thin yellow lines on the points of your components don’t worry that’s what it should have. Once you have your parts where you want them you can ether press auto button it’s the one that’s on the side bar right above the very bottom that looks like a magnifying glass. Or you can press the rout button and hand rout the joints, this is better if you want to only have a 1 sided board.
Step 2: Checking
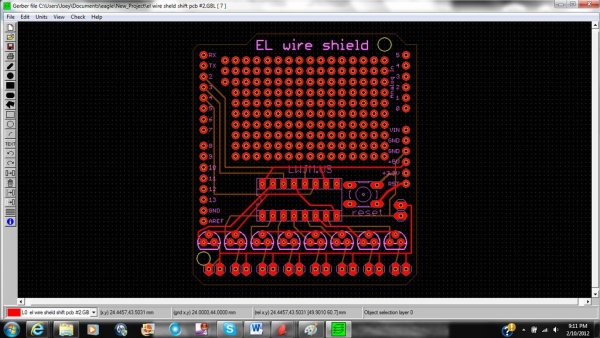
To check your board and getting the files needed for the companies that will print the board for you you use viewplot . for instructions that could explain this better then I could go to http://hackaday.com/2009/01/15/how-to-prepare-your-eagle-designs-for-manufacture/
And read from the part that says Create gerber files and down.
Step 3: Parts

After you have designed and check your pcb you have to order theme frome someone.acuple of pcb companies are seeed, pcbbatch, and there are others. you also need to buy your parts for your shield. then you are done.
Source: How to Make Your Own Professional Arduino Sheld
- What software is used to design the shield?
The article states that Eagle CAD is used to design the shield schematics. - Can I manually route the joints on the board?
Yes, you can press the rout button to hand route the joints if you want a one-sided board. - How do I check my board before printing?
You use Viewplot to check your board and generate the files needed for printing companies. - Where can I find a tutorial on schematics?
A video by Collin on YouTube explains what a schematic is for those unfamiliar with it. - Which library should I use for the arduino shield?
The author uses the SparkFun Eagle Library found on GitHub. - Does the auto button work for routing?
Yes, you can press the auto button which looks like a magnifying glass to automatically route. - Who are some companies that print the boards?
The article mentions Seeed and PCBBatch as examples of PCB companies. - What do the thin yellow lines represent in Eagle?
The thin yellow lines appear at the points of your components during the design process.