
Summary of GoPRO Shutter
This article details a DIY custom GoPro shutter project using an Arduino MKR1000 board. The system controls a GoPro camera by establishing a Wi-Fi connection and sending commands to power the device on/off or start/stop video capture. Three physical buttons manage these functions, with corresponding LEDs providing visual status feedback for connection, power state, and recording status.
Parts used in the Custom GoPRO Shutter:
- Arduino MKR1000
- LED (generic)
- SparkFun Pushbutton switch 12mm
- Breadboard (generic)
- Jumper wires (generic)
- Resistor 221 ohm
- Arduino Web Editor
- Arduino GoPRO library
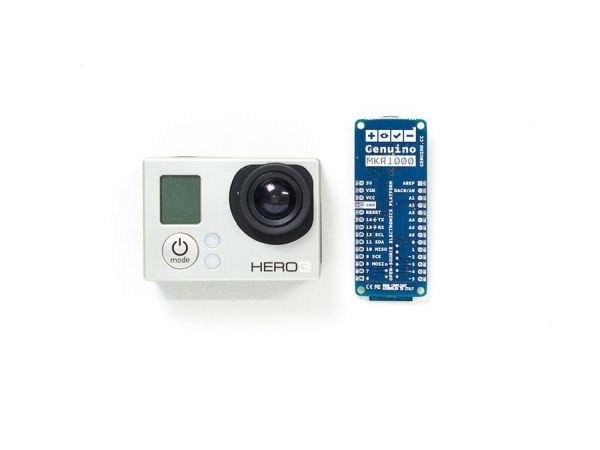
Make your own custom GoPRO shutter using a MKR1000 board, 3 buttons and 3 LEDs.
Things used in this project
Hardware components |
||||||
 |
|
× | 1 | |||
 |
|
× | 3 | |||
 |
|
× | 3 | |||
 |
|
× | 1 | |||
 |
|
× | 1 | |||
 |
|
× | 1 | |||
Software apps and online services |
||||||
 |
|
|||||
Story
Arduino GoPRO libraries
This tutorial relies on the use of the Arduino GoPRO libray that can be installed using the Arduino Library Manager.
This library allows the user to fully communicate with a GoPRO camera, but we will use only two very basic functions:
- Turn ON and OFF the camera;
- Start or stop the capture;
How it Works
The libraries relies on the fact that a connection between the camera (in AP mode) and the board exist.
The library has so the method GoPRO.begin(ssid, pass) to try a connection. This function in fact returns true if the connection is established falseotherwise.
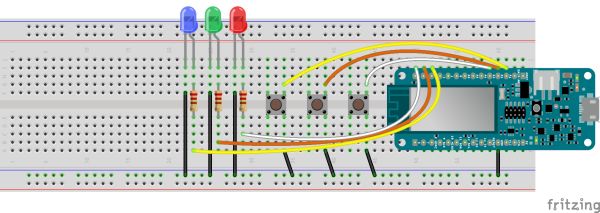
The sketch interacts with three buttons:
- Connect/Disconnect (attached to A1);
- Turn ON/OFF the camera (attached to A2);
- Start/Stop Capture (attached to A3);
Pressing the buttons reflects to the status of the three LEDs in such a way:
- Blue LED: when the connect button is pressed, the board tries to establish a connection with the camera. If the connection is successful, the LED will be turned ON. If pressed another time the connection will be stopped and the LED is turned OFF;
- Green LED:when the turn ON/OFF button is pressed, the board sends the
turnOn()command if the LED is OFF theturnOff()command otherwise; - Red LED:when the Start/Stop Capture button is pressed, the board sends the
startCapture()command if the LED is OFF thestopCapture()command otherwise;
NB: Every command is sent only if the connection between the board and the camera is still active. This can be check using the method checkConnection()that returns true if the connection is active, false otherwise.
Schematics
-
How do I connect the board to the camera?
The sketch uses the method GoPRO.begin(ssid, pass) to attempt a connection when the Connect/Disconnect button is pressed. -
Can I turn the camera on without a connection?
No, every command is sent only if the connection between the board and the camera is still active as checked by checkConnection(). -
Which LED indicates a successful connection?
The Blue LED turns ON if the connection is successful and turns OFF if the connection is stopped. -
What function does the Green LED control?
The Green LED reflects the status of the Turn ON/OFF button which sends turnOn() or turnOff() commands. -
How do I start capturing video?
Pressing the Start/Stop Capture button sends the startCapture() command if the LED is currently OFF. -
Where can I find the required software library?
You can install the Arduino GoPRO library using the Arduino Library Manager. -
What happens if I press the Connect button again?
If pressed another time after a successful connection, the connection will be stopped and the LED is turned OFF.
