Summary of Speech Synthesizer using Arduino
This article details the creation of an Arduino speech synthesizer shield using the modern SpeakJet chip to overcome the processing limitations of ATmega microcontrollers. It explains how the project combines the SpeakJet with an LM386 audio amplifier to provide voice feedback without consuming excessive CPU cycles, effectively reviving the functionality of obsolete 1980s hardware in a compact form factor suitable for new or existing Arduino projects.
Parts used in the Speech Synthesizer Shield:
- Arduino Duemilanove, Arduino Pro, Seeeduino, or equivalent
- Prototyping shield
- SpeakJet speech synthesizer chip
- 18-pin DIP IC socket
- Resistors (1K, 10K, 27K)
- Ceramic capacitors (10nF, 100nF, 1nF)
- Electrolytic capacitors (10uF, 100uF, 220uF)
- Green, red, and blue 3mm LEDs
- Line-level output cable
- Connectors (2-pin male header, line-mount female connector, 3.5mm stereo socket)
- Shielded single-core audio cable
- LM386 audio amplifier IC
- 8-pin DIP IC socket
- 10K trimpot
- Screw terminal
- Audio speaker
Synthesized speech was for a long time the Holy Grail of computing, and back in the 1980s when a 4MHz CPU made your computer the fastest machine in the neighborhood it just wasn’t practical for software to create intelligible speech. In those days the only sensible way to generate speech was to offload the task to dedicated hardware because the CPU simply couldn’t keep up. The most widely used speech chip through the 80s and early 90s was the famous SPO256A-AL2, the allophone speech processor. It was used in toys, in external speech synthesizer peripherals for desktop computers, in industrial control systems, and all sorts of other unexpected places. Then as CPU power continued to increase rapidly speech synthesis was moved to being a software function, and nowadays of course it is almost always done entirely in software by the main CPU using only a tiny fraction of the available processing power. As a result the SPO256 chip dropped out of production and became a footnote in the history of technology.
Which leaves Arduino developers in a quandary, because in terms of processing power the ATmega chips put us back into the 80s again. An ATmega could possibly produce intelligible speech directly but it would use every available CPU cycle to do it, and the Arduino itself would be pretty much useless at doing anything else at the same time. Not much good if you just want to add voice feedback to an existing project. However, the demise of the SPO256 means you can’t just link one up to your Arduino and offload speech generation to it.
With old stock of the SPO256 drying up Magnevation decided to do something about it, and designed a new speech chip that works on the same principles as its predecessor but has a much smaller physical package and offers a handy serial interface rather than a clunky parallel interface. The result is the SpeakJet, an 18-pin DIP device that can do everything the old SPO256 did plus more.
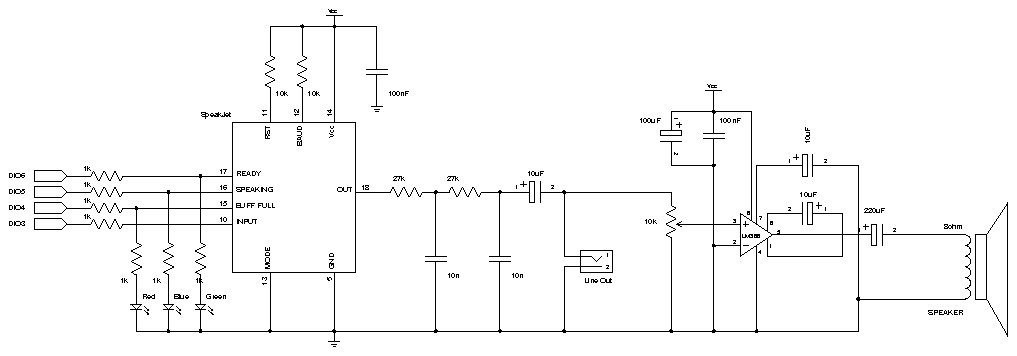
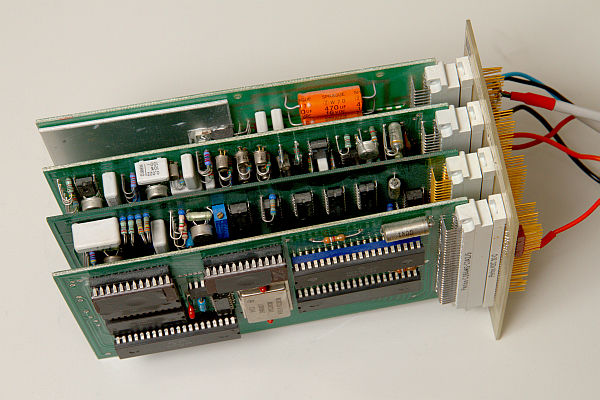
In this project we’ll assemble a speech-synthesizer shield that combines a SpeakJet chip with a simple audio amplifier to let you add speech output to a new or existing Arduino project.
| Qty | Description |
| General Parts | |
| 1 | Arduino Duemilanove, Arduino Pro, Seeeduino, or equivalent |
| 1 | Prototyping shield |
| 1 | SpeakJet speech synthesizer chip (www.magnevation.com) |
| 1 | 18-pin DIP IC socket |
| 3 | 1K resistors 1%: brown-black-black-brown-brown 5%: brown-black-red-gold |
| 2 | 10K resistors 1%: brown-black-black-red-brown 5%: brown-black-orange-gold |
| 2 | 27K resistors 1%: red-violet-black-red-brown 5%: red-violet-orange-gold |
| 2 | 10nF monolithic ceramic capacitors (marked “103”) |
| 1 | 100nF monolithic ceramic capacitor (marked “104”) |
| 1 | 10uF electrolytic capacitor (6.3V or greater) |
| 1 | 3mm green LED |
| 1 | 3mm red LED |
| 1 | 3mm blue LED |
| Line-level output cable | |
| 1 | 2-pin, 0.1-inch pitch PCB-mount male header |
| 1 | 2-pin, 0.1-inch pitch line-mount female connector |
| 1 | 3.5mm stereo line socket |
| 1m | Shielded single-core audio cable |
| On-board audio amplifier | |
| 1 | LM386 audio amplifier IC, DIP-8 package |
| 1 | 8-pin DIP IC socket |
| 2 | 10uF electrolytic capacitors (6.3V or greater) |
| 1 | 100uF electrolytic capacitor (6.3V or greater) |
| 1 | 220uF electrolytic capacitor (6.3V or greater) |
| 1 | 1nF (1000pF) ceramic capacitor (marked as “102”) |
| 1 | 100nF monolithic ceramic capacitor (marked as “104”) |
| 1 | 10K trimpot |
| 1 | 2-pin PCB-mount screw terminal |
| 1 | Audio speaker (usually 8 Ohms) |
For more detail: Speech Synthesizer using Arduino
- Why was speech synthesis difficult on early computers?
In the 1980s, CPUs like the 4MHz model lacked the power to create intelligible speech in software, requiring dedicated hardware. - Can an ATmega chip produce speech directly?
An ATmega could possibly produce intelligible speech but would use every available CPU cycle, making the board useless for other tasks. - What is the main advantage of the SpeakJet chip over the SPO256A-AL2?
The SpeakJet has a much smaller physical package and offers a handy serial interface instead of a clunky parallel interface. - How does this project solve the problem of limited processing power?
The project uses a SpeakJet chip combined with an audio amplifier to offload speech generation from the Arduino. - What type of audio amplifier is used in this design?
The design utilizes an LM386 audio amplifier IC in a DIP-8 package. - What components are required to connect the audio output?
You need a 3.5mm stereo line socket, a 2-pin PCB-mount screw terminal, and an audio speaker. - Is the SPO256 chip still available for purchase?
No, the SPO256 chip dropped out of production as speech synthesis moved entirely to software. - What is the pin count of the SpeakJet device?
The SpeakJet is an 18-pin DIP device that can do everything the old SPO256 did plus more.