Wouldn’t it be nice if you could start warming up the camp before you leave the house? How about using Alexa to do it for you!
Things used in this project
Story
My idea is a home automation system for a camp with no internet.
Wouldn’t it be nice if you could start warming up the camp before you leave the house? How about turn on some lights because your getting there late? Maybe you would like to know what the temperature is in an outside the camp. Well with Alexa and my cellular home automation project you could. From your home, just say “Alexa, start warming up the camp at 5:00pm,” Alexa will send a trigger to my system to turn on the heat on at the time requested.
My system will use arduinos to control devices and read sensors. The arduinos will send or receive the information to a Raspberry Pi using mqtt where the Pi can connect to the internet using a Hologram Nova cellular modem.
There is a couple assumptions,
1. You have power at your camp, the gateway can run off of batteries and solar, but it wasn’t tested to see how long
2. Even though you dont have internet, you still need to be in an area where cell phones work.
Sensor:
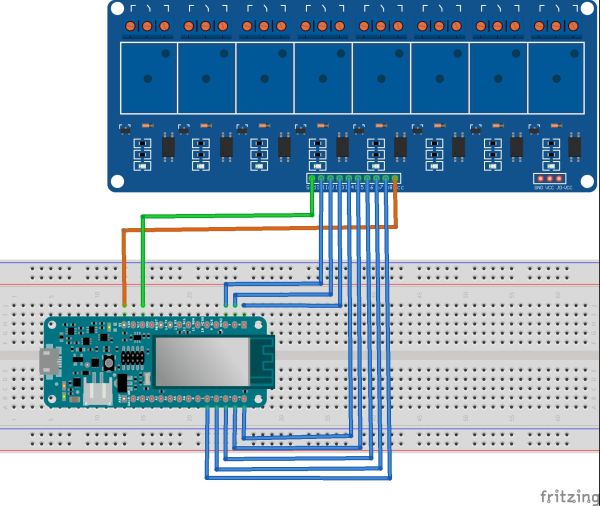
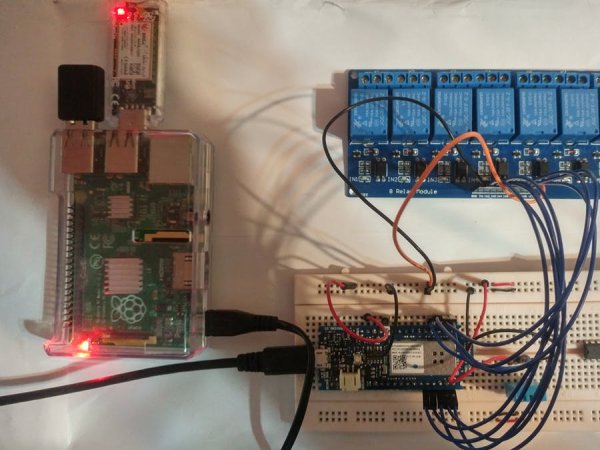
For the hardware, we will use an Arduino MKR1000 and an 8-channel relay board. See the schematic for wiring info. The MKR1000 still has a few extra IO pins, so if you wish to add a few more sensors there is space.
The sensor emulates a WeMos. I was able to find some code online that does this for an ESP8266. I used that code to port it to the MKR1000 for sending and receiving the messages.
How does the code work:
- First it makes a wifi connection to the access point (details about this later)
- then it starts up a server to which it will accept UDP and TCP connections.
- IF a M-SEARCH UDP broadcast request is received, it evaluates it and returns the url to the device setup.xml.
- The broadcaster will then request the setup.xml this file contains all the services available for the device. I will also contain the uri’s to the service and what eventservice definition file is.
<serviceList>
   <service>"
      <serviceType>urn:Belkin:service:basicevent:1</serviceType>
      <serviceId>urn:Belkin:serviceId:basicevent1</serviceId>
      <controlURL>/upnp/control/basicevent1</controlURL>
      <eventSubURL>/upnp/event/basicevent1</eventSubURL>
      <SCPDURL>/eventservice.xml</SCPDURL>
   </service>
...
- It will then wait for request to come in on the service urls and process those events as defined.
Testing the sensor
- Open the adruino UI and load the arduino code attached.
- Build and flash it to your MKR1000 ( other boards can be used if they have wifi)
- Open the serial monitor, you should see some messages showing the sensor is waiting for request.
- Open a browser, and goto http://arduino_ip/index.html. you should see a hello message. At this point your sensor should be working.
- One more test would be to goto http://arduino_ip/setup.xml to see the xml file that gets returned on a UDP broadcast M-SEARCH
Cellular Gateway
The Cellular Gateway will use a raspberry pi 2 as its controller. Connected to that will be a hologram nova USB cellular modem and a WIFI adapter. And of course a power adapter. The USB modem will be used for access to internet and the WIFI adapter will be used to create an access point for the sensor created above to connect to.
There is a number of software packages required normally I would list off all of them, but there are existing scripts to run to add the majority of what is needed and I will give instruction to add what is missing.
Raspberry Pi setup
- The first thing to do is assemble the hardware. basically plug everthing together. At this point DONT plugin the cellular modem. That will be done later once we’re ready to create the access point. We want to make sure everything is working before we create and startup the Cellular access point. This will save on data costs. Plus its easier to debug everything if your doing it locally.
- I’m going to assume that you know how to configure a raspberry pi. So install rasbien lite and do the standard configuration. there are many tutorial on how to do this. Just find one you like
- Once its installed, make sure its fully up to date
$sudo apt-get update
$sudo apt-get upgrade
Nodejs, Node-Red and etc.
This software will process the messages coming in from Alexa and transform it to what the sensor can understand.
- Now the software. The first one were going to install is called a-christmass-script. Follow the instruction on the link. Once you have it downloaded execute the script and answer a few questions, it will take a few hours to install everything. But its worth it.
- Once its installed you should be able to get to the main page by going to http://your_pi’s_ip From there you can get into node red. We will use node-red to create our nodejs flows.
Alexa Node-Red sdk
This software will add Alexa nodes to node-red.
- Open a browser and goto http://your_pi_ip:1880 this will bring up node-red login with the admin account that was created.
- Click on the menu icon
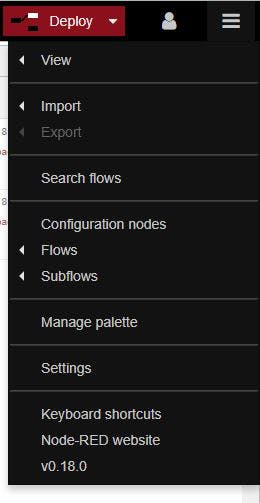
- Click on manage pallet
- Click the Install node
- Enter alexa-node-red-contrib-sdk and press search
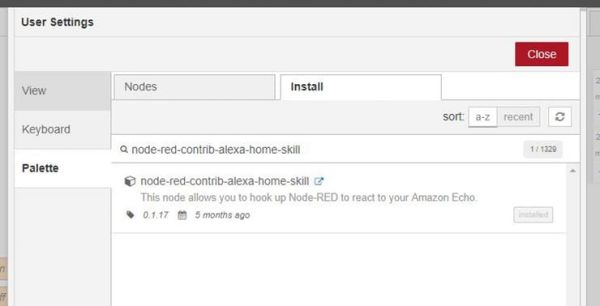
- Install the node-red that comes up.
- Once it installs, you should see these two nodes in your pallet now.
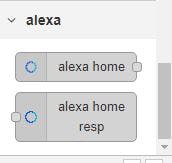
Alexa Node-Red Bridge
This software will allow you to use your Alexa though the internet to remote devices
- Goto https://alexa-node-red.bm.hardill.me.uk/
- Click on the Documentation link at the top. This is the instruction to setup the Alexa Node-Red bridge.
- Follow the instruction here, The main things to do at this point is Create the account, add devices and link the account to your Alexa account.
- To link your account download the alexa app from google playstore for android.
- Open the app and goto add skill and look for nodejs
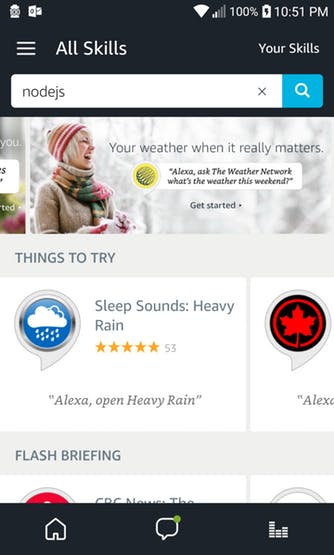
- The install nodes was done above
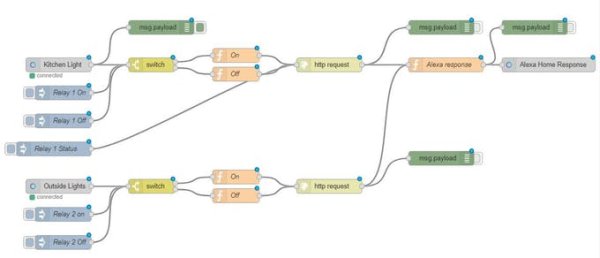
- You can configure the nodes after you import the node-red flow.
Node-red Flow
This will process messages coming in from Alexa via the Alexa-Node-Red Bridge and send them to the sensor
- Login into node-red
- Click on the menu icon
- Click on import
- Select the flow to import (save it from the attached files)
- Now update the necessary nodes with your details.
- Alexa input nodes – add the alexa node-red credentials you created for the Alexa Node-Red Bridge
- html nodes – update the ip in the url to your devices ip.
Testing
Its time to start testing. At this point were still havn’t created the access point, but for ease of debugging, we will use you router at home to give out IP’s. Your raspberry pi and sensor should be connecting to the same router so they can talk
- Open a browser and goto node-red.
- If the configuration is correct, your alexa nodes should so connected.
- You should be able to test from node-red by clicking on one of the Relay On buttons, the corresponding relay should activate.
- Click the Relay Off button, again the corresponding relay should switch off
- This tells you node-red to the sensor is working correctly.
- Now try it with your Alexa, if you dont have an Alexa echo use echoism.ioto emulate one.
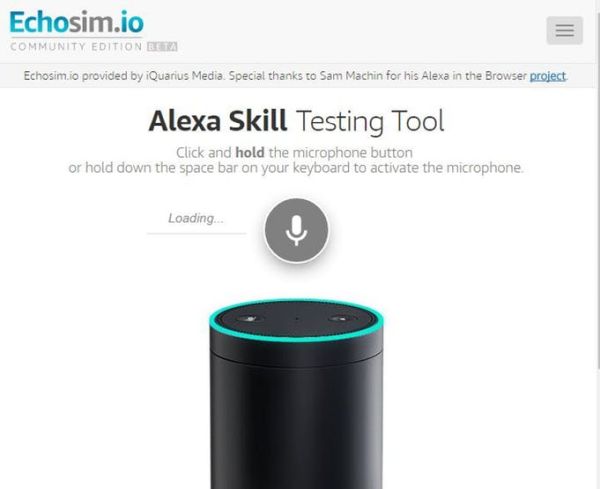
- Say “Alexa, turn on kitchen light” you should see that relay switch on.
- Say “Alexa, turn off kitchen light” you should see that relay switch off.
- Congradulations, you now have a working system from Alexa to sensor.
Access Point
The last piece of work is to turn your raspberry pi into an access point. We do this so all your sensors will connect directly to it instead of having to have another piece of equipment. Also at this point we will be configuring the Nova USB cellular modem so we can communicate to our pi over the internet because remember, your camp doesn’t have internet access at this point.
The easiest way to do this is to use the project BenStr from Hologram has create here on hackster with the complete instruction. He does a much better job at explaining it than I would.
Conclusion
Well I hope you enjoyed this project. There are a lot of moving part, but all seem to come together pretty smoothly. Adding new sensor or switch should be pretty simple, just connect them up and alter the flow in node-red as necessary.
Thanks
Dana.
Schematics
Code
Source : Home Automation System for a Camp with Cellular Internet



.png?auto=compress%2Cformat&w=48&h=48&fit=fill&bg=ffffff)

