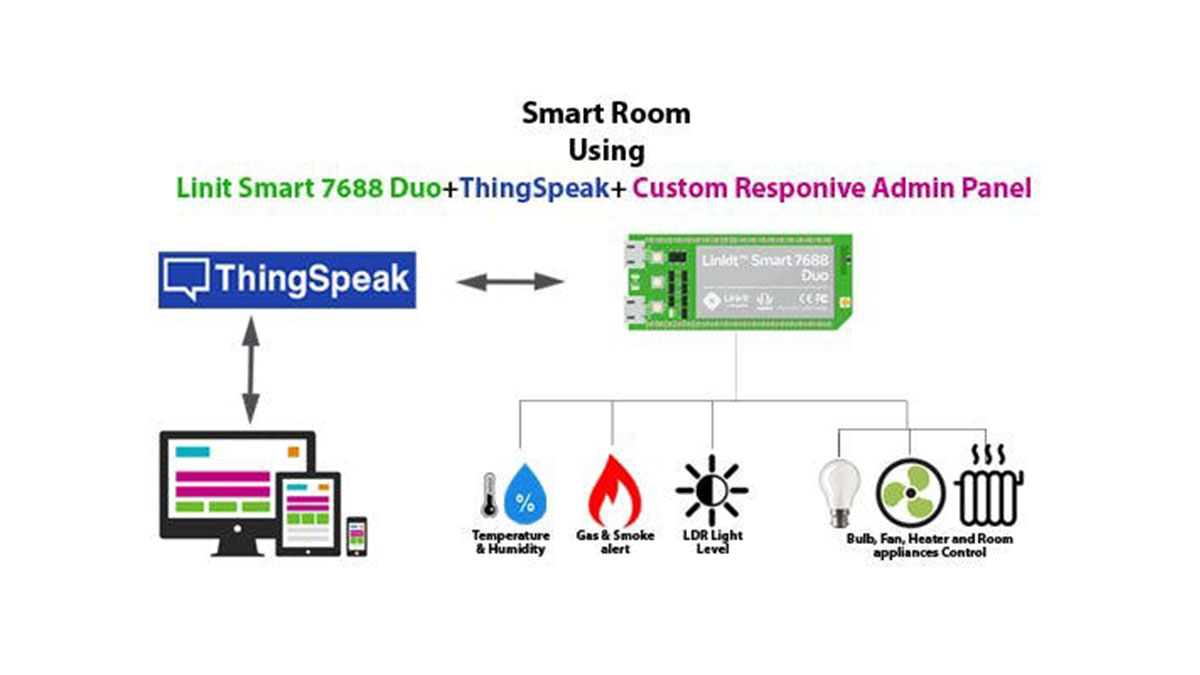
This Project will demonstrate you to control & monitor your room through my custom designed responsive web app.
Things used in this project
Story
After Creating MKR1000 Surprise Room Decoration I decided to make another project to monitor and control my Parents room. Like you are out of home in day and working in a office long night but you don’t know what’s going on in your parents room. You want to monitor you parents room, what’s the Temperature & Humidity of the room and by watching this you can turn on/off the fan or heater. Also, by watching the light level you can control your lights of room. And if is there any smoke or Gas leakage in a room you can get the alert on your screen and you can take the immediate decision to save your parents. I am creating this project with the help of:
- Linkit Smart7688 Duo Board
- Thing Speak
- My Custom PHP Responsive app
Introduction to Linkit Smart7688 Board:
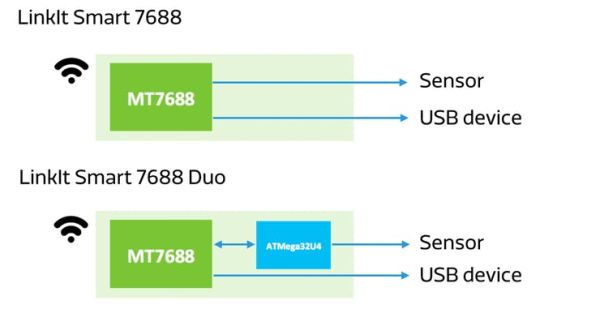
Linkit Smart 7688 is Running OpenWrt Linux Distribution & consist of MPU MT7688AN + MCU Atmega32U4. you can program this board with many different lanugages like Node.js, Pathon, C++ & even with Arduino IDE.
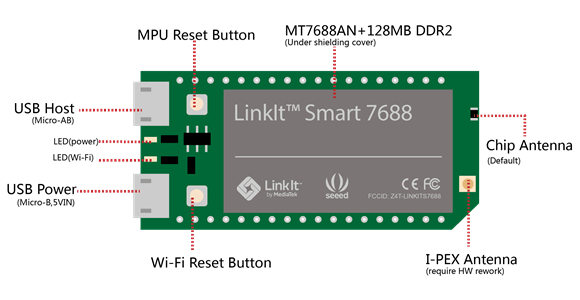
Add an imageDelete this imageIn the pervious Model which is Linkit Smart 7688 does not contains MCU but in the Duo Model it’s Contains Atmega32u4 MCU and if you see in the picture sensors are directly connected to MCU.
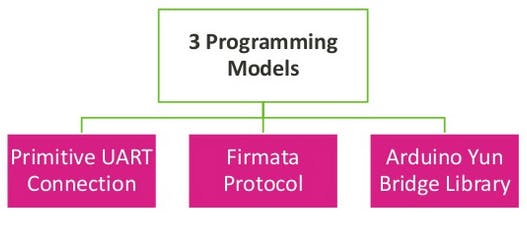
Duo Board contains 3 Different Programming Model as you can see in the below image. We are not going into the depth of these models as we are only going to use Arduino Yun Bridge Library Model in this project.
Below picture is demonstrating the Bridge Library Model. As we just need to write the code in Arduino IDE for sensors reset of communication with other components (Wifi,SD Card, Video and etc) of MPU is done by Bridge Library.
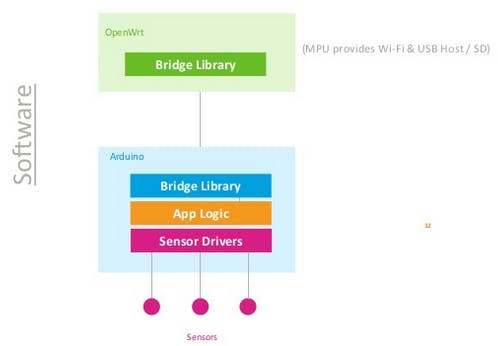
Add an imageDelete this imageif any of guys want to learn more about it’s architecture & other programming model please visit this link https://www.slideshare.net/MediaTekLabs/peripheral-programming-using-arduino-and-python-on-mediatek-linkit-smart-7688-duo-59281246
ThingSpeak:
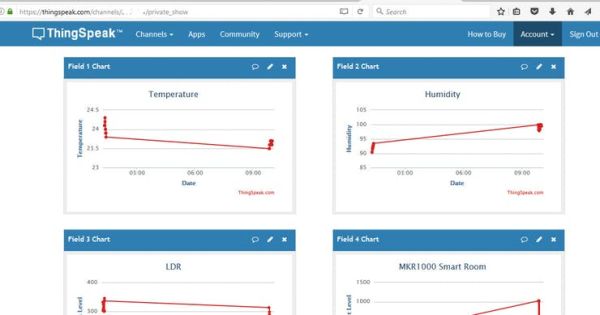
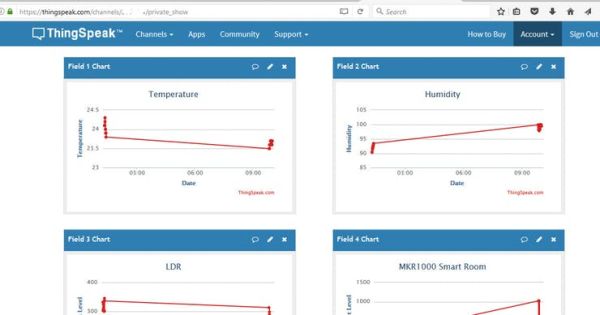
Thing speak is a cloud designed by Matlab Company. which store the devices data into cloud and provide you real time stream of devices data. for more details please visit ThingSpeak Below is the Interface of Thing Speak Channel. Which is showing real time device data.
Custom Responsive Web App:
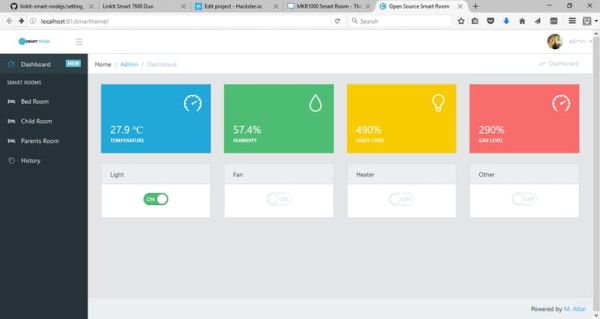
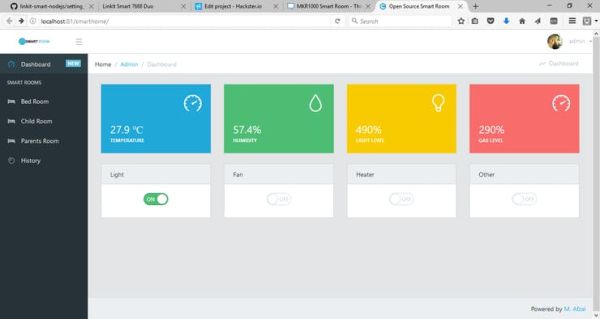
Thing speak is good for storing devices data into cloud but it’s GUI is Generic for every device and it’s interface only allow you to view the data in graph format and you are not able to control your devices from it’s interface. that’s why i write my own custom PHP responsive web application. Which will take the data from Thing Speak API and display in informational manner and you can control your room devices via this application and this web application is responsive you can use it on Android, iPhone, Tablets, PC and etc.
Hardware Setup:
For this Project please collect the Hardware which is above listed in the project.
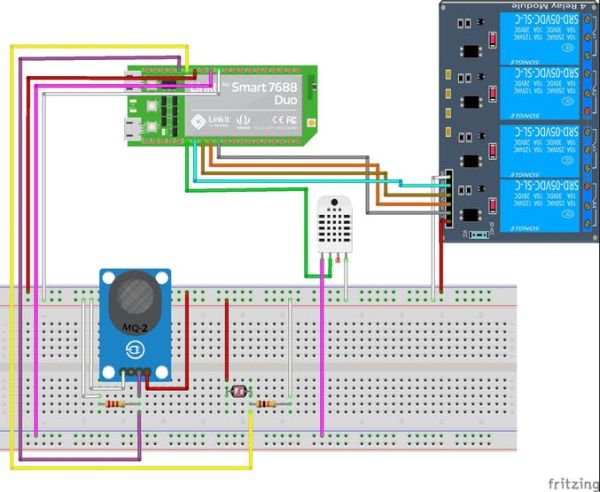
Note: Be careful during use of Relay as it contains 220V of Current or Higher
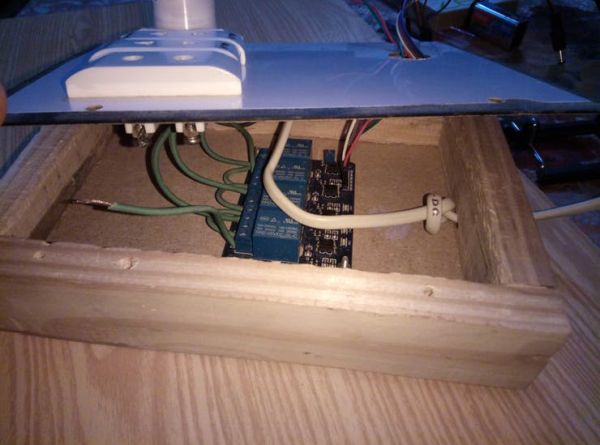
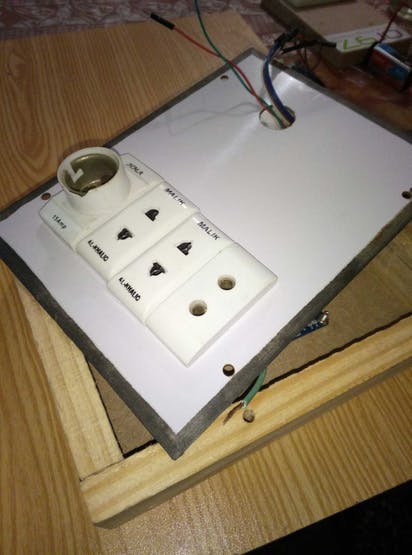
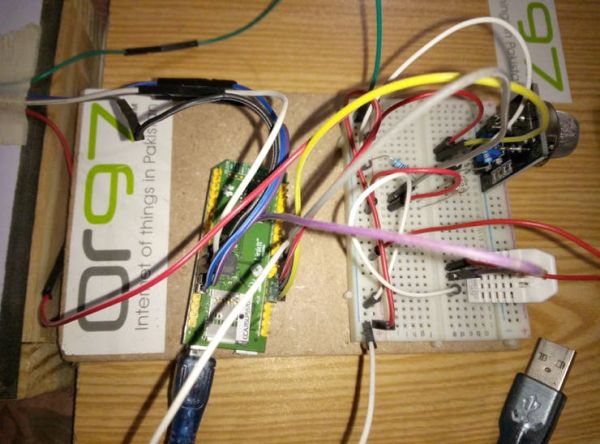
MQ-2 Gas Sensor & LDR are both Analog sensors so please use 220 ohm resistor with Gas Sensor and 10K ohm resistor with LDR to get proper level details. And for temperature & Humidity I am using DHT22 if you are new to this sensor please read my this article. Please enclose the Relay module in a box for safety purpose. View the below pictures for batter understanding.
Pin Layout:
LDR Pin ->A0
MQ-2 Gas Pin -> A1
DHT22 Pin-> D7
Relay Pin-> D8,D9,D10,D11
Note: you can change the pins according to your requirements but if you change the pin please also change the pin in code.
Setting Up Linkit Smart7688 Duo Board:
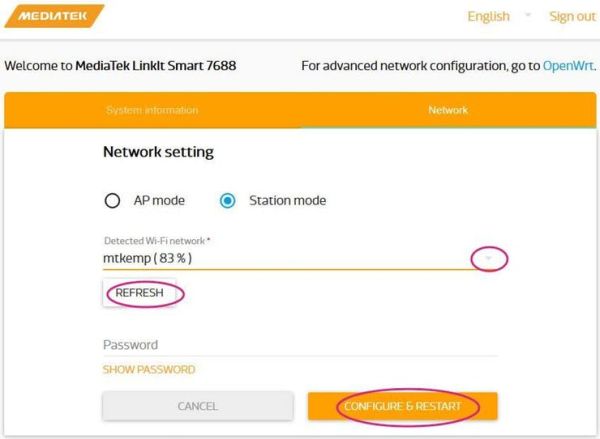
By Default Linkit Smart7688 Duo is working in AP Mode but for this project we need to make it to Station Mode and we also need some configuration to create a Bridge between MPU & MCU as we are going to use Bridge Library Model in this Project.
Connect the Board with your PC and Scan the Wifi Network and you will fine the Network with the name of LinkIT ******* Connect to it and open your browser and type this URL. http://mylinkit.local/ and you will see the screen. First time put the password and click on save and then again login. After Login click on “Network” tab and then you will the following screen and select the Station mode. and then select your home/office wifi network and then enter your wifi password and click on “Configure & Restart“. Now your board is with you 😉 on your network.
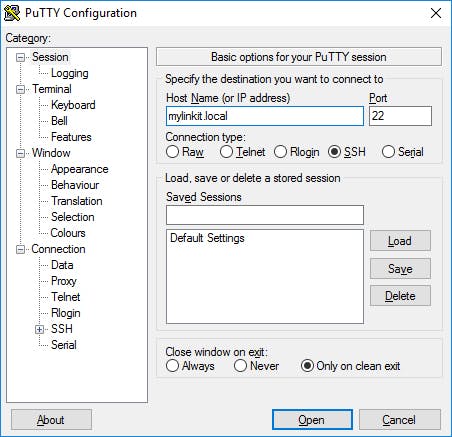
After connecting putty with board execute the following commands to enable Bridge Mode.
# uci set yunbridge.config.disabled=’0’ # uci commit # reboot
If you are totally new to this board please visit this link for complete details click here.
Now our board is ready for final task. please download the code from github and before uploading code to board please change the ThingSpeak Channel Number+ Write API Key and pins according to your setup.
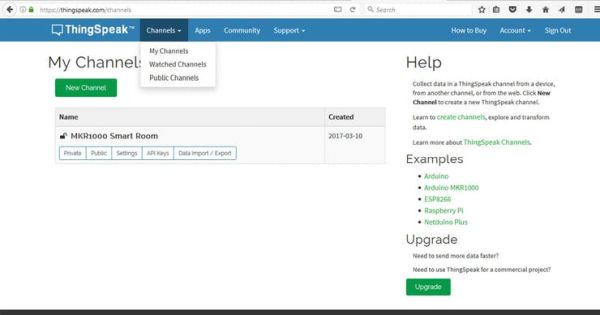
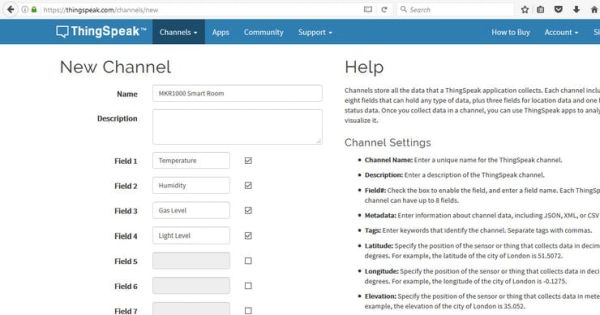
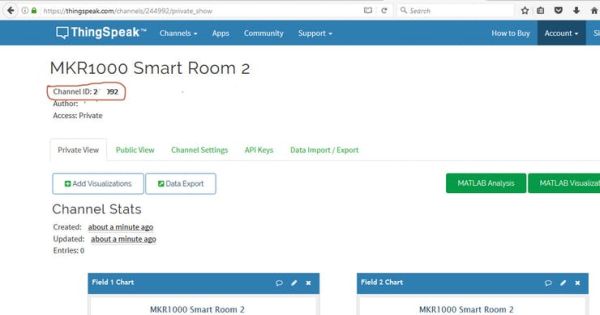
if you don’t have thingSpeak Account please follow the following Steps. Thingspeak is a cloud for IOT devices to send & receive message from and to devices. For thingspeak just go to https://thingspeak.com/ and create an account and login to ThingSpeak and after that click on Channel Menu in the Top and select My Channels and then click on New Channel and enter the details of channels like name, description, fields like temperature, humidity, gas level, light level and then click on Save button. Now take the Channel ID and put into code. After that click on API Keys Tab and get the Write API Key and put into code. For particle demonstration of thing-speak please visit the Next Step.
Web app is totally custom made in PHP & Bootstrap. Download the Web App from GitHub and upload on any PHP hosting or if you don’t have any hosting space then download the wamp server and copy the web app folder in WWWdirectory of WAMP server and browse it as localhost/yourappdirectoryname
Change the Channel ID, write API Key & read API Key in Config.php file which is located under Core folder. My final hardware setup looks like below. Now upload the code to board via Arduino IDE.
Note: Install the Linkit Smart7688 Board in Arduino IDE if you already did not installed. For installation instruction click here.
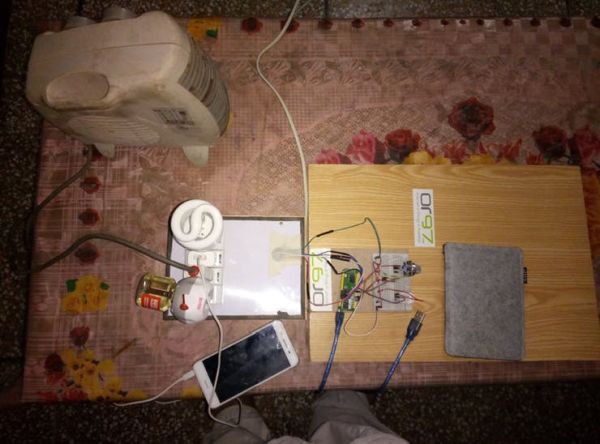
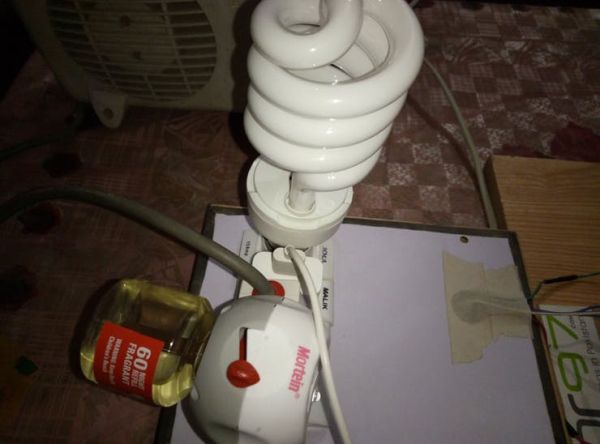
Now our setup is ready please view the video for live demo. If you have any question please post the question in a comment I will be happy to answer your query.
Future Work:
- Extension of this work to multiple rooms.
- Controlling Room window curtains.
- Garden Monitoring when we move this project to smart home.
- Garage door Control
- Optimization of Communication time. hope in future i will use Microsoft Azure or amazon for Instant Communication between web app & devices.
Schematics
Code
Source : LinkIt™ Smart 7688 Smart Room


