Summary of How to Send Data from Arduino to Webpage using WiFi
This tutorial demonstrates how to send data from an Arduino UNO to a local web server using an ESP8266 Wi-Fi module. The project utilizes the Software Serial Library to manage communication between the microcontroller and the Wi-Fi module on digital pins 2 and 3. It details the specific AT commands required to configure the module, connect to a router, establish a local server, transmit data, and view the results in a web browser.
Parts used in the Send Data to Web Project:
- Arduino UNO
- ESP8266 Wi-Fi Module
- USB Cable
- Connecting wires
- Laptop
- Power supply
Wireless communication between Electronic devices and modules is very important, to make them ‘Fit’ in the World of Internet of Things. HTTP protocol and HTML language have made it possible to transfer the Data anywhere in the world, over the web. We have already covered some projects which use Wi-Fi with Arduino, have a look at them to Getting started :
- Sending Email using Arduino and ESP8266 WiFi Module
- WiFi Controlled Robot using Arduino
- Controlling RGB LED using Arduino and Wi-Fi
Now in this tutorial, we are building a program to Send Data to Web using Arduino and Wi-Fi module. For this we first need an IP address of either Global or Local server, here for the ease and demonstration purpose, we are using Local Server.
Components Required:
- Arduino UNO
- ESP8266 Wi-Fi Module
- USB Cable
- Connecting wires
- Laptop
- Power supply
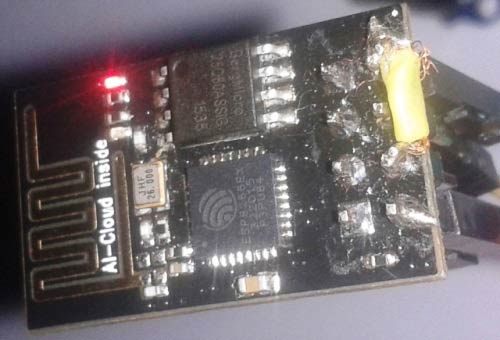
Wi-Fi Module ESP8266:
Circuit Connections:
Circuit Diagram for “Post Data from Arduino to Web” is given below. We mainly need a Arduino and ESP8266 Wi-Fi module. ESP8266’s Vcc and GND pins are directly connected to 3.3V and GND of Arduino and CH_PD is also connected with 3.3V. Tx and Rx pins of ESP8266 are directly connected to pin 2 and 3 of Arduino. Software Serial Library is used to allow serial communication on pin 2 and 3 of Arduino. We have already covered the Interfacing of ESP8266 Wi-Fi module to Arduino in detail.
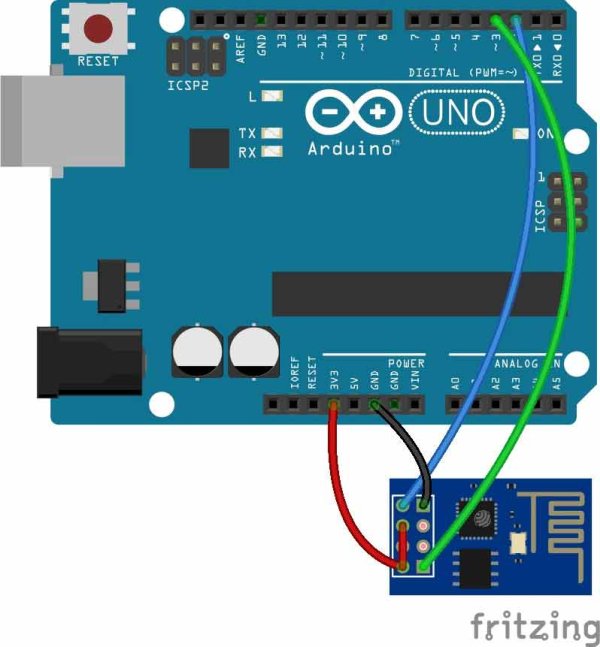
By using Software Serial Library here, we have allowed serial communication on pin 2 and 3, and made them Rx and Tx respectively. By default Pin 0 and 1 of Arduino are used for serial communication but by using SoftwareSerial library, we can allow serial communication on other digital pins of the Arduino.
Note: To watch the response of ESP8266 on serial monitor, please open Serial Monitor of Arduino IDE.
Working Explanation:
First of all we need to connect our Wi-Fi module to Wi-Fi router for network connectivity. Then we will Configure the local server, Send the data to Web and finally Close the connection. This process and commands have been explained in below steps:
1. First we need to test the Wi-Fi module by sending AT command, it will revert back a response containing OK.
2. After this, we need to select mode using command AT+CWMODE=mode_id , we have used Mode id =3. Mode ids:
1 = Station mode (client)
2 = AP mode (host)
3 = AP + Station mode (Yes, ESP8266 has a dual mode!)
3. Now we need to disconnect our Wi-Fi module from the previously connected Wi-Fi network, by using the command AT+CWQAP, as ESP8266 is default auto connected with any previously available Wi-Fi network
4. After that, user can Reset the module with AT+RST command. This step is optional.
5. Now we need to connect ESP8266 to Wi-Fi router using given command
AT+CWJAP=”wifi_username”,”wifi_password”
6. Now get IP Address by using given command:
AT+CIFSR
It will return an IP Address.
7. Now enable the multiplex mode by using AT+CIPMUX=1 (1 for multiple connection and 0 for single connection)
8. Now configure ESP8266 as server by using AT+CIPSERVER=1,port_no (port may be 80). Now your Wi-Fi is ready. Here ‘1’ is used to create the server and ‘0’ to delete the server.
9. Now by using given command user can send data to local created server:
AT+CIPSEND =id, length of data
Id = ID no. of transmit connection
Length = Max length of data is 2 kb
10. After sending ID and Length to the server, we need to send data like : Serial.println(“[email protected]”);
11. After sending data we need close the connection by given command:
AT+CIPCLOSE=0
Now data has been transmitted to local server.
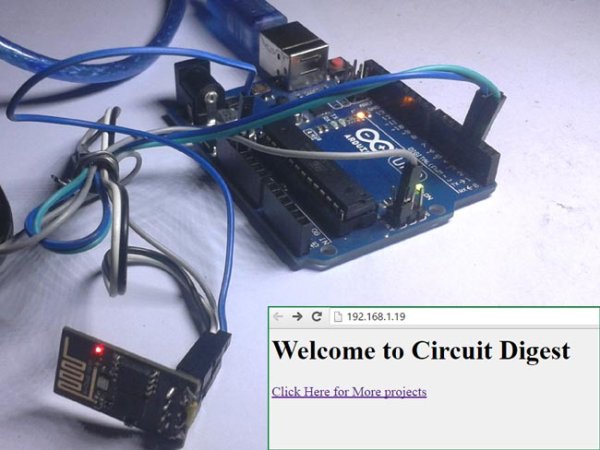
12. Now type IP Address in Address Bar in web browser and hit enter. Now user can see transmitted data on webpage.
Check the Video below for complete process.
Read More: How to Send Data from Arduino to Webpage using WiFi
- How do I connect the ESP8266 module to the Arduino?
The Vcc and GND pins of the ESP8266 connect directly to the 3.3V and GND of the Arduino, while CH_PD connects to 3.3V. - Can I use Software Serial for the ESP8266 connection?
Yes, the Software Serial Library allows serial communication on digital pins 2 and 3 instead of the default pins 0 and 1. - What command tests if the Wi-Fi module is working?
You must send the AT command, which will revert back a response containing OK. - Which mode ID enables both AP and Station modes?
Mode id = 3 enables AP + Station mode on the ESP8266. - How do I connect the module to a specific Wi-Fi network?
Use the command AT+CWJAP with your wifi_username and wifi_password. - What command retrieves the IP address of the module?
The AT+CIFSR command returns the IP Address of the connected device. - How do I enable multiplex mode for multiple connections?
Enable this by using the command AT+CIPMUX=1. - What is the maximum length of data allowed during transmission?
The maximum length of data is 2 kb. - How can I verify the transmitted data on a webpage?
Type the IP Address into the address bar of a web browser and hit enter to see the data. - Which command closes the connection after sending data?
You must use the command AT+CIPCLOSE=0 to close the connection.