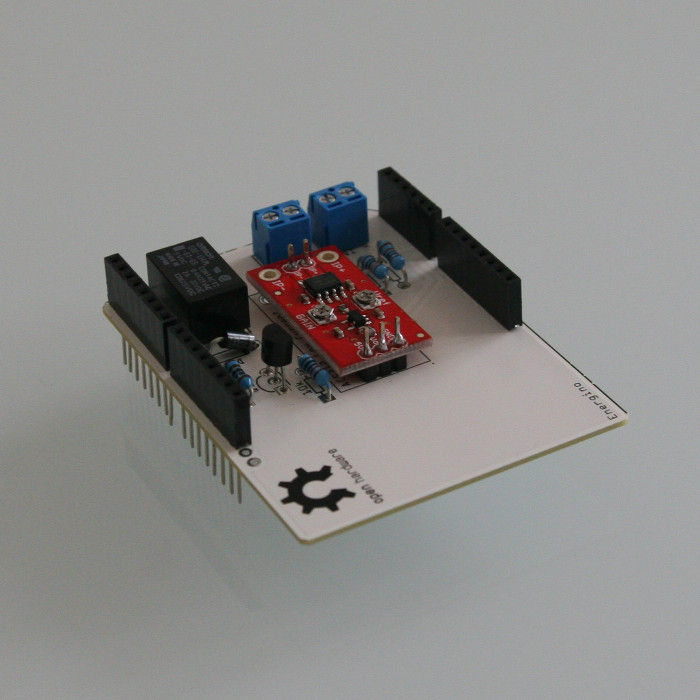
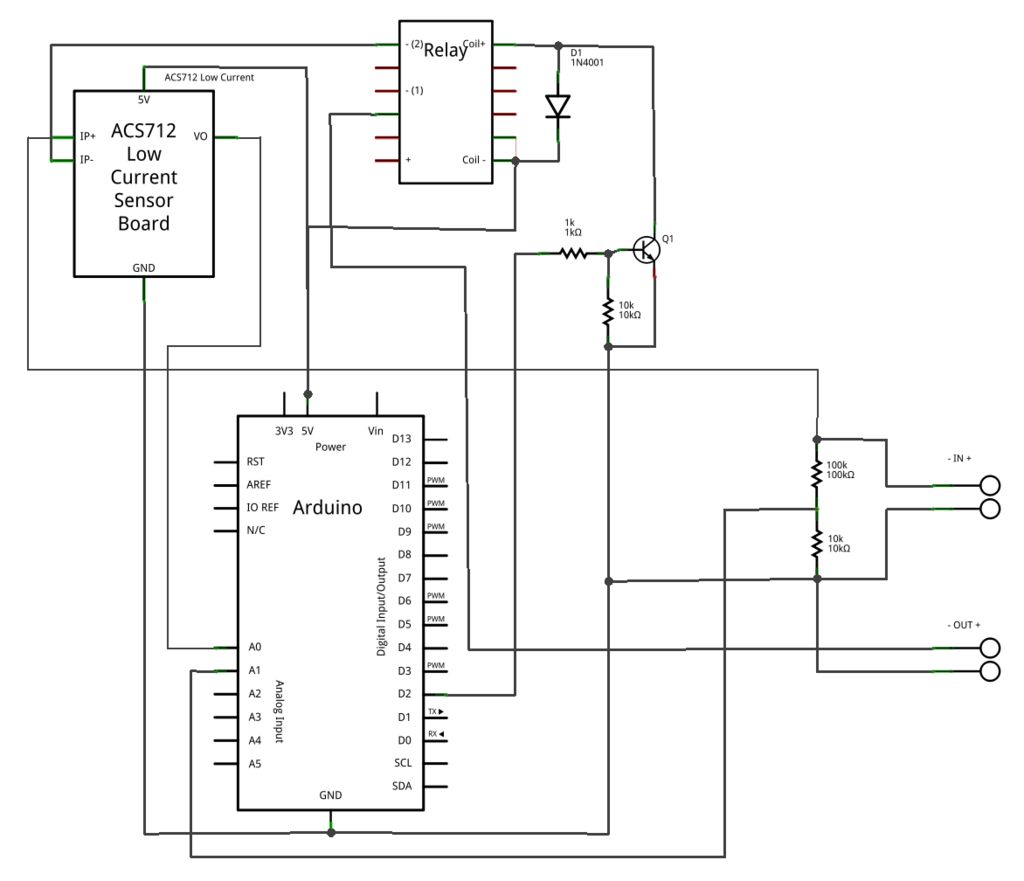
It has the following basic features:
* Supported load voltage: 0-60V
* Supported load current: 0-5A
* Sampling rate: up to 5000 Hz
* Sampling resolution (voltage): 60mV
* Sampling resolution (current): 30mA
Moreover, when used in combinations with an Ethernet shield it supports:
* push interface to COSM (formerly Pachube)
* REST interface for polling current energy consumption and for turning the attached device on/off
Step 1: Bill of materials
Energino PCB from Fritzing or a Proto Shield
ACS712 Low Current Sensor Breakout
Resistors 10K x2
Resistor 1K
Resistor 100K
Diode 1N4001
Transistor NPN 2N3904
Screw terminals (2 Pin) x2
Relay Omron G6E-134PL-ST-US
Arduino Stackable Header – 8 Pin x3
Arduino Stackable Header – 6 Pin x1
Step 2: Assembly
Alternatively you can use this Fritzing project to order a professionally printed PCB frorm Fritzing.
Fritzing is an open-source an open source initiative for designers, artists, and hobists. Among other things Fritzing allows you to create a custom PCB layout and have it manufactured for you at a very honest cost. For example an Arduino shield costs 19 Euro. You can find more information in their official web site and you can order the PCB from the Fritzing Fab.
In the pictures you can see the Energino shield mounted on top of either an Arduino UNO or an Arduino UNO + Ethernet Shield.
Step 3: Calibrating the current sensor
The ACS712 chip outputs an analog voltage that varies linearly with sensed current. The regular version can measure up to 5A of DC or AC current. In the Sparfun breakout board an opamp gain stage has been added for more sensitive current measurements. In particular by adjusting the gain of the embedded opamp (from 4.27 to 47) it is possible to measure very small currents.
In order to calibrate the current sensor you must configure the offset and the gain trimmers using a screw-driver and a digital voltmeter. This is done in two steps:
1) Configuring the offset. With no current on the sense lines, adjust the offset in order to read about 2.5V on the sensor output line.
2) Configuring the gain. With a known current input Iref (a 100mA limited supply works well for this), set the gain in such a way to read the desired value Vref on the output line. The sensitivity is then given by (Vref – 2.5) / Iref. For example, if with a reference current of 100mA the sensor output line reads 2.8V, it follows that the sensor sensitivity is 3 V/A.
Considering that the sensor output increased linearly with the sensed current and that the maximum value cannot exceed 5V, it follows that the gain must be set as a tradoff between resolution and maximum measurable current.
Download the Arduino sketch available here and open it using the Arduino SDK. Before uploading the code to the microcontroller remember to modify the OFFSET (in mV) and the SENSITIVITY (in mV/A) variables using the values above. In the screenshot the OFFSET is set to 2500mV while the SENSITIVITY is set to 850 mV/A
For more detail: Energino: an Arduino-based energy consumption monitoring shield


