Summary of $50 Analog Joystick (HOTAS) With Haptic Feedback for Flight Sim
This article details the construction of a low-cost, fully functional USB HOTAS joystick using an Arduino Leonardo as the core microcontroller. The project integrates a main industrial joystick, a modified Wii Nunchuck for sub-control, and a sliding potentiometer for throttle management. It features programmable buttons, weapon toggles, and four vibration motors for haptic feedback. The entire build costs under $50 and is compatible with Mac, PC, and Linux systems, offering extensive customization through software like Controllermate.
Parts used in the Low-Cost Analog Joystick (HOTAS):
- Arduino Leonardo
- Old Wii Nunchuck
- Joystick with potentiometers (CCTV or wheelchair type)
- ABS Enclosure
- Flip up weapon toggle switch
- Sliding Potentiometer
- 100K Potentiometers
- Dupont cable connectors
- Mini vibration units
- L289n Motor driver
- Minibuttons
- 'Carbon fibre' vinyl wrap
The aim is to create a fully functioning USB HOTAS* joystick from low cost electronics parts.
I bought Elite Dangerous when it was released for the Mac and realised very quickly I was going to have the floor wiped with me if I didn’t have a decent joystick, the problem is a really good joystick costs 100’s of dollars or $450 in the case of this one: http://arstechnica.com/gadgets/2014/09/flying-in-s… . Its very difficult for me to tell my wife should doesn’t need another pair of shoes if I order a $450 joystick for playing a “space game”.
SPECS
Fully USB powered
Mac / PC / Linux Compatible
Programable Micro Controller
Analog X/Y Axis primary joystick
Analog X/Y Axis sub controller
Analog Throttle capable of 1024 acceleration points and boost
Weapon Arming toggle switch
2 x Analog Trimming Knobs
4 x Programable Momentary Buttons
4 Vibration motors
*HOTAS Stands for Hands on Throttle and Stick, so this is not a ‘typical’ HOTAS Joystick, by some definitions it would have to have a DPAD on the joystick controller, where my DPAD is controlled by the thumb of the throttle hand. But definitions aside this is an extremely capable game controller and infinitely customisable thanks to the on board programable micro controller.
Step 1: Parts List
$10 – Arduino Leonardo
$3 – Old Wii Nunchuck
$19 – Joystick with potentiometers – type used for CCTV systems or wheelchairs
$3 – ABS Enclosure
$2.5 Flip up weapon toggle switch
$4 – Sliding Potentiometer
$0.5 – 2 x100K Potentiometers
$0.5 – a few Dupont cable connectors
$2 – 4x mini vibration units
$2 – L289n Motor driver
$2 – 4x minibuttons
$2 – ‘Carbon fibre’ vinyl wrap
The hardware is under $50 including postage to Australia.
It should be said I’m not picky about brands, the only genuine parts here are the Dupont cables, and I’m not even sure about them, this is how I managed to keep the costs down.
Step 2: The Brain
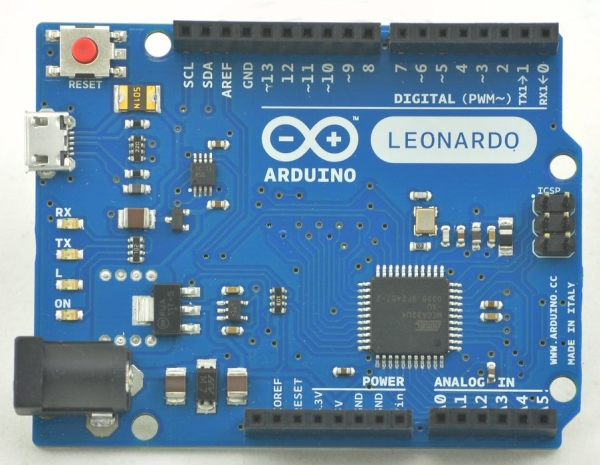
The $10 Arduino Leonardo is the brain of the joystick – it has a few advantages over to more commonly known UNO model. One of which is that it can act directly as a USB mouse or Keyboard. Example sketches are included with the Arduino software that allow you to control a mouse x & y access and also a ‘scroll wheel’ (which I connect to the throttle).
So out of the box the Leonardo can control 3 joystick axis* + give you access to the entire suite of keyboard commands, pretty good for 10 bucks.
Software
I also used Ordered Bytes amazing Mac Controllermate software to read the USB events and translate to a virtual keyboard joystick. this made it so much easier to set up centre points etc and calibrate the joystick I would not really enjoy having to do this in the Arduino code – not 100% necessary but life is short. I’m not sure of a PC or Linux equivalent to Controllermate, but there will be something.
You could just build this, load the code in and it would work, but Controller mate makes it really easy to do things like adjusting the left right balance, or adding an automatic boost trigger to the accelerator.
* There is a firmware mod for Arduino UNO’s out there that allows control for more than 3 axis – but I have not modded the firmware on this instructable.
Step 3: The Main Joystick
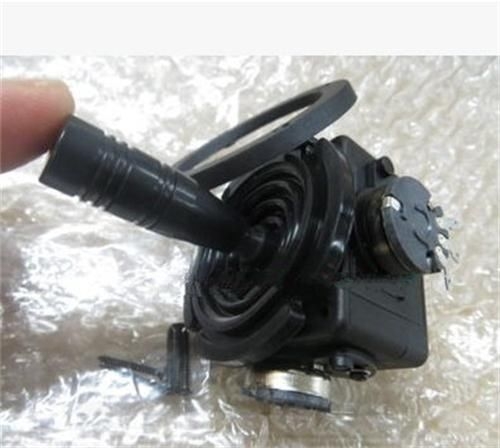
I purchased an industrial grade joystick (JH-D202X) for US $18.57 from ebay.
They have a few variations and they seem really solid.
If you get a different joystick, make sure you get one with potentiometers not microswitches – there are a few models available, they also have models with buttons on top.
There are 3 pins on both the x and y axes, the side pins on each axes connect to 5v and GND on the Arduino.
The centre pins connect to the Analog pin you will use to read the data on the Arduino.
x axis rolls the craft left and right
yaxis pitches the crafts nose up and down
Step 4: The Sub Controller (mini Joystick)
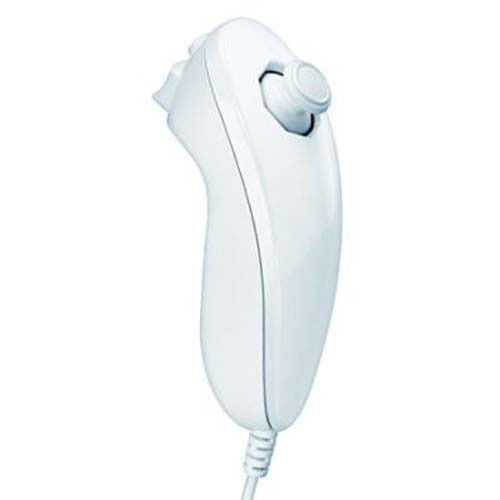
To make this I butchered a cheap Wii Nunchuck – basically opened it up and removed the joystick.
It’s basically the same (2 potentiometer joystick) as the main joystick, but smaller- I soldered some dupont cables onto the 6 fiddly connectors, and connected the side pins to 5V and GND – and then the middle pins to the appropriate Arduino pin.
It’s controlled with your left thumb or right thumb for lefties:
When flying it gives you left and right YAW and Vertical up /down thrust
When in an interface it controls up, down, left, right
You can also configure it to behave differently when in landing mode << just do this in the controller options in game.
x left presses the a key.
x right presses the d key
y up presses the r key
y down presses the f key
NB the YAW flight control provided here is not analog, its just on/off – this works great for me. Because of the limited axis supported by the Arduino, this is our only option without modding the Arduino firmware.
Step 5: The Throttle
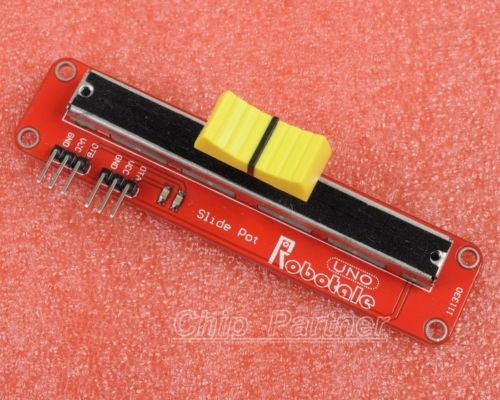
For a throttle I bought a $4 sliding potentiometer from eBay, this is the kind of thing you see on a mixing desk. Again this is another potentiometer, so connect it to another analog in on the Arduino. $4 is a bit much for this, I’m sure you could get a cheaper one.
Z axis increases and decreases the velocity
+ Pushing it to the extreme top causes the TAB key to be pressed and a boost to trigger << this is genius, once you try this you can’t live without it.
There are six pins (in order):
OTA > ignore this pin
VCC> ignore this pin
GND> ignore this pin
OTB > to Arduino Analog Pin
VCC > to 5v
GND > to Earth
Step 6: The Weapons
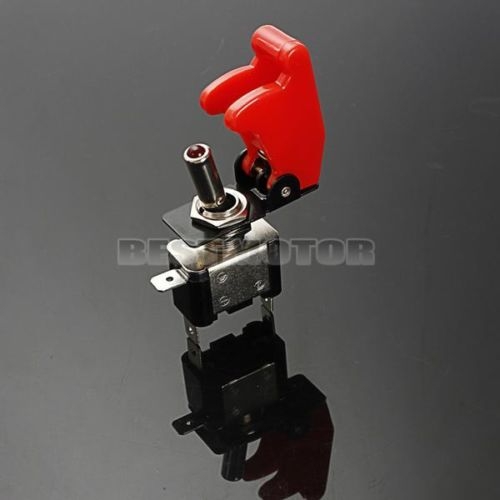
I needed a weapon arming system (to deploy hard points) , so one of these low cost “missile switches” seemed ideal.
But I also needed to have the ability to trigger individual weapons on common, so I purchased 4 red momentary pushbuttons, in the image above I have started soldering the cables.
Step 7: Haptic Feedback
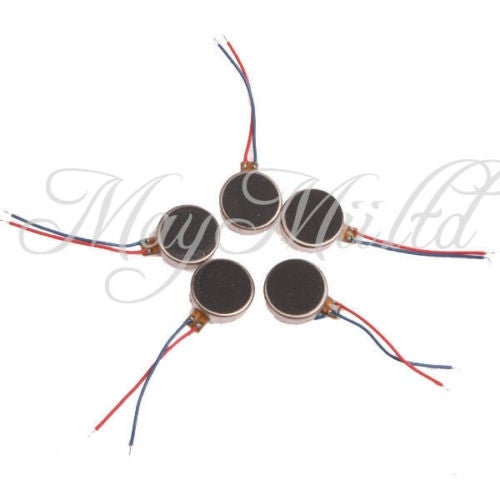
The Arduino Leonardo has a lot of pins – so it would be foolish resist the temptation to add vibration units to the joystick, these ones even have self adhesives backs.
Basically you connect the the positive wire of the vibration units direct to the Arduino digital pins then when you pass a current though the Dupont compatible pin – it will start the shakes up. You can pulse and trigger the units as you want.
One thing you can’t do yet is to respond to events in the game – Like being hit or exploding. – you can only respond to your own input events. This still leaves room for control feedback, events I added are:
1) Micro pulse every time you hit a button
2) Micro pulse at the correct side when main joystick hits an extremity
3) Two second big buzz fading out when you press velocity boost
4) One send stuttering buzz when you deploy hard points or the landing gear
Step 8: The Enclosure
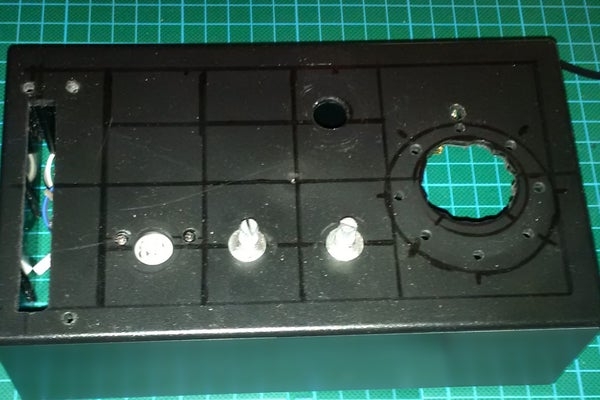
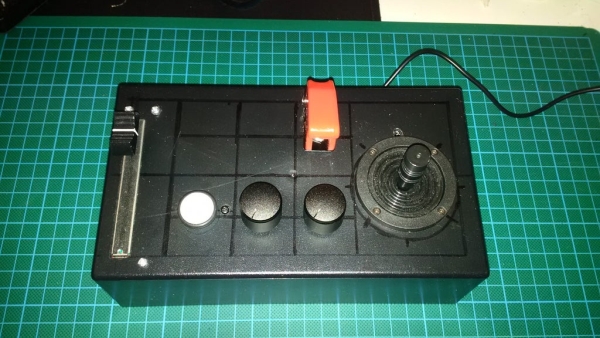
In the attached image I have mounted the Wii Nunchuck joystick, the 2 potentiometers and drilled the holes and made the slot for the sliding potentiometer.
The idea is you use your left hand for the sliding pot and wii joystick and your right thumb for the serious joystick.
It can be used on a desk, or in your hand like a giant controller.
Step 9: Adding the Controllers
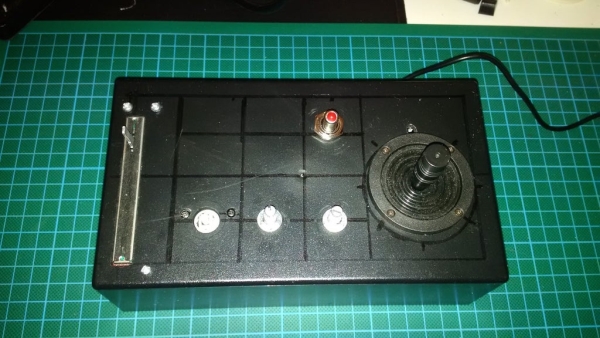
In this first image I have mounted the sliding pot, the weapon arming toggle switch and the main joystick, the circular surround and screws are provided with the joystick its easy to mount and hole doesn’t need to be exact.
Behind the back I have mounted the 4 custom buttons.
Step 10: Check Inside
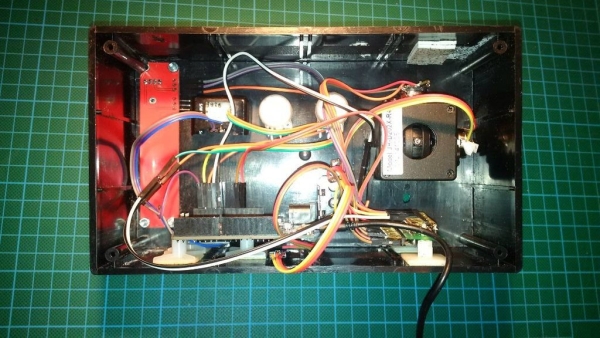
Here you can see I have mounted the Arduino and connected up the potentiometers.
I have added an earth and live rail on the bottom right to try and keep it tidy.
Whats still missing in this image- 4 programable buttons & vibration motors (also the weapon arming is not connected up)
Step 11: Step 10 Final Touches
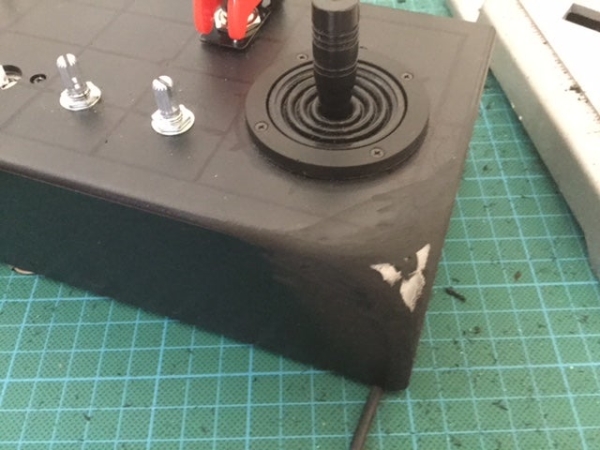
I have curved the box edges with my Dremel and use a small amount of polymorph plastic to fill any holes.
I also have added grooves for my fingers to wrap around if I am picking up the joystick and using it like a handheld controller.
The next step was to remove the control parts and wrap the whole thing in half adhesive “carbon fibre” and reinstall the controller parts. I used a hair dryer to make the self adhesive plastic mould to the enclosure better.
Source: $50 Analog Joystick (HOTAS) With Haptic Feedback for Flight Sim
- What makes the Arduino Leonardo suitable for this project?
The Arduino Leonardo can act directly as a USB mouse or keyboard without needing additional drivers. - Can this joystick work on different operating systems?
Yes, the device is fully compatible with Mac, PC, and Linux. - How is the yaw control implemented in the sub-controller?
The yaw flight control provided by the sub-controller is not analog but functions as an on/off input due to limited axis support. - What software is recommended for calibration?
The author recommends Ordered Bytes amazing Mac Controllermate software to translate USB events and calibrate center points. - Does the throttle include a boost feature?
Yes, pushing the sliding potentiometer to the extreme top triggers the TAB key to activate a boost function. - What kind of feedback does the haptic system provide?
The system provides micro pulses on button hits, side buzzes at joystick extremities, and specific buzz patterns for boosting or deploying hard points. - Is it possible to respond to game events like being hit?
No, currently the vibration units can only respond to user input events, not external game events like explosions. - How much did the hardware cost including postage?
The total hardware cost was under $50 including postage to Australia. - What type of joystick should be purchased for the main controller?
You must purchase one with potentiometers rather than microswitches to ensure analog functionality. - How is the enclosure finished for a better grip?
The creator curved the box edges with a Dremel tool and added grooves for fingers before wrapping it in carbon fiber vinyl.