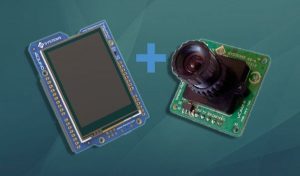
The main objective of this project is to show how to interface a uCAM-II serial camera to 4Duino. uCAM-II is a highly integrated micro serial camera which could be controlled by any host that requires a video camera or a JPEG compressed still camera for embedded imaging applications. uCAM-II processes various features making it trivial to interface to a microcontroller. Following are the list of few features to help you understand the module better.
- 5V DC Supply nominal
- On-board EEPROM providing a command based interface to external host
- UART with 3.68Mbps for transferring JPEG still picture or RAW images.
- On board VAG colour sensor and RAW/JPEG CODEC for different resolutionBuilt-in colour conversion circuits for 16-bit, 16-bit RGB, 8-bit Gray or standard JPEG images
- No additional DRAM required
More information could be found from uCAM-II datasheet if required.This project allows the user to capture images in JPEG format using uCAM-II and save it in a uSD card. The 4Duino’s resistive touch display is used as a means for a graphical interface to control and notify the status of the uCAM-II.
Step 1: How It Works
Step 2: BUILD
COMPONENTS
Build the circuit as shown in the diagram.
Step 3: Program
Workshop 4 – 4Duino Extended Graphics environment is used to program this project.
This project requires the Arduino IDE to be installed as Workshop calls the Arduino IDE for compiling the Arduino sketches. The Arduino IDE however is not required to be opened or modified to program the 4Duino.
- Download the project here.
- Open this file using Workshop 4.
- Connect the 4Duino to the PC using µUSB cable.
- Then navigate to the Comms tab and select the Comms port to which the 4Duino connected.
- Finally, go back to “Home” tab and now click on the “Comp’nLoad” button.
- The Workshop 4 IDE will prompt you to insert a µSD card to the PC in order to save the widget images. Insert µSD card, select the appropriate drive and press button “OK”. If the µSD card has the widget images you can click button “No Thanks”.
Read more: 4Duino UCAM-II Demo

