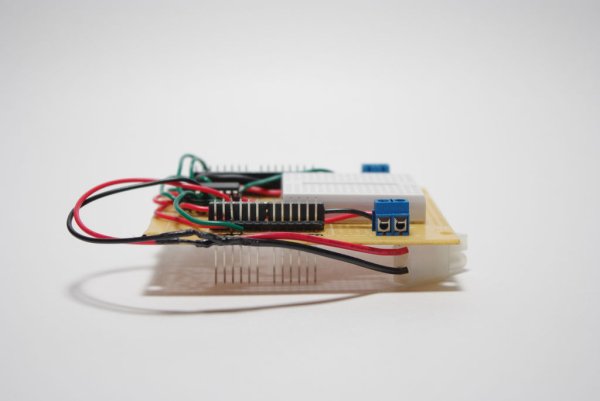
In this instructable I will detail how I went about making a quick and easy, Arduino compatible, H-bridge shield. But first, a brief intro into what got me motivated to make it.
A couple of years ago, I started wanting to learn more about micro-controllers. This led me to want to make my own robot, which then led me to Arduino. Then I wanted to make something move. It was then that I learned that in order to control a motor, I would need a H-bridge.
I had to learn quite a bit in order to make something that worked, and then I had to go that extra step to make something that could be used on different vehicle platforms a little more seamlessly. The first one I made wasn’t very user-friendly.
If you like this instructable don’t forget to vote for this in the Arduino contest. Thanks in advance.
Step 1: Materials Needed
The first thing to do is to figure out what you need and then find a place to get it from. For me that currently is one of two places: Radio Shack or Sparkfun. The list of items I used is comprised of the following items:
1 – Project PCB board, Radio Shack,
1 – Mini breadboard, Sparkfun, http://www.sparkfun.com/products/7916
1 – Long pin headers, Sparkfun,
1 – PCB board screw terminals, Radio Shack
1- SN754410, Sparkfun, http://www.sparkfun.com/products/315
1 – Hookup Wire, Radio Shack or Sparkfun, (I use stranded wire, not solid)
Total approx. cost = around $10.00-$12.00
Loads of fun = priceless!
Step 2: Tools Needed
For this project you will need the following tools:
1 – wire stripper
1 – soldering iron
1 – solder spool
1 – tabletop vise or a third hand. You’ll need this to hold the pcb board while you solder component to it.
1 – voltmeter / conitnuity checker
For more detail: Quick and Easy Arduino Compatible H-bridge Shield