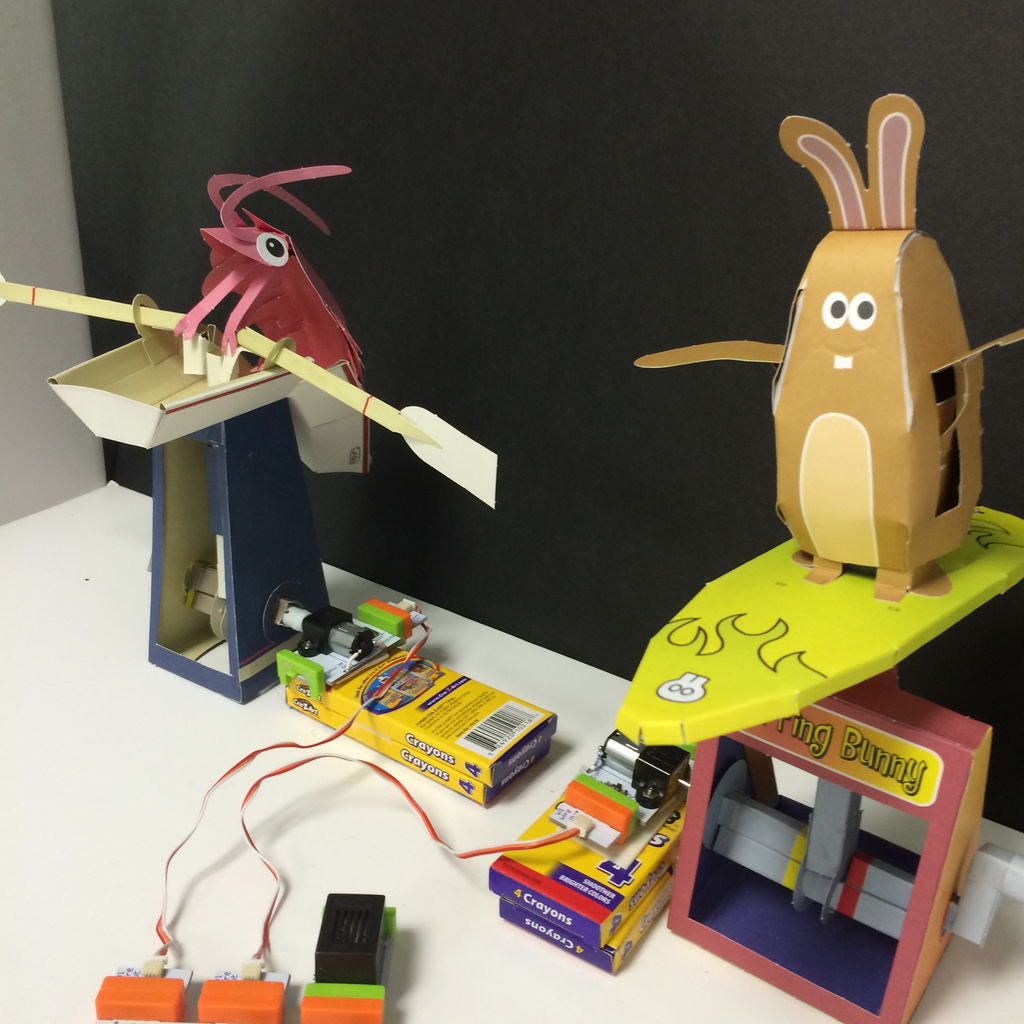
This instructable will show you how to create a game using littleBits. The game will start with a sound trigger. Each player will have to press a button repeatedly. The first person to press their button 25 times wins. A buzzer will sound to end the race while the winning machine will do a victory lap while the losing machine remains still.
You will need the following littleBits modules:
- 1 Power (p1)
- 1 Arduino at Heart (w6) with micro USB cable
- 1 Fork (w7)
- 1 Buzzer (o6)
- 1 Sound Trigger (i20)
- 6 Wire (w1)
- 2 Button (i3)
- 2 DC Motor (o5)
- 2 motorMate (a10)
Non littleBits Materials needed:
- 4 party crayon packs
- mounting tape
- adhesive tape
- foamboard
Arduino code used in this instructable can be found at:
Note: You will also need two paper rowing automata. We used the Shrimp Boat and the Surfing Bunny from the kit, Gizmos: Paper Machines that Really Work by Rob Ives. You can also find similar paper machines directly from robives.com for download to print on heavy weight paper. Instructions are included with your download.
Step 1: Connecting Inputs to the Arduino Module (w4)
Gather the following modules:
- 4 Wire (w1)
- 1 Fork (w7)
- 2 Button (i3)
- 1 Sound Trigger (i20)
- 1 Power (p1)
- 1 Arduino (w6)
On the Fork module, connect the Wire Out end to the first branch and the Wire In to a Button (i3) module
Do the same thing on the second branch and connect a second wire to the remaining button.
On the last branch, connect the Sound Trigger (i20) module. Then, attach the other end of the Sound Trigger to the first input pin (D0) on the Arduino (w6) module.
Take another Wire module and connect the button on the first fork branch and connect it to the the second input pin (A0) on the Arduino. Do the same with the remaining button and attach to the last input pin (A1).
Then attach the Power module to the left of the Fork (w7) module so that it can provide power to all the input modules.
Step 2: Connecting the Output Modules
Gather the following littleBit modules:
- 2 Wire (w1)
- 2 DC Motor (o5)
- 2 motorMate (a10)
- 1 Buzzer (o6)
Attach the motorMate (a10) to the DC Motor (o5). Repeat with the second DC Motor.
Next, using the Wire module, connect the Wire Out end to Output Pin 1 and the Wire In end to the DC Motor plus motorMate.
Connect the second DC Motor to Output Pin 5 with the wire module like the first motor.
Lastly, connect the Buzzer (o6) module to Output Pin 9.
Step 3: Assemble Paper Automata Platform
Materials Needed for this step:
- 4 party crayon boxes (or anything sturdy at the right height to connect the mechanism to the motorMate)
- adhesive tap
- foamboard
- mounting tape
Stack two party crayon boxes and tape them together with the adhesive tape. Repeat with the remaining two boxes. These will serve as platforms to hold up the DC Motor modules at the right height so that the motorMate attachments can connect to the cranking mechanism for each paper automata.
Position your paper automata on the foamboard and use the mounting tape to secure the automata and the crayon platforms to the foamboard.
Note: You may want to experiment with positioning before adhering to the foamboard. Be sure that the two machines have enough space between them so that their rowing action doesn’t interfere with each other.
For more detail: Papercraft Automata Race Game littleBits Circuit using Arduino