Summary of Humidity and Temperature Measurement using Arduino
This Arduino project measures ambient temperature and humidity using the DHT11 sensor and displays the data on a 16x2 LCD. The DHT11 provides a calibrated digital output via single-wire serial communication. Arduino sends a start signal, receives a 40-bit data transmission containing humidity and temperature values, and then displays these readings in percentage and Celsius on the LCD. The sensor includes resistive humidity and NTC temperature components with an integrated microcontroller, ensuring precise and reliable measurements at low cost.
Parts used in the Arduino Humidity and Temperature Measurement Project:
- Arduino Uno
- DHT11 temperature and humidity sensor module
- 16x2 LCD display
Humidity and temperature are common parameters to measure environmental conditions. In this Arduino based project we are going to measure ambient temperature and humidity and display it on a 16×2 LCD screen. A combined te
mperature and himidity sensor DHT11 is used with Arduino uno to develop this Celsius scale thermometer and percentage scale humidity measurement project. In one of my previous project, I have also developed a digital thermometer using temperature sensor LM35.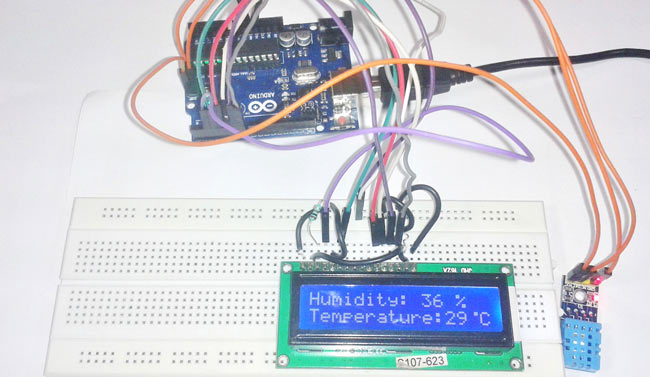
This project consists of three sections – one senses the humidity and temperature by using humidity and temperature sensor DHT11. The second section reads the DHTsensor module’s output and extracts temperature and humidity values into a suitable number in percentage and Celsius scale. And the third part of the system displays humidity and temperature on LCD.
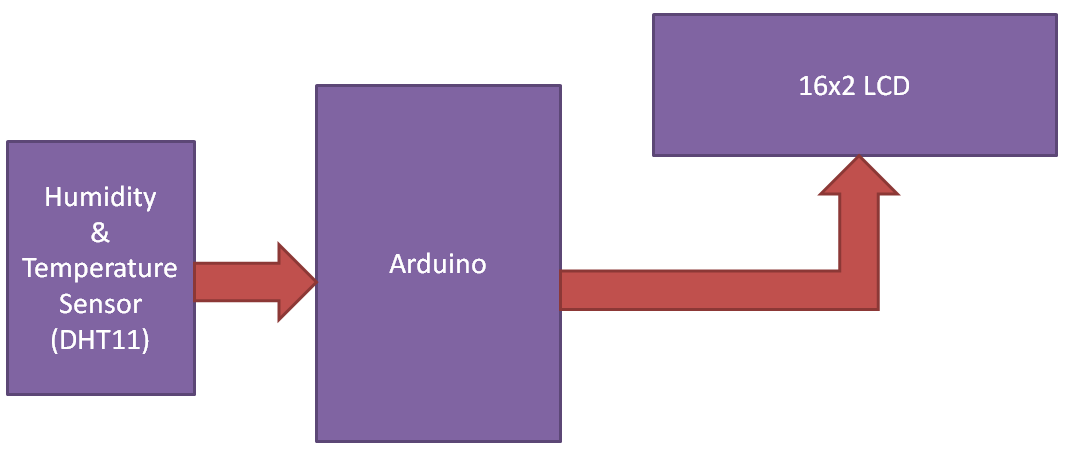
Working of this project is based on single wire serial communication. First arduino send a start signal to DHT module and then DHT gives a response signal containing temperature and humidity data. Arduino collect and extract in two parts one is humidity and second is temperature and then send them to 16×2 LCD.
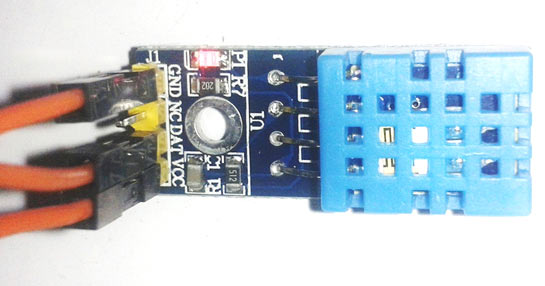
Here in this project we have used a sensor module namely DHT11. This module features a humidity and temperature complex with a calibrated digital signal output means DHT11 sensor module is a combined module for sensing humidity and temperature which gives a calibrated digital output signal. DHT11 gives us very precise value of humidity and temperature and ensures high reliability and long term stability. This sensor has a resistive type humidity measurement component and NTC type temperature measurement component with an 8-bit microcontroller inbuilt which has a fast response and cost effective and available in 4-pin single row package.
DHT11 module works on serial communication i.e. single wire communication. This module sends data in form of pulse train of specific time period. Before sending data to arduino it needs some initialize command with a time delay. And the whole process time is about 4ms. A complete data transmission is of 40-bit and data format of this process is given below:
8-bit integral RH data + 8-bit decimal RH data + 8-bit integral T data + 8-bit decimal T data + 8-bit check sum.
Complete Process
First of all arduino sends a high to low start signal to DHT11 with 18µs delay to ensure DHT’s detection. And then arduino pull-up the data line and wait for 20-40µs for DHT’s response. Once DHT detects starts signal, it will send a low voltage level response signal to arduino of time delay about 80µs. And then DHT controller pull up the data line and keeps it for 80µs for DHT’s arranging of sending data.
When data bus is at low voltage level it means that DHT11 is sending response signal. Once it is done, DHT again makes data line pull-up for 80µs for preparing data transmission.
Data format that is sending by DHT to arduino for every bit begins with 50µs low voltage level and length of high voltage level signal determines whether data bit is “0” or “1”.
Read More: Humidity and Temperature Measurement using Arduino