This instructable assumes very little with respect to prior knowledge.
If there are any areas you feel could be improved or clarified, please feel free to message or comment and I will update.
Here are all the details you need to produce a simple wall avoiding robot. Along the way you will have the chance to take a look at (and modify) the arduino code needed, get a bit of info on header files and look at some troubleshooting.
If you think this is complex, I can assure you that it’s not. You can look at this project as an assembly project if you wish – however, there is room to get more in depth too.
Step 1: Robot video
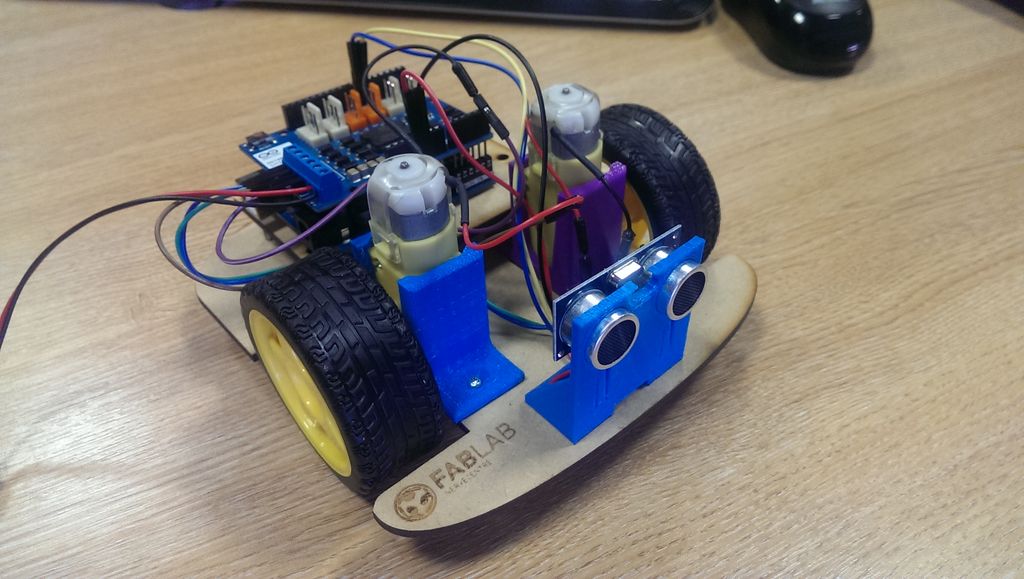
Step 2: What it is and what you need
Take a look at the video to see how the finished product works.
What you’re seeing is a little bit of the fundamentals of what a microcontroller is used for.
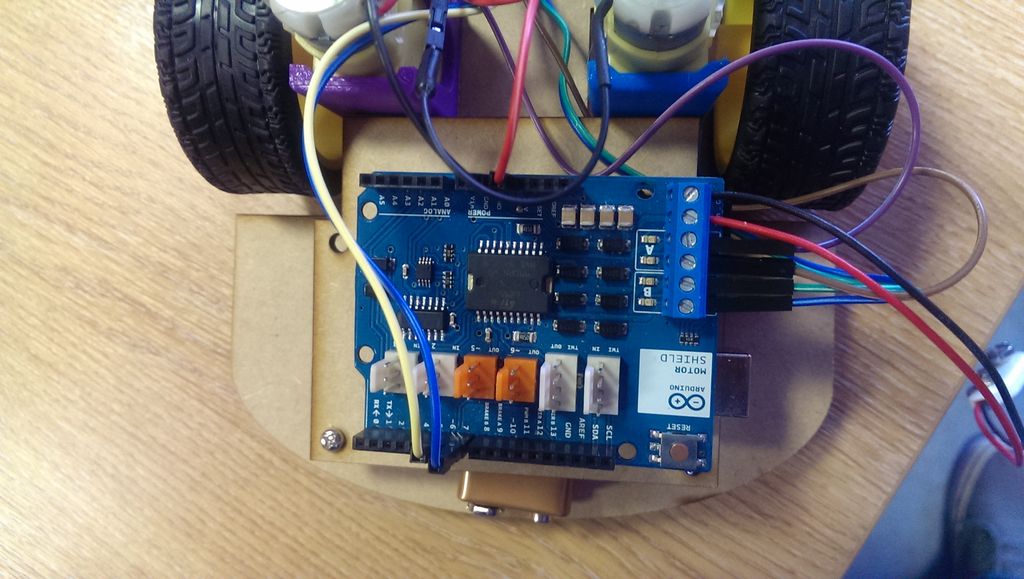
The arduino board itself is pretty much there for the purpose of facilitating the 32 pin ATMEGA chip. This is a microcontroller chip – microcontrollers are used for taking data in, performing calculations and putting data out. In this case, we’re using an ultrasonic sensor to measure time between a “ping” and “echo”.
The code performs calculations to convert time to distance – based on the speed of sound. This distance is continuously calculated and monitored. If the distance goes below a user-defined level, the robot changes it’s outputs to the 2 motors.
Below is the list of parts you will need – I’ve stuck to known components that are commonly used as these tend to be better supported for users who are kicking off their “maker life”!
- Arduino Uno
- Arduino motor shield
- 9V battery & clip/holder
- HC-SR04 ultrasonic sensor
- 2 x geared dc motors with wheels
I will also include files for 3D printed partss and for a laser cut chassis. If you have access to neither of these tools, you will find that you can make a decent chassis from cardboard and double sided tape.
Step 3: Here’s some files
First, you can download all the required files in this step.
They include:
- 3D printing:
- HC-SR04 mounting from user Shaun Saggers on thingiverse (a brilliant bit of design IMO)
- DC motor mounts modeled by myself and available from thingiverse. If you are making your own chassis, I have also modeled these mounts which need a different motor.
- Instead of a castor I’ve modeled this “third wheel” riser to let the robot move around with less friction.
- Laser cutting:
- The attached chassis (robot template) pdf file can be modified as you see fit for your own use.
- The Arduino “NewPing” library.
- The attached Arduino (Robot_Build.ino) sketch.
Step 4: Here’s some software
You’ll need a couple of bits of software too. Or rather, you’ll need one bit (the Arduino IDE) and may find the other (Inkscape) to be one of the most useful pieces of software you’ll use as a maker (plus it’s free and open source!)
The Arduino IDE is available for linux, windows and mac. FabLabs aim to use free and open source software where possible and as a lover of linux myself I can give help mostly for that platform.
Step 5: Your NewPing file
The newping header file is called by the arduino sketch (btw – an arduino “sketch” is simply an arduino file full of your code).
Open the Arduino IDE on your computer, and open the Robot_Build.ino sketch file – at the very top of the code you will see the text:
#include
This means that the sketch will call some functions that are described by the NewPing.h library. Without this line, you will get errors in verifying and compiling the sketch code. To see the effect of excluding a bit of code you don’t have to delete it. Instead you can prefix any bit of text with 2 forward slashes // and hit the verify button (on the top left) to check the code.
You will need to place the NewPing.h library into a folder from which the sketch will read it.
On Ubuntu, create the folder “sketchbook” in your /home/$username/ folder. In the sketchbook folder, create a “libraries” folder. Finally, create a “NewPing” folder in the libraries folder and save the NewPing.h file within this folder. That might seem a little confusing so I’ll try to clarify. You need to create all the necessary folders to end up with a location like this: /home/$username/sketchbook/libraries/NewPing/ within which you can place your NewPing.h file.
This structure is a good idea to keep to for any header files you may need. There is a sketchbook folder already in your arduino install folder – but if you do any updates to the IDE you may lose them. So having this ~/sketchbook/libraries/ structure means you hold on to all the hearder files you might end up needing for this and other projects.
Step 6: Sending your code to the Arduino
First, you’ll need to plug in your Arduino Uno as per the included image. After opening the Robot_Build.ino file you can then select Tools > Serial Port where you will see a list of connected devices. Make sure there’s a tick beside your Arduino.
The Arduino IDE can be used with a wide range of different boards and chips. Make sure you select Arduino Uno from the list at Tools > Board > Arduino Uno.
You can now upload your open sketch by hitting the upload button. The one crudely outlined in red in the image!
Any errors (there shouldn’t be any) will show up in the console at the base of the screen.
For more detail: Arduino wall avoiding robot