Updated : 16/3 Add step 4, about using the stage.
Updated : 18/3 Add photos (cutting vinyl adhesive sheet)
Updated : 19/3 Add step 5, acting as pen plotter
Updated : 20/3 Add laser engraving video (Wood) and photo
Updated : 22/3 Add 2 drawings to show the structures of machine, also visit this link.
+++++++++++++++++++
I read many posts and now I had finished my first mini Lazer Cutter.
The design is simple and reliable ( u can see the video )
+++++++++++++++++++
It is using Arduino Duemilanove + GRBL (0.8c) + 100mW blue/ violet lazer with external battery power supply (5V)
Drawing program is inkscape + gcodetools, gcode sender is Unversai G Code Sender
++++++++++++++++++++
I want to share with u but it is really difficult for me to explain it in english…
I just want to share some experiences, or, may be u can ask me…
Also, most of the technical things (especially about GRBL) u can find in the following articles.
Step 1: Main Body…
I had read many GRBL lazer-cutter design (especially using CDROM as axis-motor)
most of them is beautiful but I can’t made them.
It is because I did not have powerful tools to make them, even prepare a wooden board is difficult to me.
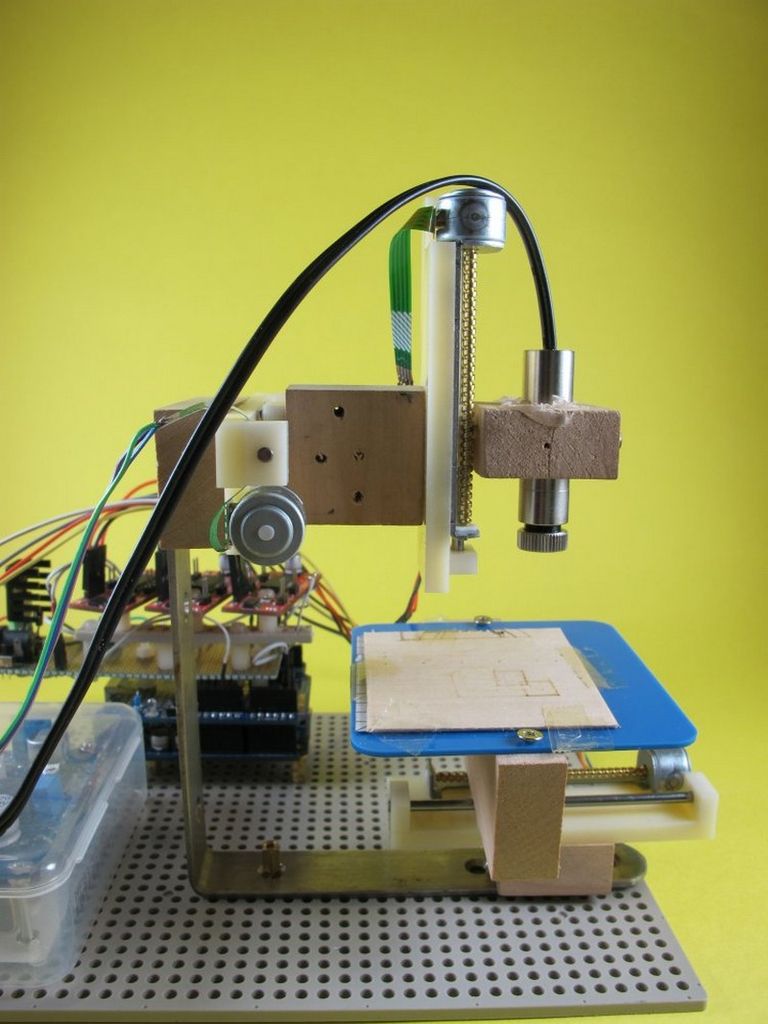
Since I think the axis-motor is running smooth, I use a metal frame together with few blocks to setup the structures.
I think u know how to build it by looking at the photo.
The tricky thing is…. u need to buy 3 small stages…
and all the stage/ metal frame are connected with a wooden block
the circuit in a small plastic box (photo) is a variable DC voltage supply, u can use any similar things instead.
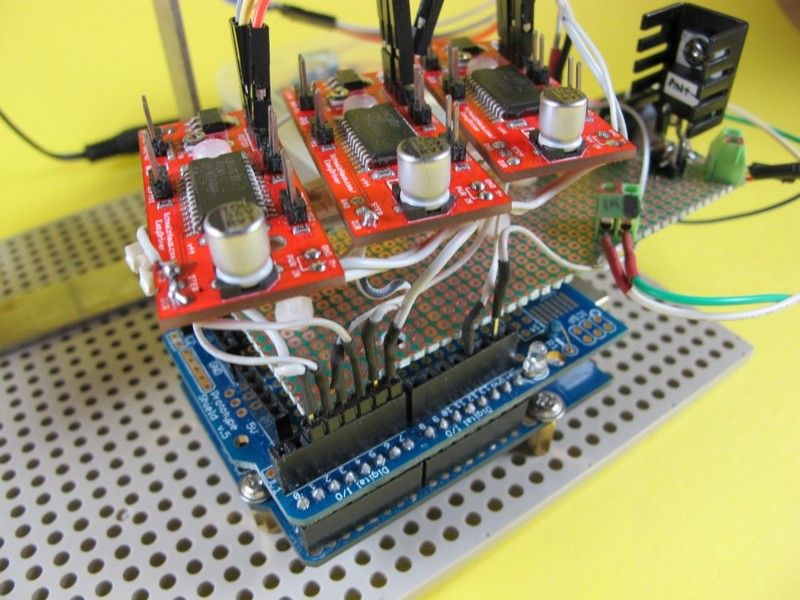
Step 2: DIY GRBL shield
I am using easydriver for controlling the movement of the stepping motor.
Some website said GRBL support not only Arduino Uno but also Duemilanove, nano…..
So I wonder I can make a shield for easily testing those arduino.
First, I screw the easydriver on a plastic stick, then solder them with wire.
Second, I allow the easydriver connect with arduino by pins (for easy configuration)
Third, I screw the plastic stick on a standard arduino shield and the whole things now can be plug and play with any arduino that come with GRBL.
I had soldered IRF510 for controlling the on/off of the lazer on the shield, together with power jack.
For more detail: Arduino 3-axis Mini Lazer Paper-Cutter