Now you can have all the remotes of your house in a device that fits in your hand with Arduino, never fight for who has the TV remote again!
To make it you will need:
- Arduino (I used a cheap copy of the arduino UNO).
- LCD keypad shield, (I bought mine from dealextreme)
- 1x Infrared LED (standard ~940nm)
- 1x Infrared sensor.
- A computer. (That can run the arduino compiler program)
Codes/Programs:
Step 1: Intro:

Infrared light has been used quite a lot for many different applications in many fields, one of them is communication, specifically between remotes and domestic devices, what allows us to control them without leaving the comfort of our sofa.
The process of communication between an emitter (the remote) and a receiver (the device) starts when the user presses any button of the remote, this device has an oscillator and a preconfigured chip that allow the signal to adopt a square waveform with a frequency of 39kHz, depending on the button pressed, the chip will use a determined signal code.
This signal travels through the circuit until it reaches the infrared LED, which transforms it into a series of pulses of invisible light (~940nm). If any sensor it’s in it’s range those pulses will be transformed into a quadratic wave that will indicate what to do according to the programming of the device.
To create a remote we want to capture those pulses, which will have a certain amplitude in time, we also want to know the time between those pulses so we can reproduce those pulses with voltage and time as the only variables.
Step 2: The hardware.
In this instructable we won’t need to work hard creating complicated circuits, instead, our work will be centered on the code we are going to implement.
The hardware we are going to use is the Arduino and the LCD keypad shield, which will help to visualize the menu that will order the codes by their function and the remote they come from .
Notice that this shields usually come without the pin headers, without them we won’t be able to use the pins that remain free.
If your shield don’t has them just go to your local electronics store and buy a female pin header, cut it and sand the edges with sandpaper, then just solder them into place.
We will use 2 different setups depending on whether we want to gather of send the codes:
Step 3: Gathering the codes.
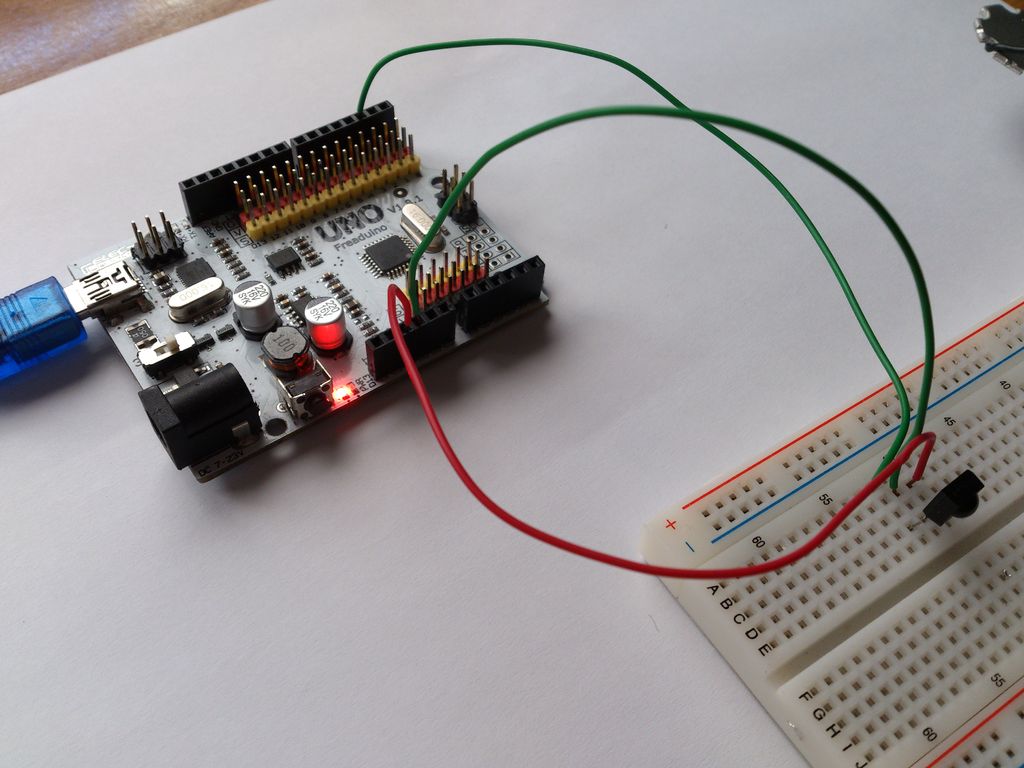
Before we can create a functional remote we will need to gather the codes of the remotes we want to use, we will use an infrared sensor to do so.
To set up the circuit, we can follow the sketch in the pictures, connecting the signal pin of the sensor to the pin 2 and the other pins to 5V and ground.
The code we will be using is from an Adafruit tutorial, I made some changes in order to make our job easier.
Now comes the boring part, once the code has been uploaded and the sensor connected we go to “Tools” and we click on “Serial Monitor”. You will see a message that says “Ready to decode IR!”, now, by pressing any key of the remote while facing the sensor, we will be able to obtain the code.
If you use the version I provided the readings will appear in a code form ready to be pasted and interpreted by the Arduino main program, we just need to take care of storing this code to avoid losing it, to do so we can open a .txt to paste and label this signals now converted into code.
IMPORTANT: the program reads the time the signal is high as well as it is low, before you send the signal the program is already counting the time it is low, that time will appear as the first reading and it is useless so it must be deleted. Also, many of the code is unnecessary since it’s repeated to make sure the device get’s it, if you can find a pattern I suggest you to cut the code and save space, if you just copy and paste it all it’s OK but you might be pasting too much redundant information.
TIP: If the Arduino compiler show this message “Serial port ‘COM3’ not found. Did you select the right one from the Tools > Serial Port menu?” your Arduino isn’t connected or the port isn’t recognized.
Once we have all the codes we want we can move on to the next step.
Before being able to send the codes we need to visualize what are we sending, we will need to create a menu with all the functions (or submenus) we want to use.
Creating a menu it’s easy, but it can be quite confusing, I’ve added lots of comments about the functions of each part in the main code.
I would have liked to use a library but instead I built it all in a single monolithic program so you don’t have to download anything else, that way it’s easier to learn how it works, creating a menu is quite useful and a must-learn task for every programmer.
For more detail: Arduino All-In-One Remote