Summary of DIY Arduino Tutorial: How to Automate Your Curtains
This Arduino Curtain Automation project enables automated control of curtain blinds using an Arduino Nano and a stepper motor. It offers two control methods: sound sensor activation via claps or manual button operation. The stepper motor, connected through a Darlington array driver, rotates the curtain’s control stick to open or close the blinds based on inputs received. The system includes locking, pausing, and return-to-original-position features managed by buttons, with an LED indicating lock status. The project is simple, compact, and ideal for temporary setups like dorm rooms.
Parts used in the Arduino Curtain Automation:
- Arduino Nano
- Adafruit sound sensor (optional)
- Stepper motor
- Darlington array driver
- 2-3 Buttons
- LED for indication
- Jumper wires
- Breadboard
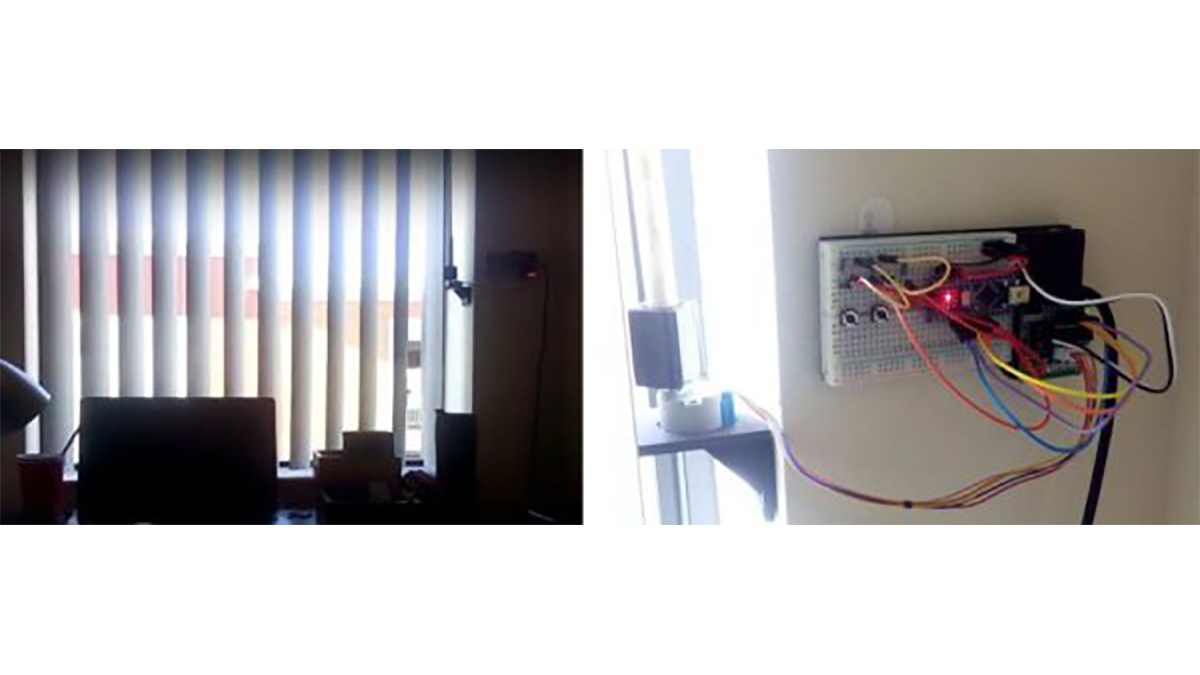
This Arduino Curtain Automation project will let you automate your curtain blinds using just an Arduino and a stepper motor. I just moved to America pursuing my higher studies. Because my dorm is very dark, I wanted to brighten up my room when I wanted to. Since I would be there for only for a month, I couldn’t make anything too complicated. So I decided to make myself this DIY Arduino Curtain Automation system. Using regular curtain blinds, I could control the amount of light in the room and suit it according to my needs.
The design for this Arduino Curtain Automation system is quite simple and there are two ways to activate the curtains:
- Using a sound sensor (mic) to control it using my claps (Step 2).
- Using buttons to move the shades of the curtain (Step 3).
So let’s get started with our DIY Arduino Curtain Automation system, follow the simple instructions to replicate this project.
Required Materials
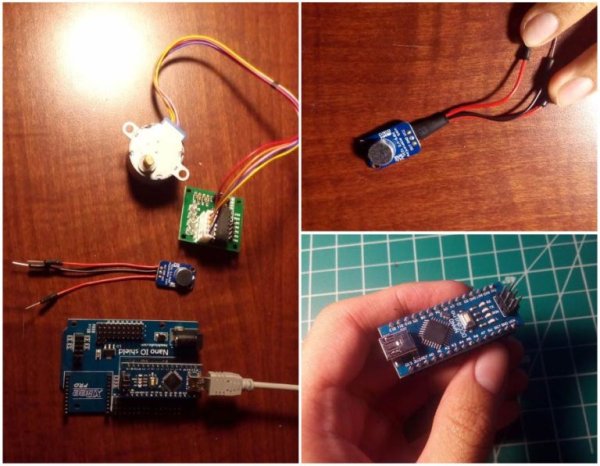
- Arduino (I am using Arduino Nano to save space; in the picture, it’s attached to a shield for easy testing)
- Adafruit sound sensor (optional)
- Stepper motor +Darlington array driver
- 2-3 Buttons
- An LED for indication
- Jumper wires and breadboard
How Does it Work?
The working of this DIY Arduino Curtain Automation system is very simple. The Arduino takes input from either the sound sensor (mic) or buttons. It then correspondingly controls the stepper motor through the Darlington array driver for the motor. The stepper motor is attached to the control stick of the curtain blinds and thus on rotation, opens/closes the blinds.
Interfacing the Stepper Motor
The first step I did was testing the design for the Arduino curtain automation system. The motor is connected to the 4 wires of the driver as shown in the diagram. Depending on the direction of rotation for your curtain, you need to plug the driver accordingly
Basically, the first button from the right will activate the motor to spin a particular degree (you can change in the code). Press the button 4 times and it will return to the original place since it will spin around 90 degrees during each press. The middle button will lock the circuit so that the first button cannot activate the motor. The LED will turn ON when the motor is locked. The final button will return the motor to the original place no matter where is it, at the time pressed. It’s still a simple program, hope you guys understand. You can find the code below.
int pin[8]={2,3,4,5,6,7,8,9};
int steps[][4] =
  {
    {HIGH,HIGH,LOW,LOW},
    {HIGH,LOW,LOW,HIGH},
    {LOW,LOW,HIGH,HIGH},
    {LOW,HIGH,HIGH,LOW},
  } ;

int numofroun=1; //Change accordingly to your needs

int current=1;
int type=3;
int place=0;

int lastLockState = LOW;
long lastLockTime = 0;
int LockState;
int Lockreading;
bool lock=true;

int lastPauseState = LOW;
long lastPauseTime = 0;
int PauseState;
int Pausereading;
bool Pauseled=false;
bool pause=false;

int lastReturnState = LOW;
long lastReturnTime = 0;
int ReturnState;
int Returnreading;

void setup() {
  for (int num=0; num<5; num++) pinMode(pin[num],OUTPUT);
  for (int num=5; num<8; num++) pinMode(pin[num],INPUT);
}

void reset(){
  for(int num=0;num<4;num++) digitalWrite(pin[num],LOW);
}

void stepper()
{
  for (int num=0; num<4;num++) { digitalWrite(pin[num],steps[abs(type-current)][num]);} if(type==0) {++place;} if(type==3) {--place;} delay(2); } void button1() { Lockreading = digitalRead(pin[5]); if (Lockreading != lastLockState) { lastLockTime = millis(); } if ((millis() - lastLockTime) > 50)
  {
    if (Lockreading != LockState) {
      LockState = Lockreading;
      if (LockState == HIGH) {
        lock=false;
        if ((place!=1536*numofroun)&&(place!=1024*numofroun)&&(place!=512*numofroun)) {type=abs(type-3);}
      }
    }
  }
  lastLockState = Lockreading;
}

void button2()
{
  Pausereading = digitalRead(pin[6]);
  if (Pausereading != lastPauseState)
  {
    lastPauseTime = millis();
  }
  if ((millis() - lastPauseTime) > 50)
  {
    if (Pausereading != PauseState) {
      PauseState = Pausereading;
      if (PauseState == HIGH) {
        Pauseled=!Pauseled;
        pause=!pause;
        if (Pauseled) {digitalWrite(pin[4],HIGH);}
        if (!Pauseled) {digitalWrite(pin[4],LOW);}
      }
    }
  }
  lastPauseState = Pausereading;
}

void button3()
{
  Returnreading = digitalRead(pin[7]);
  if (Returnreading != lastReturnState)
  {
    lastReturnTime = millis();
  }
  if ((millis() - lastReturnTime) > 50)
  {
    if (Returnreading != ReturnState) {
      ReturnState = Returnreading;
      if (ReturnState == HIGH) {
        type=3;
        while (place>0)
        {
          for (int num=0; num<4;num++) {
          digitalWrite(pin[num],steps[3-current][num]);}
          --place;
          if (current==3) {current=0;}
          else ++current;
          delay(2);
        }
        reset();
      }
    }
  }
  lastReturnState = Returnreading;
}

void loop() {
  if (lock==true) {button2();button3();}
  if (!pause)
  {
    if (lock==true) {button1();}
    if (lock==false) {stepper();}
    if ((place==2048)or(place==0)or(((place==1536*numofroun)or(place==1024*numofroun)or(place==512*numofroun))&&(type==3)))
       {lock=true;reset();}
    if (current==3) {current=0;}
    else ++current;
  }
}
Read More: DIY Arduino Tutorial: How to Automate Your Curtains!