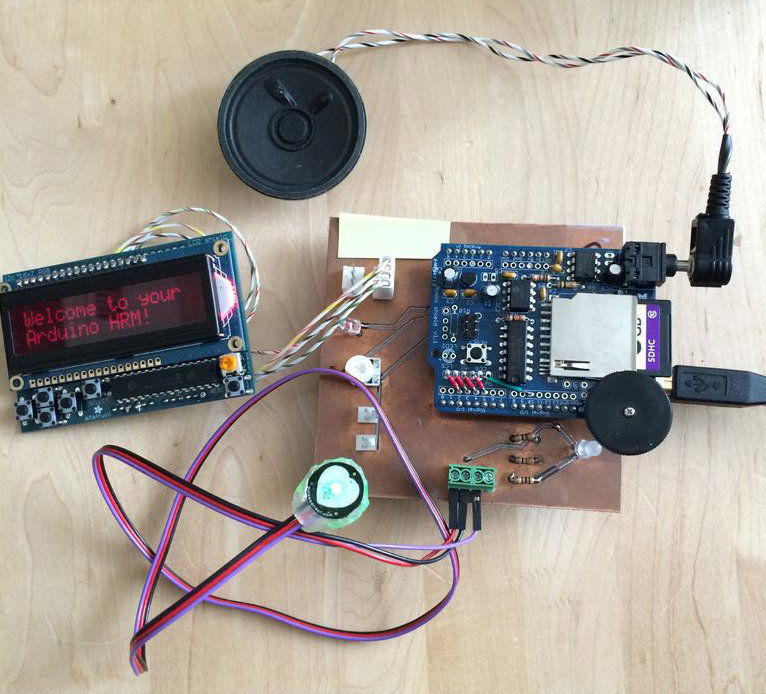
My partner and I wanted to make heart rate monitor that does more than simply measure a user’s heart rate. Our heart rate monitor talks! Each button gives a verbal description of its functionality and makes the measurements visible on the screen. This monitor will save the last four readings, display them, average them, and also offer some inspirational quotes!
Step 1: What you need
- Arduino Uno
- Pulse Sensor
- Adafruit Wave Shield (Must be soldered by user. This is what makes the device speak!)
- Adafruit RBG LCD Shield
- Standard speakers
- Custom Shield (helpful for mounting multiple shields to the Arduino)
- USB Cable
- SD card (8GB is a LOT of space… Even 2GB will do. Make sure to purchase the real SD brand. Fakes are out there.)
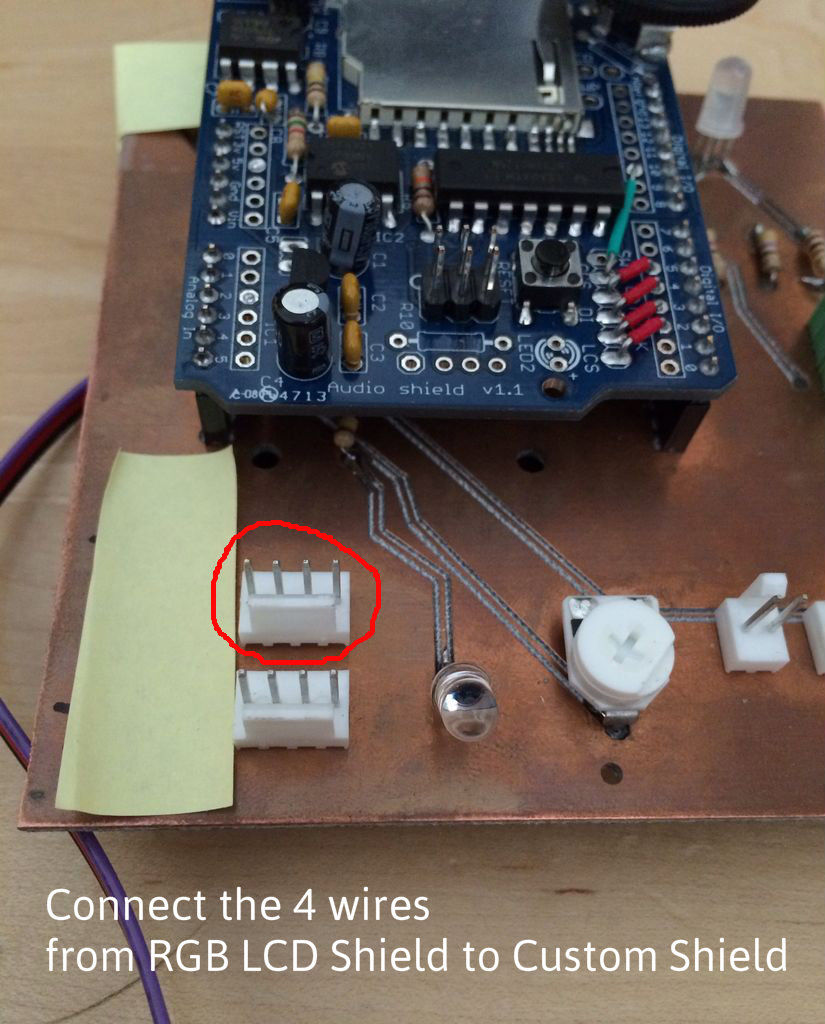
Step 2: Connecting components to the custom shield
Custom shield
The custom shield was built as a lab exercise for our class. This shield is mounted on top of the Arduino and gives you access to unused pins (or pins that can be shared) on the Arduino–enabling your to mount multiple shields or devices at once. Adafruit also sells a shield that should work just fine as a substitute.
The custom shield was used for the following:
- Power the Pulse Sensor. This will require 3 pins: 5V, ground, and analog pin 2.
- Power the RGB LCD shield. This will require 4 pins: 5V, ground, and analog pins 4 and 5.
- Provide space to mount the Wave Shield.
Pulse Sensor
The sensor requires some set up depending on how you choose to use it. We insulated the back of the pulse sensor with hot glue. Here is a video that guides you through the set-up (video). All of the wires on it go the the screw terminal on the custom shield. The screw terminal gives access to 4 pins on the Arduino: 5V, ground, analog 2, and a digital pin (which we will ignore). The red wire on the Pulse Sensor goes to 5V, the black wire to ground, and the purple wire goes to analog 2.
RGB LCD Shield
The shield itself requires no set-up. You will need 4 wires that connect to the shield’s 5V, ground, analog 4 and analog 5. We highly recommend soldering the 4 wires directly onto the LCD shield to stabilize the device if placing in a container later. These wires will connect to the Arduino’s respective pins, which for us were accessed by the custom shield.
Wave Shield
Mount the wave shield on top of the custom shield and now we’re ready to code!
Step 3: Using the Wave Shield
- Download the WaveHC Library from Adafruit.
- Format the SD card
- The wave shield library only reads files in FAT format (both FAT16 and FAT32).
- Some SD cards come formatted with FAT (mine did) and one way to test this is by running an example code that checks for the format of the card.
- A program that formats SD cards
- You will need an SD card reader to transfer files from your computer to the SD card. Most laptops come with SD slots (Macbook Pros do!). Else you will need to purchase one.
- Add sound files to the SD card
- The files must be .wav files
- We decided to use AT&T’s Text-to-Speech website to generate voice files. These files already come formatted in .wav.
- Suggestion: You can play with voice using Audacity. (Lower the pitch and add some echo for a Darth Vader voice!)
- Connect the Speaker to the audio jack. You can also solder the speakers to the audio output on the shield.
For more detail: Talking Arduino Heart Rate Monitor