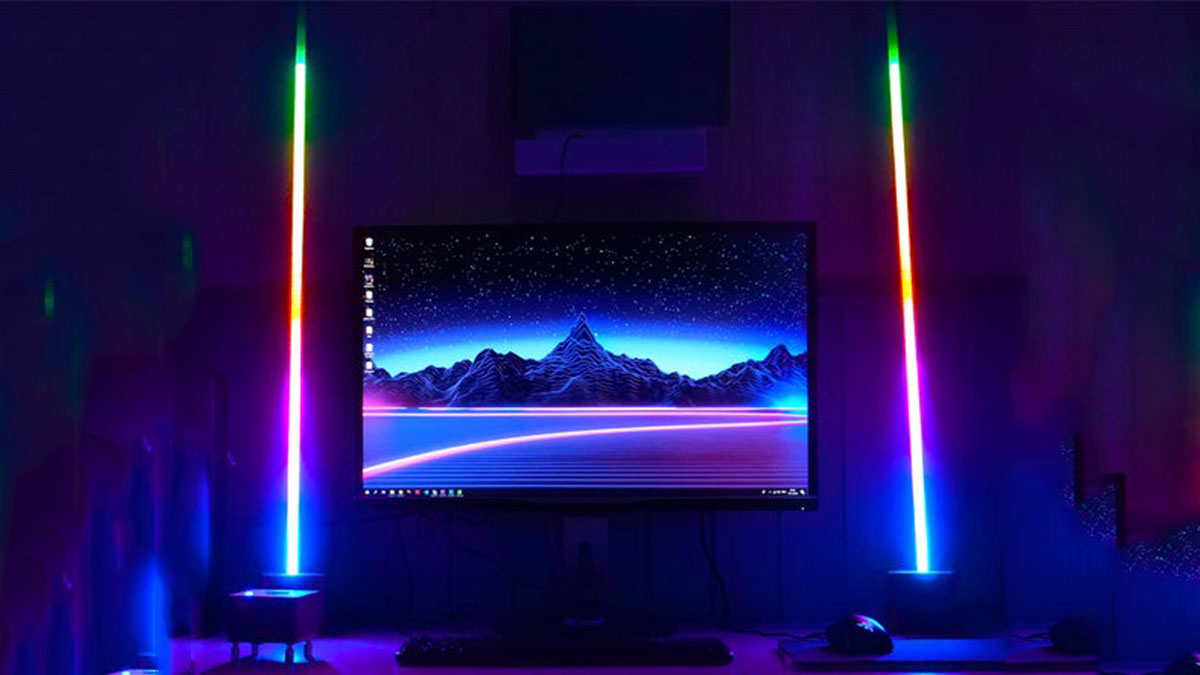
In this instructable we’ll be making some centrally controlled wireless RGB lamps, that responds to music and sounds in the environment! In addition to instructions, the instructable contains:
- Schematics
- List of components
- Link to the code so you can make and modify your own project
Step 1: Planning Ahead
Here are the major components I have used:
LAMPS:
- 4x LED-strips: http://bit.ly/144ledstrip
- 4x 5v Power Supply: http://bit.ly/5v50wpower
- 4x WeMos Wifi Board: http://bit.ly/5v50wpower
- Power plug: http://bit.ly/5v50wpower
CONTROLLER:
- Sound Sensor: http://bit.ly/dynosound
- Wi-Fi board, I used NodeMCU as I didn’t have another WeMos D1. Wemos should work.
- Push Button: http://bit.ly/push1button
- Power Switch: http://bit.ly/powerswitch32
- Colored Diodes (blue): http://bit.ly/powerswitch32
- Li-ion battery: http://bit.ly/powerswitch32
- Battery holder: http://bit.ly/powerswitch32
- Charger module: http://bit.ly/powerswitch32
So I had this very clear idea in my head of what I wanted to create. I wanted a central (but portable) sound detector that could pick up surrounding sounds, and transmit them to lamps that could be placed anywhere inside a room, or even a house. Because all audio will be picked up by the same mic, the lamps should stay synchronous. Moreover, I decided to use a sound detector and not an audio jack (albeit I know many would prefer that option), because I wanted it to be completely wireless and also be able to pick up people singing, clapping, or whatever.
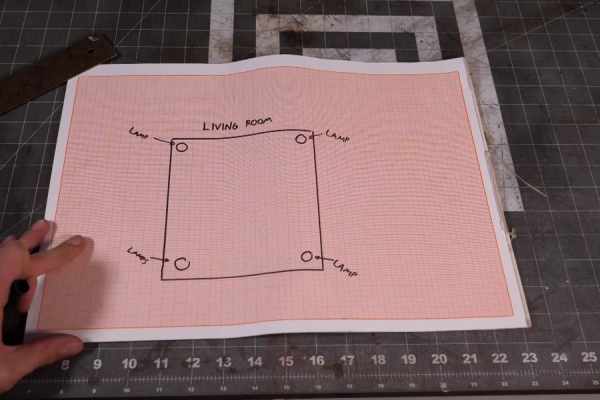
The pictures shows my first initial plans, and the schematics that I ended up using for the lamps, and the one I used for the controller.
Step 2: Creating the Lamp Fixture
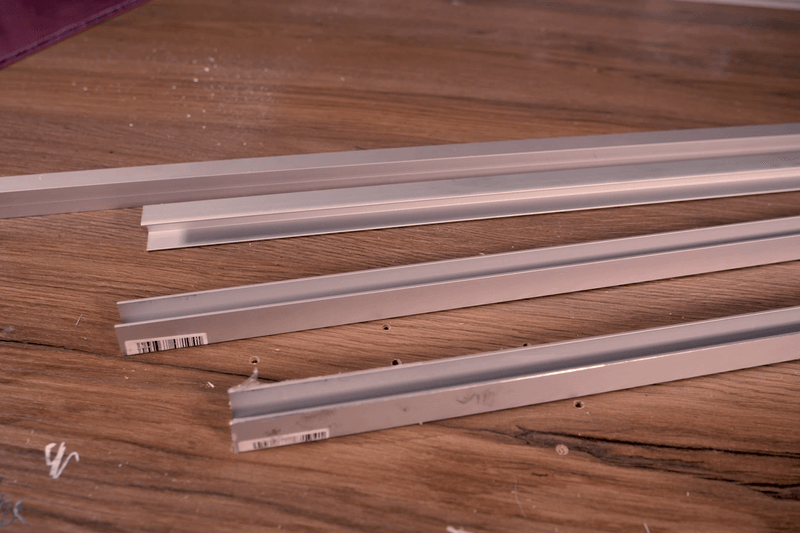
The lamp “fixture” consist of two basic components:
* Aluminium channel to hold the LED-strip
* Acrylic glass to diffuse the light
The aluminium channels were 1 meters each, and bought at a hardware store. The acrylic glass I cut on my table saw to the width of the aluminium channel. To get the acrylic to diffuse the light, it had to be sanded down to get that frosted look, and also to smoothen the edges the table saw made. I started on 80 grit and gradually moved up to 600 grit.
Step 3: Adding the LED-strips
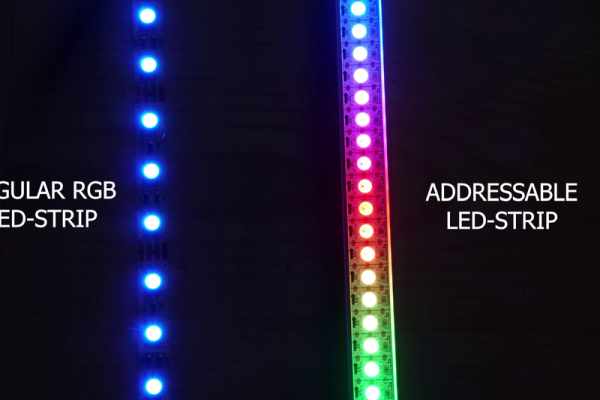
For this special purpose I am using an Individually Addressable LED-strip, which is also called a Neopixel. If you’re not familiar with it, it’s a type of LED-strips that lets you reference each diode separately. This allows for some fancy stuff, like giving different diodes different colors, or only lighting up parts of the strip.
I used the adhesive that comes on the back of the strip to fasten it to the aluminium channel, along with some hot glue to make sure it really stuck in there!
Step 4: Fastening the Acrylic Light Diffuser
Now we have to fasten the acrylic light diffuser to the aluminium light diffuser. This step is harder than it sounds, as the edges of the aluminium channels are quite thin. The best way I found was to use some quick drying epoxy on the edges, and hold it steady for about 5 minutes before attaching some clamps to hold it in place until it was completely cured.
Step 5: Beginning the Wood Base
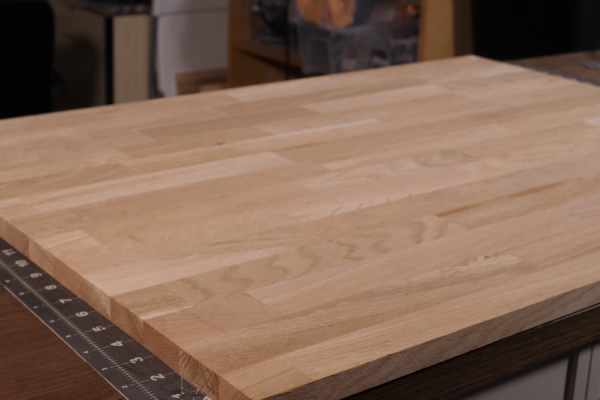
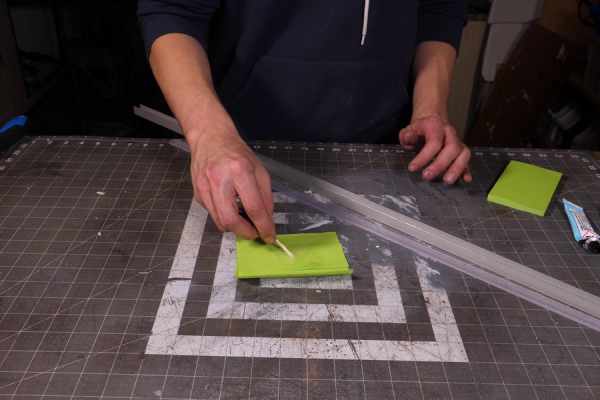
The wood base will be made out of a slab of glued oak wood I bought at the hardware store. As it is quite thin, I will glue several layers together to make a block. I ripped strips of it on the table saw, and used the miter saw to cut 10×10 cm large squares of wood. Then I glued together pieces of two and pieces of 3 together. Once the glue was dry, I could take the 3-pieces high block and use a chisel to create a hole like a mortise for the light fixture. Here it is important to get a nice and snug fit so the lamp wont have much room to wiggle around.
Step 6: Finishing the Wood Base
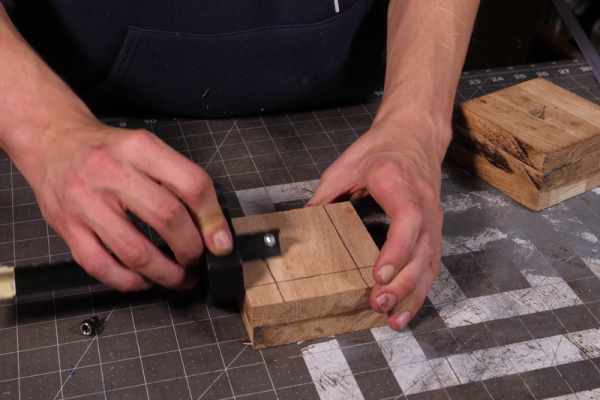
For the second half of the wood base, the piece with 2 layers glued together, I used the drill press to cut hols in each corner. This is so I could fit the jigsaw and cut out a square in the room, as to make room for the electronics later in the process.
When I had finished the cutting in the upper and lower part, I glued them together before sanding them on the belt sander. Lastly I applied some oil to get the grain to pop.
Source: Wireless Music Reactive Floor Lamps