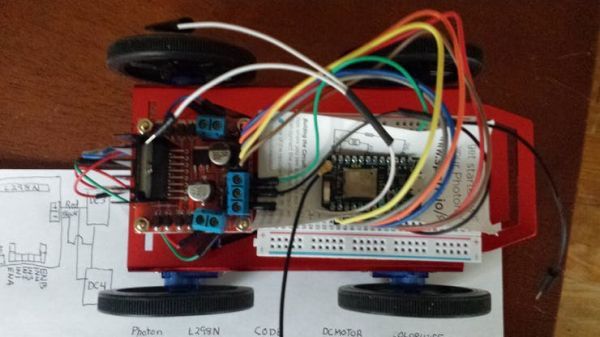
Web Enabled 4 Wheeled Robot using a Photon

Expanding upon MKR1000 based Robot project, I created this 4 wheeled Robot.

Things used in this project

Hardware components

Photon
Particle Photon
× 1
Adafruit Basic Robot Kit
× 1
Amazon Web Services L298N
× 1
Adafruit DC Motor in Servo Chassis
× 4
Adafruit Wheels
× 4
Amazon Web Services 6xAA Battery Holder
× 1
Adafruit 5v USB Battery Pack
× 1
Jumper wires (generic)
× 1
Breadboard (generic)
× 1

Hand tools and fabrication machines

screwdriver
electrical tape
Dupont wire connectors- Male to Female

Story

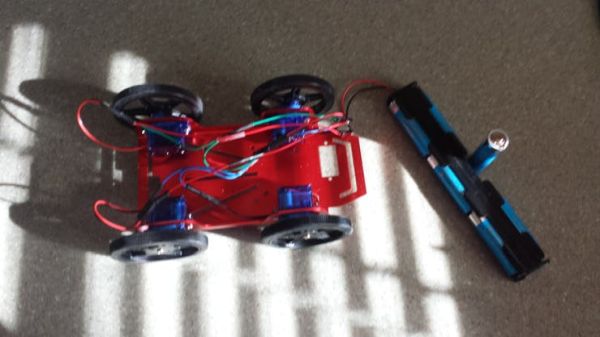
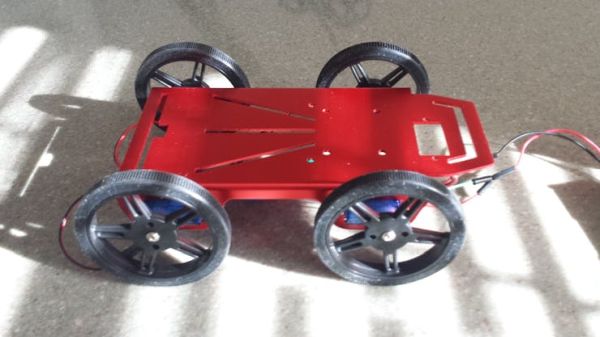
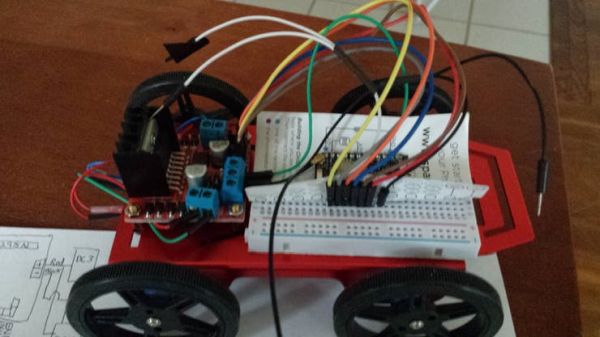
Initial Demo code tests

6. Here is a short video of Web page control and my Simple Robot in action.

Schematics

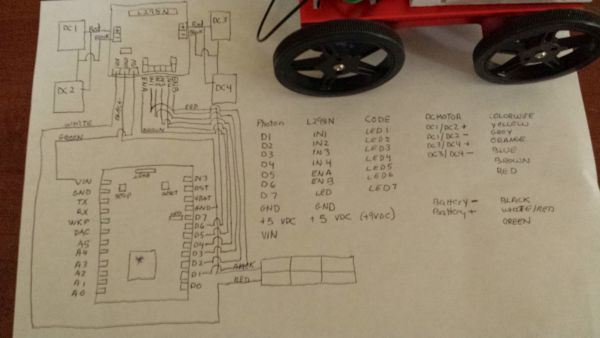
Hand drawn wiring diagram

Hopefully its straight forward, look at code for breakdown

Code

Web-Enabled-LED-DCMotor

Arduino

Using a Photon, a L298N DC Motor Driver, an Adafruit basic 4 wheeled Robot Platform, and the Particle.IO interface
// -----------------------------------


// Controlling LEDs over the Internet


// -----------------------------------


// First, let's create our "shorthand" for the pins

// Same as in the Blink an LED example:


// led1 is D0, led2 is D7


int led1 = D0;


int led2 = D7;


int led3 = D1; //motorA+

int led4 = D2; //motorA-

int led5 = D3; //motorB+

int led6 = D4; //motorB-

int led7 = D5; //pwm INA

int led8 = D6; //pwm INB


// Last time, we only needed to declare pins in the setup function.


// This time, we are also going to register our Spark function


void setup()


{


   // Here's the pin configuration, same as last time


   pinMode(led1, OUTPUT);

   
   pinMode(led2, OUTPUT);

      pinMode(led3, OUTPUT); //motorA+

      pinMode(led4, OUTPUT); //motorA-
   
      pinMode(led5, OUTPUT); //motorB+
   
      pinMode(led6, OUTPUT); //motorB-
   
      pinMode(led7, OUTPUT); //pwm INA
   
      pinMode(led8, OUTPUT); //pwm INB


      // We are also going to declare a Spark.function so that we can turn the LED 

on and off from the cloud.
   
   
      Spark.function("led",ledToggle);


      // This is saying that when we ask the cloud for the function "led", it will 

employ the function ledToggle() from this app.


      // For good measure, let's also make sure both LEDs are off when we start:


   digitalWrite(led1, LOW);

   
   digitalWrite(led2, LOW);


      digitalWrite(led3, LOW);                // GET /S STOP
   
      digitalWrite(led4, LOW);
   
      digitalWrite(led5, LOW);               
   
      digitalWrite(led6, LOW);
   
      digitalWrite(led7, LOW);
      digitalWrite(led8, LOW);

}


// Last time, we wanted to continously blink the LED on and off


// Since we're waiting for input through the cloud this time,


// we don't actually need to put anything in the loop


void loop()


{

   
// Nothing to do here


}


// We're going to have a super cool function now that gets called when a 

matching API request is sent


// This is the ledToggle function we registered to the "led" Spark.function 

earlier.


int ledToggle(String command) {


    /* Spark.functions always take a string as an argument and return an 

integer.

    
Since we can pass a string, it means that we can give the program commands 

on how the function should be used.
    
    
    In this case, telling the function "on" will turn the LED on and telling it 

"off" will turn the LED off.
     
    Then, the function returns a value to us to 

let us know what happened.
    
    
    In this case, it will return 1 for the LEDs turning on, 0 for the LEDs 

turning off,
    
    
    and -1 if we received a totally bogus command that didn't do anything to 

the LEDs.
    
    
    */


 if (command=="on") {


          digitalWrite(led1,HIGH);


          digitalWrite(led2,HIGH);


          return 1;


    }


    else if (command=="off") {


          digitalWrite(led1,LOW);


          digitalWrite(led2,LOW);


          return 0;


    }

    else if (command=="w") {


          digitalWrite(led3, HIGH);               //D1 motor A+ GET /W moves FORWARD

          digitalWrite(led4, LOW);
		  //D2
          digitalWrite(led5, HIGH);		  //D3 MOTOR B+
          digitalWrite(led6, LOW);                //D4
          digitalWrite(led7, HIGH);               //D5
          digitalWrite(led8, HIGH); 		  //D6
          delay(300);

          digitalWrite(led3, LOW);

          digitalWrite(led5, LOW);


          return 2;


    }


    else if (command=="x") {


          digitalWrite(led3, LOW);               // GET /X moves REVERSE

          digitalWrite(led4, HIGH);		 // MOTOR A-
          digitalWrite(led5, LOW);
          
digitalWrite(led6, HIGH);		 // MOTOR B-
          digitalWrite(led7, HIGH);
          digitalWrite(led8, HIGH);

          delay(300);

          digitalWrite(led4, LOW);

          digitalWrite(led6, LOW);


          return 3;


    }


    else if (command=="s") {


          digitalWrite(led7, LOW);                // GET /S STOP

          digitalWrite(led8, LOW);

          digitalWrite(led3, LOW);
          digitalWrite(led4, LOW);

          digitalWrite(led5, LOW);
          digitalWrite(led6, LOW);

          delay(30);


          return 4;


    }


    else if (command=="a") {


          digitalWrite(led3, LOW);               // GET /A moves LEFT

          digitalWrite(led4, HIGH);
          digitalWrite(led5, HIGH);
          
digitalWrite(led6, LOW);

          digitalWrite(led7, HIGH);
          digitalWrite(led8, HIGH);

          delay(300);

          digitalWrite(led4, LOW);
          digitalWrite(led5, LOW);


          return 5;


    }


    else if (command=="d") {


          digitalWrite(led3, HIGH);               // GET /D moves RIGHT

          digitalWrite(led4, LOW);
          digitalWrite(led5, LOW);
          
digitalWrite(led6, HIGH);

          digitalWrite(led7, HIGH);
          digitalWrite(led8, HIGH);

          delay(300);

          digitalWrite(led3, LOW);

          digitalWrite(led6, LOW);


          return 6;


    }


    else {


          return -1;


    }


}
Web Access-DCMotor Control page

HTML

Use this code to access your Web-Controlled Robot
/* Paste the code between the dashes below into a .txt file and save it as an .html file. Replace your-device-ID-goes-here with your actual device ID and your-access-token-goes-here with your actual access token.

------------------------------------------------------
*/
<!-- Replace your-device-ID-goes-here with your actual device ID
and replace your-access-token-goes-here with your actual access token-->
<!DOCTYPE>
<html>
  <body>
  <center>
  <br>
  <br>
  <br>
  <form action="https://api.particle.io/v1/devices/xxxxxxxxxxxxxxxxxxxx/led?access_token=xxxxxxxxxxxxxxxxx" method="POST">
    Tell your device what to do!<br>
    <br>
    <input type="radio" name="args" value="on">Turn the LED on.
    <br>
    <input type="radio" name="args" value="off">Turn the LED off.
    <br>
    <br>
    <br>
    <input type="radio" name="args" value="w">Move Robot forward.
    <br>
    <input type="radio" name="args" value="x">Move Robot backward.
    <br>
    <input type="radio" name="args" value="s">Stop the Robot.
    <br>
    <input type="radio" name="args" value="d">Turn the Robot right.
    <br>
    <input type="radio" name="args" value="a">Turn the Robot left.
    <br>
    <br>
    <input type="submit" value="Do it!">
  </form>
  </center>
  </body>
</html>


Source : Web Enabled 4 Wheeled Robot using a Photon


About The Author

Ibrar Ayyub

I am an experienced technical writer holding a Master's degree in computer science from BZU Multan, Pakistan University. With a background spanning various industries, particularly in home automation and engineering, I have honed my skills in crafting clear and concise content. Proficient in leveraging infographics and diagrams, I strive to simplify complex concepts for readers. My strength lies in thorough research and presenting information in a structured and logical format.

Follow Us:
LinkedinTwitter

Leave a Comment

Your email address will not be published. Required fields are marked *

Scroll to Top