Summary of VivoGame
VivoGame is a two-player game where one player wears blindfold-like cardboard glasses with LEDs for each eye, and the other uses a joystick to light LEDs (left/right/up/down) to orient the blindfolded player's head toward a visible target and press the joystick button to trigger a servo-driven dart launcher. The project uses a DragonBoard 410c with a 96Boards Sensors Mezzanine (ATmega328p) to read joystick inputs and drive LEDs and the servo. Construction involves cardboard glasses, styrofoam LED mounts, basic electronics, and Arduino-style coding on the Mezzanine.
Parts used in the VivoGame:
- Cardboard (for glasses body)
- Paint
- Elastic cord
- Rubber bands (for slingshot on dart launcher)
- Scissors
- Servo motor (for dart launcher)
- Hot glue
- 2 styrofoam blocks (for lens LED mounts)
- 6 LEDs
- 4 resistors (100 ohm)
- Five-wire cable (example: UTP cable)
- Joystick module
- DragonBoard 410c
- 96Boards Sensors Mezzanine (ATMEGA328p)
- Arduino IDE (software for programming Mezzanine)
VivoGame (something like “liveGame” in english) is a funny 2 players game whose goal is hit a target with a automated dart. One player wear a “glasses” that doesn’t let him see the target. 3 leds that replace each lens, allow the other one, who see the target, moving the first player’s head with a joystick (strange but very funny!). When, for instance, the joystick is moved to the left, a led is turned on in front of the left eye of the player with the glasses. Other leds allow moving up, down and to the right. Upon the glasses, there is a dart launcher automated through a servo motor. Pressing the joystick button, the player can trigger the servo and throw the dart.
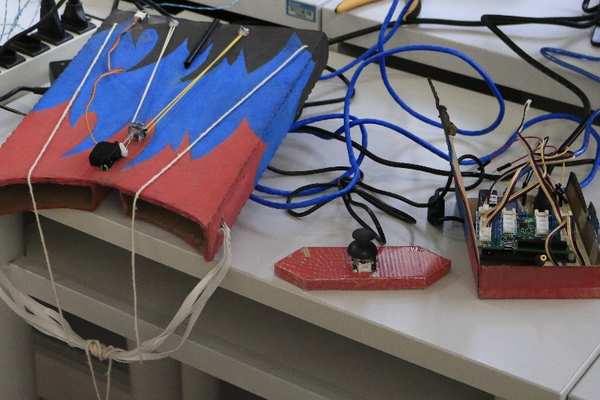
Step 1: Assembling the Glasses
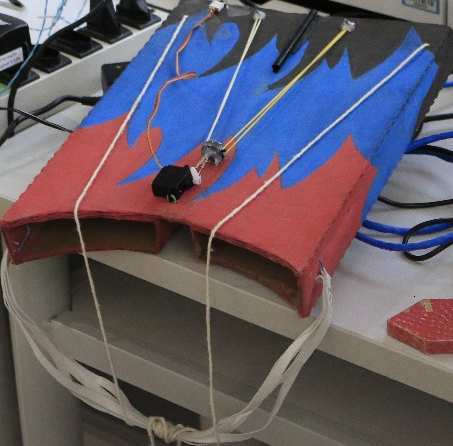
To assembly the glasses you’ll need: cardboard, paint, elastic cord, rubber bands, scissors, a servo motor, hot glue and a lot of creativity!
With the cardboard, the paint and the scissors, assemble and paint the body of the glasses (Tip: You can use a thin box and adapt it to fit the face). Use the elastic cord to hold the glasses on the head.
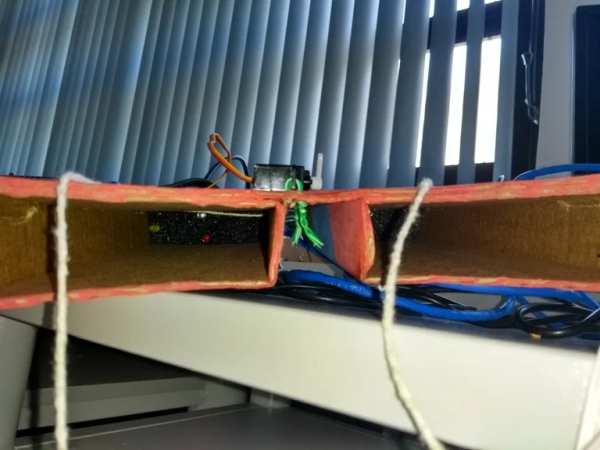
To assemble the dart launcher, paste the servo motor upon the glasses and use some rubber bands with the ends attached at the glasses’ body as a slingshot.
Step 2: Assembling the “lens”
To assemble the lens, you’ll need: 2 styrofoam blocks, 6 leds, 4 resistors (100 ohm) and a five-wires cable (we’ve used an UTP cable).
Attach the leds at the styrofoam blocks as in the illustration and assemble, with the leds and the resistors, the circuit shown in the schematic.
Attach each connector (G, L, U, D e R) at a wire of the cable.
Step 3: Coding!
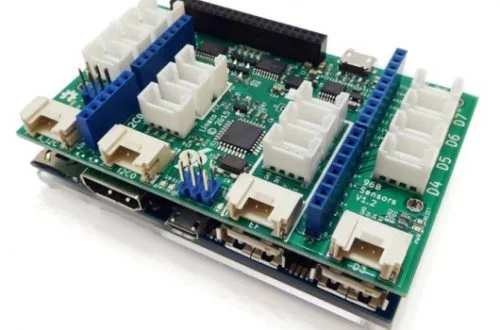
We’ve used a DragonBoard 410c and a 96Boards Sensors Mezzanine adapter attached to it.
Firstly we have to prepare the DragonBoard for program the Mezzanine (an ATMEGA328p microcontroller).
At this link you can find how to configure the board and some examples using the Mezzanine:
https://github.com/96boards/Sensor_Mezzanine_Getti…
Connect the wires from the leds to the Mezzanine as follow (CONNECTOR, MEZZANINE PORT):
(L,4); (R,7); (U,5); (D,6); (G, GND).
For the joystick, we’ve used this module. Connect it to the Mezzanine in this way (MODULE PIN, MEZZANINE PORT): (X, A0); (Y, A1); (GND, GND); (VCC, VCC).
At the Dragon board, launch the Arduino IDE, compile the code and download to the Mezzanine.
At now, we have a lot of idle fire power with the DragonBoard. We can use it to link the game to a web application.
But it is for another instructable.
Source: VivoGame
- What is the goal of VivoGame?
The goal is for two players to hit a target with an automated dart by steering the blindfolded player's head with LEDs and a joystick and firing a servo-triggered dart launcher. - How are the glasses constructed?
The glasses are made from cardboard painted and cut to fit the face, held by elastic cord, with a servo mounted and rubber bands forming a slingshot dart launcher. - How are the lens LEDs assembled?
Mount 6 LEDs into two styrofoam blocks, wire them with 100 ohm resistors according to the schematic, and attach connectors G, L, U, D, R to the five-wire cable. - Which board and mezzanine are used to control the game?
The project uses a DragonBoard 410c with a 96Boards Sensors Mezzanine containing an ATMEGA328p microcontroller. - How should the LEDs be connected to the Mezzanine?
Connect L to port 4, R to port 7, U to port 5, D to port 6, and G to GND on the Mezzanine. - How is the joystick connected to the Mezzanine?
Connect joystick X to A0, Y to A1, GND to GND, and VCC to VCC on the Mezzanine. - How do you program the Mezzanine?
Prepare the DragonBoard as documented on the Sensor Mezzanine GitHub, open the Arduino IDE on the DragonBoard, compile the code, and upload it to the Mezzanine. - Can the DragonBoard be used for additional features?
Yes; the article notes the DragonBoard has idle processing power that can be used to link the game to a web application later.