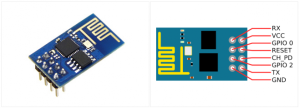
After we managed to connect the ESP8266 WiFI module to Raspberry Pi, we can now try to change the module firmware to a custom one.
The firmware we will install on it is a simple webserver, that will handle HTTP requests. It will allow us to access a web interface for ESP8266. The interface will allow us to search for available WiFi networks, choose one and login. We will also have a page that will control the GPIO02 output (we can connect a led or something else to this pin). On the GPIO00 we can connect a button that will switch the GPIO02 state. Keeping the button pressed more than 3 seconds will restart the chip.
The firmware also contains a 3 simple API calls which will allow you to switch or get the GPIO02 state from many devices, not only from its own web interface.
First we need a tool that will upload the firmware to ESP8266. It is available here or in the firmware zip archive.
Now we need to connect to the ESP module using its own access point. Search for a wireless network named like ESPxxxx and connect.
Finally we can access the mini webserver we’ve uploaded on ESP8266 using this address http://192.168.4.1/. From the same interface we can now control the GPIO02 or connect the module to home router and get its IP. After we have the IP we can access the module webserver from every device connected to the same network.
API Doc:
POST http://{ipAddress}/gpio02.cgi value=1 – Set GPIO02 output to active.
POST http://{ipAddress}/gpio02.cgi value=0 – Set GPIO02 output to inactive.
GET http://{ipAddress}/api/gpio02.tpl – Returns the GPIO02 status.
Note: You can connect whatever you want to the GPIO02 and control it wirelessly. Connect a relay to it and you have the wireless switcher.
Git Repository: https://github.com/dubaurazvan/esp8266-wireless-switcher
For More Details: Use ESP8266 module as a wireless switcher

