
Summary of USA Flag made with diffused LED using Arduino
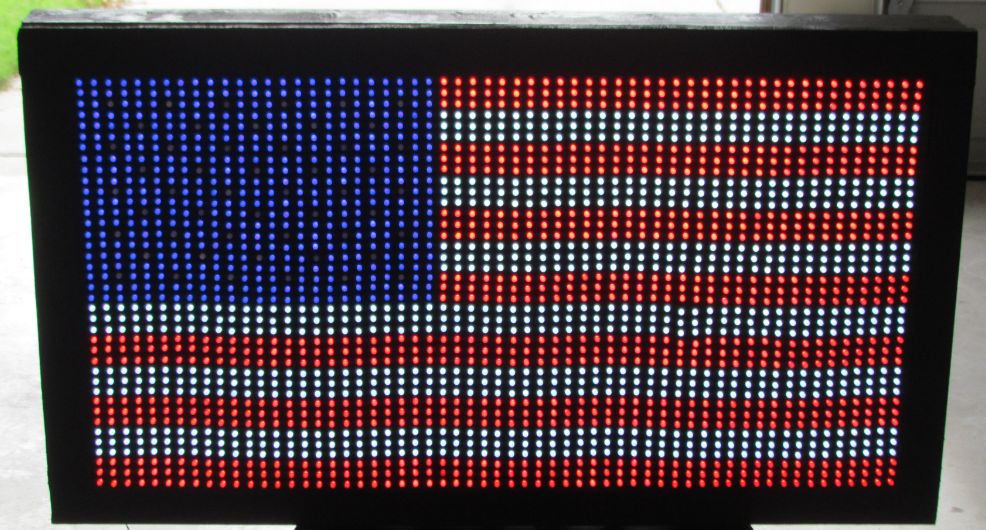
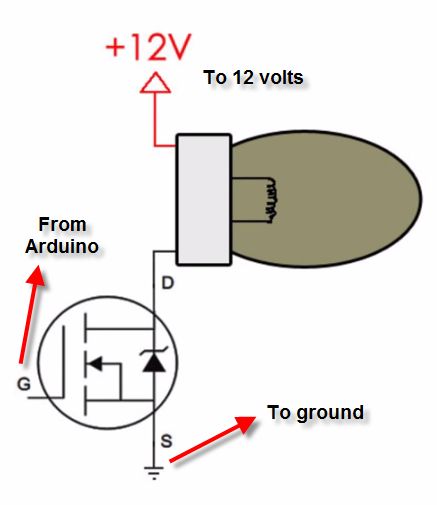
This article details a DIY project to build a USA flag using 2,301 diffused LEDs (red, white, and blue) controlled by an Arduino Mega 2560. The creator outlines the materials, tools, and specific steps for measuring, drilling holes in a polystyrene sheet, and assembling the circuit with MOSFETs and resistors. The project is suitable for patriotic holidays and includes a YouTube video demonstration of the animated flag.
Parts used in the USA Flag LED Project:
- Polystyrene plastic sheet (0.125" thickness)
- 5mm Red Diffused LED
- 5mm White Diffused LED
- 5mm Blue Diffused LED
- Arduino Mega 2560
- N-Channel MOSFET
- 12V 5A Power Supply
- Prototype board
- 100 ohms Resistors
- 220 ohms Resistors
USA flag constructed using a total of 2,301 diffused red, white and blue LEDs completed with Arduino sketch animations, I hope this instructions helps anyone who wants to try this out. This flag can be displayed during the 4th of July, memorial day or during Christmas. If you find this project interesting and you do something similar by making either the hardware or the Arduino software codes better, please share with others.
Below is the You Tube video of the finished flag.
Step 1: Materials and Tools
Here is a list of materials and tools I used for this
project.
Material:
- Polystyrene plastic sheet (0.125″ thickness; Quantity: 1)
($21 + $12.35 shipping US):
http://www.ebay.com/itm/271352111127
- 5mm Red Diffused LED (Quantity: 1000)
($16.52 for 1000 free shipping from China):
http://www.ebay.com/itm/221419131258
- 5mm White Diffused LED (Quantity: 1000)
($22.40 for 1000 free shipping from China):
http://www.ebay.com/itm/111125366867
- 5mm Blue Diffused LED (Quantity: 500)
($11.91 for 500 free shipping from China):
http://www.ebay.com/itm/400686984848
- Arduino Mega 2560
($14.96 free shipping US)
http://www.ebay.com/itm/131207329852
- N-Cannel MOSFET (Quantity: 15)
($12.13+ $3.09 shipping US)
http://www.ebay.com/itm/331154081014
- 12V 5A Power Supply (Quantity: 1)
($15.99 free shipping US):
http://www.ebay.com/itm/181284109670
- Prototype board (Quantity: 1)
Obtained at a local Radioshark at $3.49
- 100 ohms Resistors (Quantity: 975)
Obtained at a local component store $0.03/resistor
- 220 ohms Resistors (Quantity: 50)
Obtained at a local component store $0.03/resistor
Tools:
- Soldering iron
- Solder lead
- Drill Press (This will make it a lot easier and accurate drilling than hand drill)
- Needle-nose pliers
- Cutter
- Tape measure
- Pencil to mark the grid lines
- Ruler (As long as possible, I used long wooden ruler from Home Depot)
- Multi meter
Step 2: Measurement and grid lines
The standard ratio of USA flag is 10:19 (Length: Breadth), the aim is to make flag that is 30inches breadth meaning that the length will be 15.8inches (rounded to 16). Cut out 16″ x 30″ from the polystyrene sheet, make sure you have minimum of 1/2 inch on all edges (this is useful for attaching the wooden frame at the very end.
Mark out 1/4″ space from left side of the board to the right and 1.18″ from top to the bottom forming a grid. I have attached excel sheet that show the LED layout for visual aid. Ensure that all the grid intersections are numbered left to right and top to bottom (Rows and columns). There should be 39 rows and 60 columns making a total of 2,340 LEDs; spreadsheet also included LED counts.
 USFlagLedLayout.xlsx162 KB
Step 3: LED hole drilling
Using drill press (preferable one with Laser guide) and 3/16″ drill bit, drill LED holes at the intersection of the grid drawn out above. Use a 3/16″ drill bit will ensure the LED fits snugly into the hole, but it require a bit of effort to place LED in.
Special Note:
The drill press that I used was only able to reach about 4 1/2″ around the rectangular polystyrene sheet meaning that it was not possible to get to the inner part of the sheet, fortunately, the polystyrene sheet was flexible enough to be bent around so I was able to use the press to completely drill all the 2,340 holes. Also, I made a mistake while I was measuring out my grid, instead of having 60 columns as I had planned it out on the spreadsheet, I had 59! So in total I only had 2,301 holes to drill; this did not make much of difference in the final product though
For more detail: USA Flag made with diffused LED using Arduino
- What is the standard ratio of the USA flag used in this project?
The standard ratio is 10:19 (Length to Breadth). - How many total LEDs are installed on the flag?
A total of 2,301 diffused red, white, and blue LEDs are used. - Which microcontroller is required for the Arduino sketch animations?
An Arduino Mega 2560 is used to control the flag. - Can the drill press reach the inner part of the rectangular sheet?
No, the drill press could only reach about 4 1/2 inches around the sheet, so the flexible polystyrene was bent to drill all holes. - What size drill bit is recommended for the LED holes?
A 3/16 inch drill bit is used to ensure the LEDs fit snugly. - How many rows and columns were planned versus drilled?
The plan was for 39 rows and 60 columns, but only 59 columns were actually drilled due to a measurement error. - What power supply specifications are needed for this project?
A 12V 5A Power Supply is required. - Why is a drill press preferred over a hand drill for this task?
A drill press makes the process easier and more accurate than using a hand drill.
