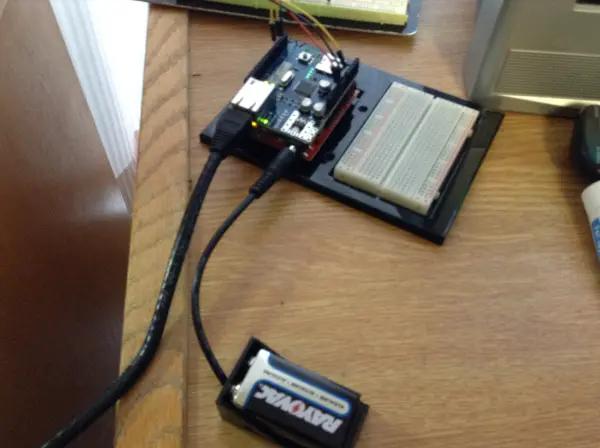
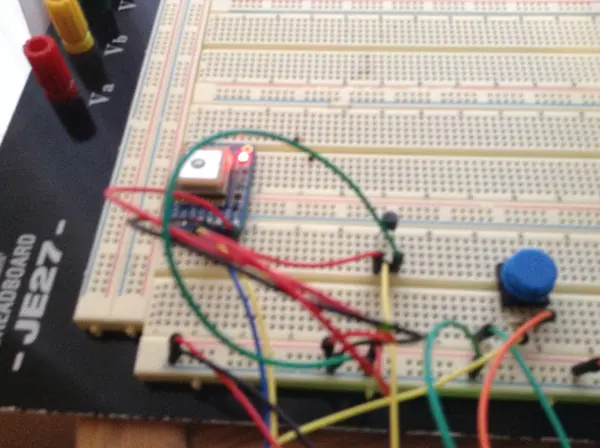
The Tweet-O-Temp includes a temperature sensor that continually monitors its surroundings. It operates by measuring the voltage and converting it to degrees Celsius. Since I reside in the United States, where Fahrenheit is commonly used, it also converts the temperature from Celsius to Fahrenheit. Additionally, the device incorporates an Adafruit GPS breakout module, which continuously tracks its position, time, and date, transmitting this data to the Arduino.
Originally, the device records time in GMT (Greenwich Mean Time), necessitating conversion to Chicago Central Time. It requires manual adjustment for daylight saving time, which is not currently observed at the time of writing. Finally, the device utilizes an Arduino Ethernet shield and Ethernet cable to connect to the Internet. With the press of a button, it sends information from the GPS and temperature sensor to Twitter. Moreover, the device is programmed to automatically post a Tweet daily at a specified time, featuring the current time, date, location, and temperature.
Exploring Physical Computing: The Genesis of the Tweet-O-Temp
This project was my initial assignment with no strict guidelines, allowing me the freedom to explore various components and concepts in physical computing. It took considerable time to settle on a direction. My fascination with the Ethernet shield and its potential to integrate my Redboard with Twitter was a major influence. The inspiration stemmed from learning about a similar device that tweeted when connected plants needed water—a concept that intrigued me greatly.
Driven by the idea of leveraging Arduino’s capability to send Tweets, I brainstormed potential applications. After assessing my available components, the concept of utilizing a temperature sensor and GPS emerged as the foundation for my current project setup.
Challenges Faced in Designing the Tweet-O-Temp
Throughout the development of this project, I encountered numerous challenges. Initially, my plan was to utilize the Arduino’s built-in EEPROM memory to store temperature readings at regular intervals, updating them every two minutes. Another button press would trigger the system to send the stored value and a corresponding message to Twitter. Unfortunately, the limited memory of the Arduino Uno/SparkFun Redboard posed a significant constraint. Despite including the code for this functionality in the main program, I had to comment it out due to space limitations. Upgrading to an Arduino with more memory could potentially resolve this issue and enable the use of this feature.
Furthermore, the memory shortage caused occasional instability in the device. Resetting the code typically restored functionality, but this became a frustrating inconvenience. Another hurdle involved organizing the code correctly, as I often struggled with correctly handling integer and float values.
The GPS module also presented challenges, particularly indoors where it frequently struggled to receive a signal. Additionally, adjusting the device to accurately reflect my local time zone and account for daylight saving time took considerable effort, as it initially adjusted days based on GMT rather than my local time zone.
Building Your Own Tweet-O-Temp: Parts and Schematics
Parts:
- (1) Arduino Uno/SparkFun Redboard (consider using a microcontroller with more memory for improved stability)
- (1) Arduino Ethernet Shield
- (1) Ethernet Cable
- (1) TMP 36 Temperature Sensor
- (1) Adafruit GPS Breakout (Adafruit GPS Ultimate Breakout can also be used)
- (1) Push Button
- (1) 10K Ohm Resistor
- Several wires
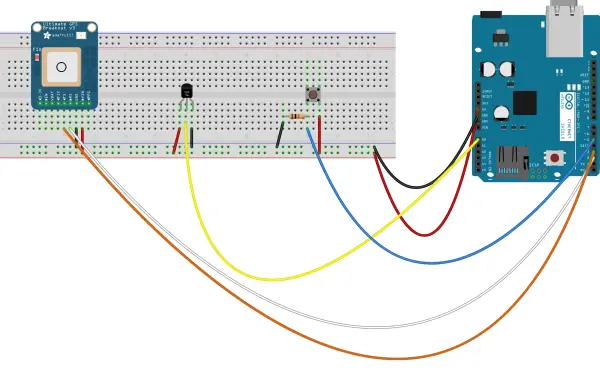
Below, you can find the basic schematic and code sketch for your reference.
Assembling the Tweet-O-Temp: Step-by-Step Instructions
- Attach the Ethernet Shield:
- Place the Ethernet shield onto the Arduino/Redboard.
- Connect the Push Button:
- Connect one end of the push button to 5 volts.
- From the other end, run a resistor to ground and a wire to a digital input pin (I used pin 5).
- This setup ensures that when the button is unpressed (open), the current flows through the resistor to the ground. When the button is pressed (closed), the current flows into the digital pin on the Arduino, configured as an input in the code.
- Connect the Temperature Sensor:
- With the flat end of the TMP 36 temperature sensor facing you, connect ground to the right pin, 5 volts to the left pin, and the middle pin to an analog input (I used A0).
- This configuration allows the sensor to send a current to the analog pin based on the temperature, with the excess current passing to the ground.
- Connect the GPS Module:
- Connect 5 volts to the VIN pin on the GPS module.
- Connect the GND pin on the GPS module to ground.
- Connect the RX pin on the GPS module to pin 2 on the Arduino and the TX pin to pin 3.
- This setup provides power to the GPS and enables the Arduino to receive data via the specified pins.
Follow these steps to assemble your Tweet-O-Temp. The basic schematic and code sketch are provided below for further guidance.
The code can be found from the link below
Key Feature: Sending a Tweet
The code comments provide detailed explanations, but here’s a highlight of the key feature—how the Tweet is sent. The Arduino continuously monitors the state of the button. When the button is pressed, it triggers the function below. This function first adjusts the time to the correct time zone and day. Then, it reads the temperature and sends a message to Twitter based on the current temperature. The placeholders %d in the message are replaced with the appropriate information, ensuring the Tweet displays the correct readings.
void sendTweet(int degreesF) { getTime(); if (degreesF >= 70) { sprintf(msg, "Date:%d/%d/20%d Time:%d:%d:%d It is currently %d °F near %d°, %d°. Look's like a hot one today. Bust out the shorts! - Arduino", GPS.month, GPS.day, GPS.year, GPS.hour, GPS.minute, GPS.seconds, degreesF, int(GPS.latitudeDegrees), int(GPS.longitudeDegrees)); } if ((degreesF < 70) && (degreesF >= 40)) { sprintf(msg, "Date:%d/%d/20%d Time:%d:%d:%d It is currently %d °F near %d°, %d°. LIttle chilly today, better take a jacket with you. - Arduino.", GPS.month, GPS.day, GPS.year, GPS.hour, GPS.minute, GPS.seconds, degreesF, int(GPS.latitudeDegrees), int(GPS.longitudeDegrees)); } if ((degreesF <= 40) && (degreesF >= 0)) { sprintf(msg, "Date:%d/%d/20%d Time:%d:%d:%d It is currently %d °F near %d°, %d°. Better bundle up, looks cold out there. - Arduino", GPS.month, GPS.day, GPS.year, GPS.hour, GPS.minute, GPS.seconds, degreesF, int(GPS.latitudeDegrees), int(GPS.longitudeDegrees)); } if (degreesF < 0) { sprintf(msg, "Date:%d/%d/20%d Time:%d:%d:%d It is currently %d °F near %d°, %d°. It's freezing out there, you should stay in. -Arduino", GPS.month, GPS.day, GPS.year, GPS.hour, GPS.minute, GPS.seconds, degreesF, int(GPS.latitudeDegrees), int(GPS.longitudeDegrees)); } if (twitter.post(msg)) { int status = twitter.wait(&Serial); if (status == 200) { Serial.println("OK."); } else { Serial.print("failed : code "); Serial.println(status); } } else { Serial.println("connection failed."); } delay(3000);}Project Improvement Suggestions
As I have previously mentioned, the project could benefit from some significant improvements. Using a device with larger memory should enhance the circuit’s stability. Additionally, this upgrade would enable the Arduino to store values, making the device more practical, especially when paired with a battery. Integrating a WiFi shield would further improve practicality by allowing the device to operate without being tethered to a wall outlet.
Regarding the temperature sensor, it appears to have accuracy issues. It’s unclear whether this is due to a problem in the code or the sensor itself, though I suspect the latter. Addressing this issue would significantly enhance the device’s accuracy.
Furthermore, since the GPS device performs better outdoors, it would be advantageous to build a case for outdoor storage while keeping the button accessible inside for convenience.
Follow this link for complete project: Tweet-O-Temp: Tweeting Temperatures with SparkFun Redboard


