geiger

Solar powered wireless Arduino based Geiger counter porject

Solar powered wireless Arduino based Geiger counter porject.

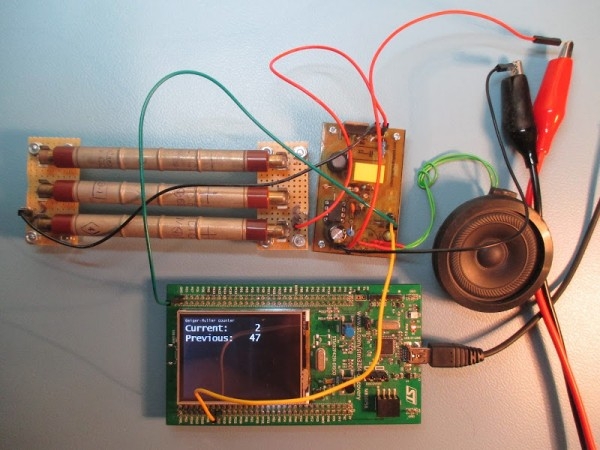
Hello, I have plans to build myself a solar powered wireless Geiger counter using a RH Electronics Arduino IDE Geiger counter connected via a serial connection through a logic level converter to a 3.3V ATmega328P-AU Pro MCU with an ESP8266 serial WiFi tranceiver to send the readings from the Geiger counter to radmon.org.I intend to …

Solar powered wireless Arduino based Geiger counter porject. Read More »

Geiger–Müller counter that can work with Arduino or (almost) any evaluation board

Geiger–Müller counter that can work with Arduino or (almost) any evaluation board

The Geiger–Müller counter is a relatively simple tool to measure ionizing radiation. To increase sensitivity, construction presented here contains three (instead of one as usually) soviet STS-5 lamps. This is important for measurements of natural sources of (low) radiation like soil, rocks (an article about my trip with Geiger–Müller counter on Śnieżka mountain). Principle of …

Geiger–Müller counter that can work with Arduino or (almost) any evaluation board Read More »

Now's a good time to check the arduino is reading the pulses from the Geiger counter... I'm still learning the basics of coding. Mostly from Garry. He showed me how to do this bit! Connect an LED between pin 13 and gnd of the microcontroller (if your board doesn't already have an integrated one). Upload the following code to your microcontroller: const int geigerPin = 12; // connected to pulse out of Geiger counter, grounds connected too void setup() { pinMode(geigerPin, INPUT); } int led = LOW; void loop() { int val = digitalRead(geigerPin); while (val == LOW) { // do what ever happens when there is no signal val = digitalRead(geigerPin); } // got the start of a pulse, so do something appropriate // toggle the LED so that you can see things working digitalWrite(13, led); led = !led; while (val == HIGH) { // wait for pulse to end, 100us is a long time for an Arduino val = digitalRead(geigerPin); } // pulse finished } Power up the Geiger counter and the arduino, check they are connected properly, and you should see the LED toggle on or off each time the Geiger counter detects some radiation. Assuming all is now working as it should, we're going to need MORE LEDS!

Geiger counter triggered LED decorations using arduino

Bored of blinky lights that blink in response to time? Make them blink with space instead! This instructable shows a quick method for connecting LED tree decorations to a Geiger counter via arduino, so that the lights blink between different strings each time radiation is detected. It’s nicer to think of this as “cosmic rays” …

Geiger counter triggered LED decorations using arduino Read More »

Scroll to Top