Summary of Sweep
Sweeps an RC servo shaft back and forth across 180 degrees using the Arduino Servo library. Connect the servo power to 5V, ground to Arduino GND, and the signal wire to digital pin 9. The sketch creates a Servo object, attaches it to pin 9, and updates the servo position variable to sweep the horn. Code and Fritzing schematic are referenced for wiring details.
Parts used in the Sweep project:
- Arduino Board
- Servo Motor
- Hook-up wire
Sweeps the shaft of a RC servo motor back and forth across 180 degrees.
This example makes use of the Arduino servo library.
Hardware Required
- Arduino Board
- (1) Servo Motor
- hook-up wire
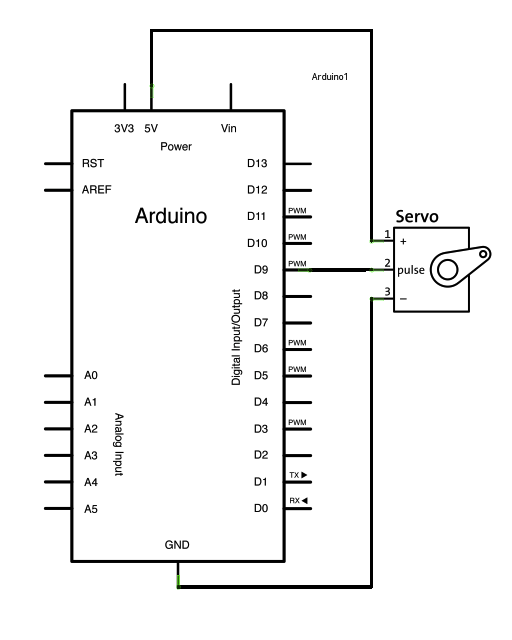
Circuit
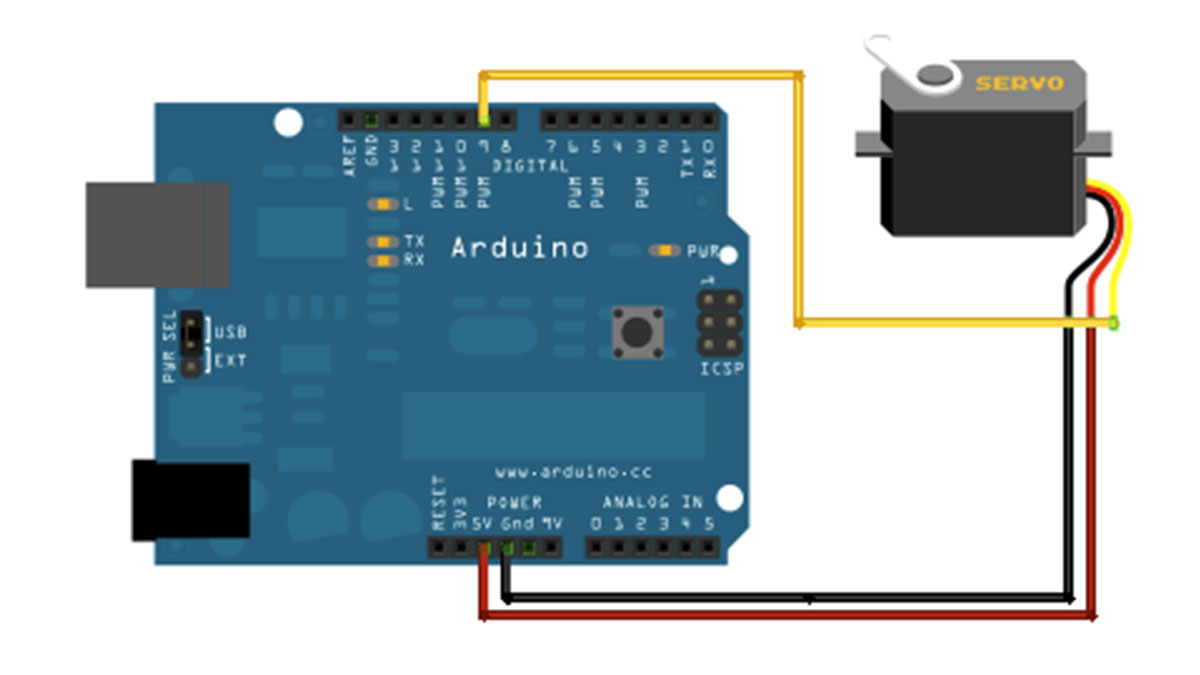
Servo motors have three wires: power, ground, and signal. The power wire is typically red, and should be connected to the 5V pin on the Arduino board. The ground wire is typically black or brown and should be connected to a ground pin on the Arduino board. The signal pin is typically yellow, orange or white and should be connected to pin 9 on the Arduino board.
images developed using Fritzing. For more circuit examples, see the Fritzing project page
Schematic
Code
// Sweep
// by BARRAGAN <http://barraganstudio.com>
// This example code is in the public domain.

#include

Servo myservo;  // create servo object to control a servo
                // a maximum of eight servo objects can be created

int pos = 0;    // variable to store the servo position

void setup()
{
  myservo.attach(9);  // attaches the servo on pin 9 to the servo object
}
For more detail: Sweep
- What does this example do?
It sweeps the shaft of an RC servo motor back and forth across 180 degrees. - Which Arduino pin is the servo signal connected to?
The servo signal pin should be connected to pin 9 on the Arduino board. - How many wires do servo motors have and what are they for?
Servo motors have three wires: power, ground, and signal. - Where should the servo power wire be connected?
The power wire should be connected to the 5V pin on the Arduino board. - Where should the servo ground wire be connected?
The ground wire should be connected to a ground pin on the Arduino board. - Which library does the sketch use?
The example uses the Arduino Servo library. - How is the servo attached in the code?
The code creates a Servo object and calls myservo.attach(9) to attach it to pin 9. - How many Servo objects can be created in this example comment?
The comment notes a maximum of eight servo objects can be created.