Summary of Smartphone / Tab Controlled ROBOT ARM !!
This article guides hobbyists in building a robot arm controllable via an Android smartphone. The project utilizes an Arduino board and four to five micro servo motors mounted on a cardboard body. A custom gripper made from juice straws is attached, powered by a 9V battery while the Arduino receives data via a USB OTG cable. The system relies on a specific free app named "Servo & Esc controller" and provided C++ code to manage motor movements through serial communication.
Parts used in the Smartphone Controlled Robot Arm:
- Servo motor (4x or up to 5x, specifically Sg90 micro servos mentioned)
- Sliced piece of Cardboard
- USB OTG (on the go) cable
- Arduino board (any model)
- Jumpers
- 9v battery
- Juice straw or pipe
- Fiber or rope
- Hot glue
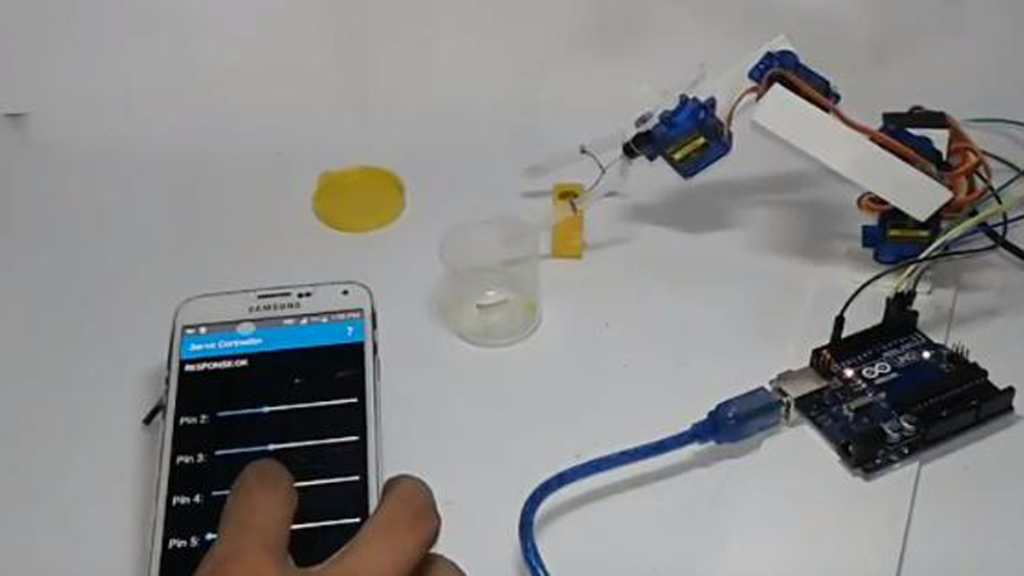
Making ROBOT ARMs is very popular and fun among hobbyists,but it’s not that easy to control a ROBOT ARM. So today we’ll be making a robot arm that can be controlled using just your Android Smartphone or tablet.
Good news is, you just need to program the Arduino, the App is already available to download for free.
Watch the video for full tutorial
Step 1: Parts You’ll Need
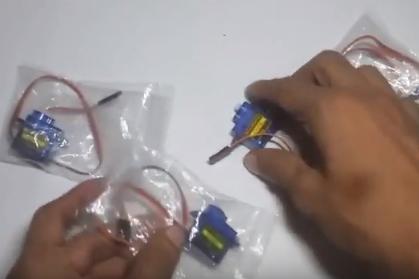
1. Servo motor 4x (I’m using micro servo Sg90 but any model or size is okay)
you can use upto 5 servo for this robot arm,I’ve only 4,so I’m using them.
2. sliced piece of Card Board – to make the body.
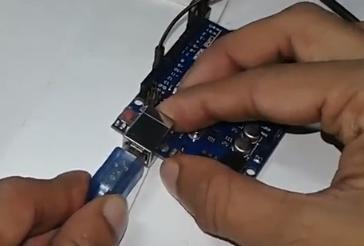
3. USB OTG (on the go) [pic3 & 4- all the same]
4. And of course a Arduino board (any board)
6. And a few jumpers to make the connection
7. And a 9v battery to power the servo motors.
Buy electronic parts ar utsource.net
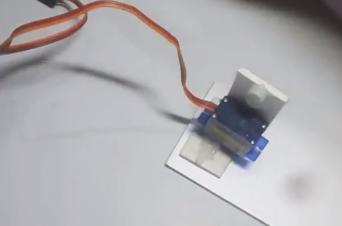
Step 2: Making the Robot Arm (THE BODY)
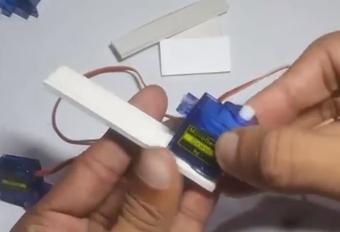
Now in here I’m actually making the body in a way so that I can easily connect and disconnect the ARM anytime. Using some pieces of cardboard and Hot glue I’ve mounted the Servo motors to the cardboard to make the body. It’s better to watch the video to better understand how it’s done.
Step 3: Making the GRIPPER (finger for Robot Arm)
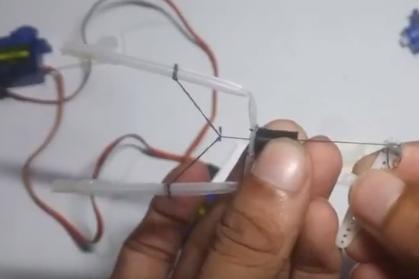
I’ve made the robot gripper using juice straw or pipe. And added a simple fiver or rope so that when it’s pulled the grip will be closed .
Step 4: Assemble the Robot ARM
after making the arm and making & the gripper you just assemble the body as shown.
Step 5: The Circuit
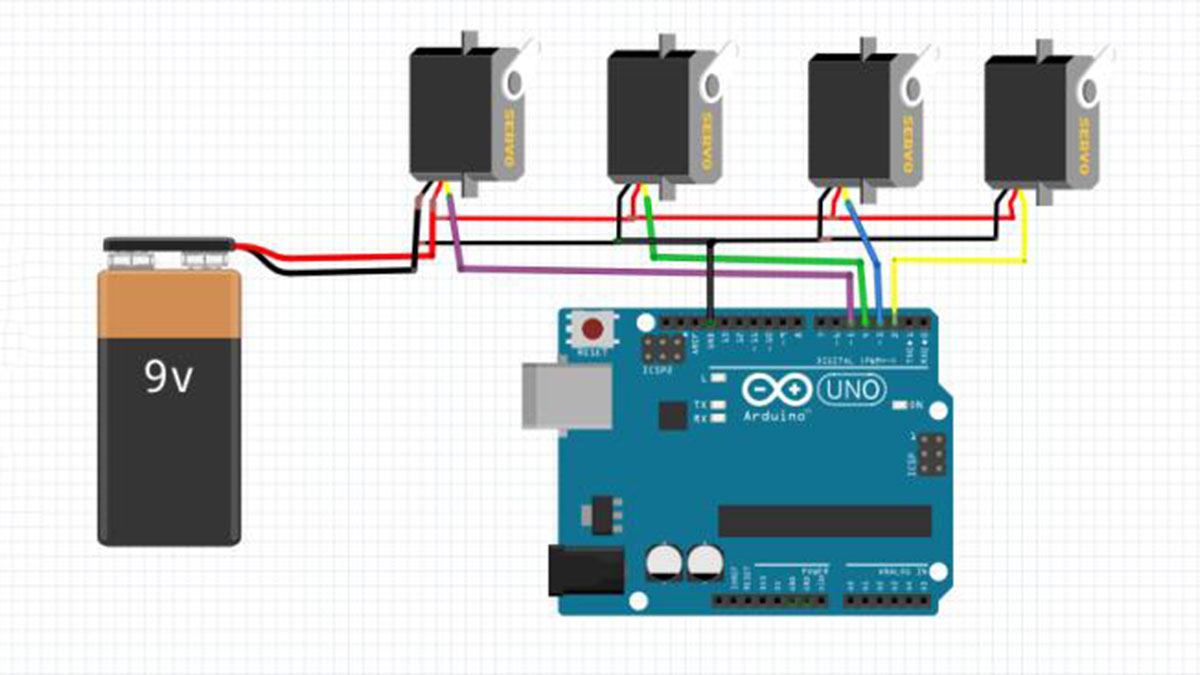
Well the circuit is very easy,you just need to power the servo motors. Arduino will take power from your phone via OTG cable. Don’t worry, the power consumption is very low.
Step 6: Download the ANDROID APP

Search on google PLAYSTORE – Servo & Esc controller.
Download from here https://play.google.com/store/apps/details?id=com….
Then Install the app.
Step 7: Programming the Arduino
You can get the code from the link in the app, I’m providing the code below
# include <Servo.h>
//PWM OUTPUT VARIABLES
Servo pin2;
Servo pin3;
Servo pin4;
Servo pin5;
Servo pin6;
//SERIAL USB BUFFER
char inData[ 65 ]; // Allocate some space for the string
char inChar; // Where to store the character read
byte index = 0 ; // Index into array; where to store the character
void setup () {
//START PIN OUTPUT
pin2. attach ( 2); // attaches the servo on pin 9 to the servo object
pin3. attach ( 3);
pin4. attach ( 4);
pin5. attach ( 5);
pin6. attach ( 6);
//SEND MINIMAL VAUE 1000, REGUIRED FOR ESC TO ARM (max is 2000)
pin2. writeMicroseconds (1000 );
pin3. writeMicroseconds (1000 );
pin4. writeMicroseconds (1000 );
pin5. writeMicroseconds (1000 );
pin6. writeMicroseconds (1000 );
//INIT SERIAL COMMUNICATION WITH ANDROID
Serial. begin (115200 );
}
void loop () {
if (Serial. available () > 0 ){
//WAIT FOR INCOMMING DATA BUFFER TO FILL
if (index < 24){
inChar = Serial. read (); // Read a character
inData[ index ] = inChar; // Store it
index ++; // Increment where to write next
if (inChar == 'X' )
index = 0 ;
inData[ index ] = '\0' ; // Null terminate the string
}
}
if (index ==24 ){
index = 0;
//STRING LOOKS LIKE "A100B96C20D0E" WHERE LETTERS ACT AS DELIMINATOR
//STRING CAN CONTAIN SINGLE VALUE LIKE "B96C"
String buf = String (inData);
int ia = buf. indexOf ( "A", 0);
int ib = buf. indexOf ( "B", 0);
int ic = buf. indexOf ( "C", 0);
int id = buf. indexOf ( "D", 0);
int ie = buf. indexOf ( "E", 0);
int iff = buf. indexOf ("F" , 0 );
Serial. print ("|" );
//A?B
if (ia!=- 1 && ib!=- 1){
//1. CONVERT VALUE TO INTEGER
//2. CONVERT 0-100 TO 1000 - 2000
//3. WRITE TO ARDUINO PIN NUMBER 2
pin2. writeMicroseconds (map (buf. substring (ia+ 1, ib). toInt (), 1, 100 , 1000 , 2000 ));
//SEND RESPONSE TO ANDROID
Serial. print ( "RESPONSE:OK" );
}
//B?C
if (ib!=- 1 && ic!=- 1){
pin3. writeMicroseconds (map (buf. substring (ib+ 1, ic). toInt (), 1, 100 , 1000 , 2000 ));
//Serial.print("PIN3 OK");
}
//C?D
if (ic!=- 1 && id!=- 1){
pin4. writeMicroseconds (map (buf. substring (ic+ 1, id). toInt (), 1, 100 , 1000 , 2000 ));
//Serial.print("PIN4 OK");
}
//D?E
if (id!=- 1 && ie!=- 1){
pin5. writeMicroseconds (map (buf. substring (id+ 1, ie). toInt (), 1, 100 , 1000 , 2000 ));
//Serial.print("PIN5 OK");
}
//E?F
if (ie!=- 1 && iff!=- 1){
pin5. writeMicroseconds (map (buf. substring (ie+ 1, iff). toInt (), 1 , 100 , 1000 , 2000 ));
//Serial.print("PIN6 OK");
}
Serial. print ("|00" );
Serial. print ("\n" );
}
}
void logg (){
}

Source: Smartphone / Tab Controlled ROBOT ARM !!
- How can I control the robot arm?
You can control the robot arm using just your Android Smartphone or tablet. - Can I use different models of servo motors?
Yes, you can use any model or size, though the author uses micro servo Sg90. - What is the best way to power the servo motors?
You should use a 9v battery to power the servo motors. - Does the Arduino get power from the phone?
Yes, the Arduino will take power from your phone via the OTG cable. - What app do I need to download?
You need to search for and download the Servo & Esc controller app from Google Playstore. - How many servos can I use for this robot arm?
You can use up to 5 servos for this robot arm. - What material is used to make the gripper?
The gripper is made using a juice straw or pipe with a fiber or rope added. - How are the servo motors connected to the Arduino?
The code attaches servos to pins 2, 3, 4, 5, and 6 on the Arduino.