Summary of Smart Homer Web-enabled TV remote using Arduino
Smart Homer is a web-enabled Homer puppet that uses an Arduino and IR LEDs in its eyes to switch on the TV when The Simpsons airs. A cloud script polls an online TV program RSS feed and triggers Homer's Arduino via a Yaler relay, which emits the recorded TV remote IR code. The project covers recording the remote, testing the IR sender, embedding electronics in the puppet, and configuring remote web access and the TV program RSS feed.
Parts used in the Smart Homer:
- Homer puppet
- Arduino Uno
- AB USB cable
- Ethernet shield
- RJ45 cable
- IR sensor (receiver)
- IR LED (infrared LED)
- Button
- Jumper wires M-M
- Jumper wires F-M
- Tiny breadboard
- 180 Ohm resistor
- 220 Ohm resistor
- 1k Ohm resistor
- LED (non-IR)
- Thread and a needle
- TV with IR remote
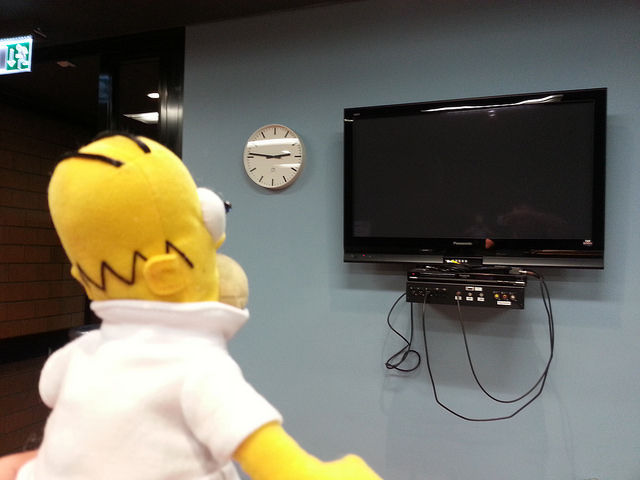
Smart Homer, a Web-enabled TV remote puppet
Smart Homer is a Web-enabled puppet that turns on your TV when Simpsons is on. As Homer is too lazy to browse the Web himself, a script in the cloud checks the online TV program for him. If Simpsons is on, the script triggers the Arduino Web service in Homer’s belly to activate his infrared eyes. No brain involved.
This project by @tamberg was built at the 24-hour SRG Hackdays with the kind help of Gianni and @urbmc. Homer even got a trophy, just by switching on a TV!
Video
Here’s a short video (electronics not yet embedded, eyes triggered with Curl).
Material
- Homer puppet (e.g. http://www.amazon.com/Simpsons-Homer-Simpson-Plush-Stuffed/dp/B00CQ3ELR2/ from Amazon)
- Arduino Uno (e.g. https://www.adafruit.com/products/50 from Adafruit)
- AB USB cable (e.g. https://www.adafruit.com/products/62 from Adafruit)
- Ethernet shield (e.g. https://www.adafruit.com/products/201 from Adafruit)
- RJ45 cable (e.g. https://www.adafruit.com/products/995 from Adafruit)
- IR sensor (e.g. https://www.adafruit.com/products/157 from Adafruit)
- IR LED (e.g. https://www.adafruit.com/products/387 from Adafruit)
- Button (e.g. https://www.adafruit.com/products/1119 from Adafruit)
- Jumper wires M-M (e.g. https://www.adafruit.com/products/759 from Adafruit)
- Jumper wires F-M (e.g. https://www.adafruit.com/products/825 from Adafruit)
- Tiny breadboard (e.g. https://www.adafruit.com/products/65 from Adafruit)
- A 180 Ohm, 220 Ohm and 1k Ohm resistor and an LED (e.g. from Pusterla)
- Thread and a needle
- TV with IR remote
Tools
- Scissors
(A second Arduino Uno, USB cable and breadboard comes in handy for testing. The Ethernet cable should be long enough to reach the sofa in front of your TV.)
Step 1: Recording your TV remote’s IR signal
From the detailed Adafruit tutorial https://learn.adafruit.com/ir-sensor we learn that TV remotes use vendor specific IR signal encodings. There is a library at https://github.com/shirriff/Arduino-IRremote covering some vendors. But you still need to know what to send. Lacking this information in our case, we resorted to recording the IR signal with Adafruit’s handy example which you can download at https://raw.githubusercontent.com/adafruit/Raw-IR-…
Set up the Arduino, breadboard, IR sensor, 1k Ohm resistor and a (non-IR) LED as shown. Upload the rawirdecodestruct.ino example to the Arduino and open the serial console. Point the TV remote to the IR sensor, shortly press a channel key and watch the console. After a few seconds, a large output appears. Copy the part that looks like code to the clipboard (or a text file) for the next step.
Step 2: Testing the IR LED with your TV
Once you copied the output of the IR receiver sketch, download and open this Adafruit Arduino sketch: https://raw.githubusercontent.com/adafruit/Nikon-I…
Build the circuit as shown in the Fritzing diagram, using the IR LED, a 220 Ohm resistor and a button. If you’ve got a second Arduino and breadboard you can leave the previous IR receiver setup untouched and use it to test this IR sender.
Replace the implementation of sendCanonCode by pasting the code you got from the receiver. You might also have to adapt the delayMicroseconds in the pulseIR function. We replaced 10 by 9 in both places, but left everything else. In the main loop, we replaced delay(3 * 1000) by delay(100).
The timing is quite critical. Play around with the sender by pointing the IR LED towards your TV’s IR receiver and pressing the button. If it works, the channel for the key you previously recorded should switch on. Many TVs have a timeout where they change the channel from e.g. 2 to 22. Try to find a safe timespan that switches the TV on, but does not go too far. A human does this intuitively when the desired result appears on the TV, but Homer is not that smart. We used a for loop to repeat the signal for the desired timespan.
(This step is easy, but it took a lot of attempts to get the timing right. We even plotted times in Excel to find out why the IR signal did not work. Another huge impact is the resistor. We accidentally used 1k Ohm instead of 220 Ohm which made the LED very weak.)
Step 3: Augmenting Homer’s eyes with IR LEDs
Pierce the infrared LED’s legs through Homer’s eyes. Take care not to break the legs. The puppet used here had a thick skin behind the eyes. Cut open Homer’s back and use your finger to “plug” a F-M jumper cable onto the LEDs legs. It is hard to remember which leg is GND, but you can test this easily by swapping the cables on the breadboard. Repeat the test from the last step to make sure your wiring works. We hooked up just one of the LEDs and kept the other as a backup.
Step 4: Testing remote access to the Arduino
The Arduino in Homer’s belly acts as a Web server. This allows us to send push notifications (or rather: trigger a Webhook) with a simple HTTP PUT request. To enable remote access without the hassle of port forwarding, we use Yaler.net, a relay service (disclosure: I’m a founder).
Follow the steps in https://yaler.net/arduino to install the YalerEthernetServer library and get a free account. To see if Yaler works in your network, open File > Examples > YalerEthernetServer > YalerWebService in your Arduino IDE.
Add the Ethernet shield to your Arduino (remove the breadboard for a second), replace RELAY_DOMAIN with your relay domain and access the Arduino at http://RELAY_DOMAIN.try.yaler.net/. You should see Hello in your browser.
(Note that this works from the public Web, not just in your local network. This is necessary for the cloud script to trigger your Arduino. If you still prefer using port forwarding, and know how to set up your router, just uncomment the respective lines in the code.)
Step 5: Testing Homer’s REST API with Curl
Once access to Homer’s belly works with the Yaler example, try the final code, available at https://bitbucket.org/tamberg/srghack/src/tip/2014… (Don’t forget to port over your TV-specific IR command and set your RELAY_DOMAIN.)
Connect the jumper wires of the IR sender breadboard circuit to the Ethernet shield, as before. Place Homer in front of your TV, at a distance and orientation that works for the IR signal. Make sure he’s connected to your LAN with the Ethernet cable.
On your computer, open a terminal and run Curl (http://curl.haxx.se/) with this command: $ curl -vX PUT http://RELAY_DOMAIN.try.yaler.net/ir?key=2 (Make sure to use your Arduino’s relay domain.)
If Homer’s response is 200, the TV should eventually switch on, just as if you pressed the button. If you get a 504, Homer might be busy. Wait, and try again.

Step 6: Embedding the Arduino into Homer’s belly
Now it’s time to integrate the electronics into Homer’s belly. Remove some of the stuffing material and insert the Arduino, Ethernet shield and breadboard. Don’t forget to connect Homer’s eyes to the breadboard and make sure they work as expected. Cut a hole into Homer’s butt for the USB and Ethernet cable. Then cover the back with some stuffing and sew Homer’s back together with a few stitches. Take care not to break the IR LEDs when dressing him up again.
Step 7: Setting up a TV program search RSS feed
SRF provides a online TV program (in German) with a neat search feature. Visit http://tvprogramm.srf.ch/q and enter Simpsons into the Suche nach text field. Click the button labelled Suchabo bestellen to “order” a search.
On the second page, select per RSS-Feed and click the Abonnieren button. This immediately provides you with an RSS feed. E.g. for all upcoming episodes of the Simpsons, the link is http://tvprogramm.srf.ch/feed/q/query/simpsons.
The RSS feed contains starting times and channel info. Unfortunately, there’s no public feed (or other notification mechanism) to get a trigger when the emission really starts. That means we’ll have to do some time keeping by hand.
For more detail: Smart Homer Web-enabled TV remote using Arduino
- How does Smart Homer know when Simpsons is on?
A cloud script checks an online TV program RSS feed for Simpsons and triggers Homer's Arduino when an airing is found. - Can I record my TV remote's IR signal for Smart Homer?
Yes; use the Adafruit IR receiver example on Arduino to capture the remote code from the serial console and copy the code output for reuse. - How do I test the IR LED with my TV?
Use the Adafruit IR sender sketch, paste the recorded code into send function, adjust pulse timing and a button to trigger the IR LED while pointing it at the TV. - How are the IR LEDs integrated into Homer's eyes?
Pierce the IR LED legs through Homer's eyes, run F-M jumper cables to the breadboard, and test wiring before final assembly. - How do I access Homer's Arduino from the cloud?
Use the Yaler relay service and YalerEthernetServer library so the Arduino acts as a web server accessible via RELAY_DOMAIN.try.yaler.net without port forwarding. - How do I trigger Homer remotely to send the IR signal?
Send an HTTP PUT request (for example with curl) to the Arduino's Yaler relay URL and endpoint, such as http://RELAY_DOMAIN.try.yaler.net/ir?key=2. - How is the Arduino embedded into the puppet?
Remove stuffing, insert the Arduino, Ethernet shield and breadboard, connect the IR LEDs, route USB and Ethernet cables through a hole, then restuff and sew Homer closed. - How do I get notifications of upcoming Simpsons episodes?
Use SRF's TV program search, subscribe to the search as an RSS feed (per RSS-Feed) for Simpsons to obtain start times and channel info.