Stage combat is the art of theatrical violence. Rather than resembling fencing, stage combat is choreographed like dance for aesthetic and theatrical effect as well as for safety. Over years of choreographing and teaching others stage combat choreography, I realized that one of the most difficult aspects of teaching someone choreography is the necessity of speaking to communicate the necessary moves. By using visual cues rather than verbal cues, the connection between intent and action can be established faster and more easily, and the clumsy language of targets can be avoided somewhat.
I chose to make a shirt for smallsword choreography, since the placement of the “targets” is convenient for sewing onto a shirt. Targets are the areas which the actor aims to attack or defend. For most of stage combat, the targets are outside of the body for safety reasons. Smallsword is primarily pointwork, though, so the targets are actually on the body (in the approximate locations of the LEDs on my shirt). Apologies–the sword I’m holding is a rapier, not a smallsword, since that’s what I had around.
This instructable describes how to convert a shirt, glove, arduino lilypad, and other electronic components into a controllable shirt for smallsword choreography instruction. At the end is a short video demonstrating the functionality and use of the completed project.
Materials:
– 1 shirt
– 1 left-hand glove
– 1 lilypad arduino
– 4 LEDs (preferably lilypad LEDs)
– 1 lilypad buzzer
– 1 lilypad switch
– wire (approximately 8 yards), either standard copper wire or flexible wire
– needle and thread
– 4.5 V battery source (preferably 3 x 1.5 V button cells and duct tape)
Step 1: Connect shirt and glove
Obtain a comfortable shirt and a left-hand glove which meets the end of the shirt sleeve. (If you fight left-handed, you can use a right-hand glove instead.) I used a 3/4-sleeved shirt an elbow-length leather glove for this project. Leather will hold up well to the electronics on the shirt, but fabric gloves should work, as well. Put on the shirt and glove to determine the most comfortable connection location. Pin the shirt and glove together on the underside of your sleeve. Remove the shirt and glove, then sew them together only on the underside of the arm with standard thread. This makes getting the shirt on and off easier, allowing the wearer to remove his or her hand from the glove first, then from the sleeve
Step 2: Get and test components
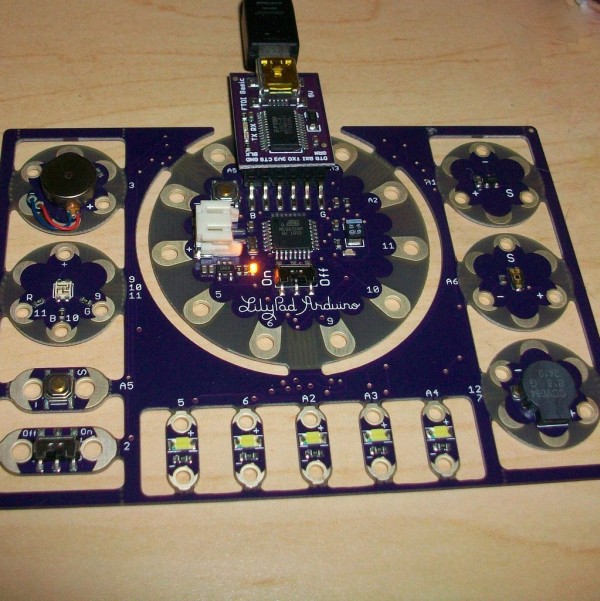
This project uses a lilypad arduino, a microcontroller intended to be sewn onto clothes. Lilypad arduinos are intended to be used with conductive thread. The first iteration of this project, described and pictured here, was created using normal metal wires because of the high impedance of conductive thread and the long lengths of wire needed. Several other components go with the lilypad arduino, as shown in the picture–LEDs, buzzers, light sensors, switches, buttons, and other components. The lilypad in the picture is a simple lilypad; a standard lilypad should be used for this project, since the simple lilypad does not have enough pins. This project uses four LEDs, one switch, and one buzzer. You will also need several resistors of approximately 200 Ohms, as well as a cable for programming the lilypad.
Test each of the components. You can choose to use Modkit, which was used for this project (visit www.modk.it) or to use more standard arduino software. To test the LEDs, connect a resistor between positive power and the control pin for the LED, then connect the LED between the control pin and ground. The LED should turn on when you set the control pin to HIGH and off when you set the control pin to LOW. Connect the switch in the same way–connect the minus side of the switch to ground and the plus side of the switch to an input pin which is also connected to positive power through a resistor. You should be able to turn on the LEDs and the buzzer using the switch.
Step 3: Place LEDs
Decide where to place the LEDs on the shirt. These should be on the front of the shoulders and hips as shown in the picture. Sew them on securely using standard thread, but remember that you will need to connect wires to these components. The picture here includes the wires used to connect the LEDs in a later step, but start by placing the LEDs by themselves and sewing them on securely
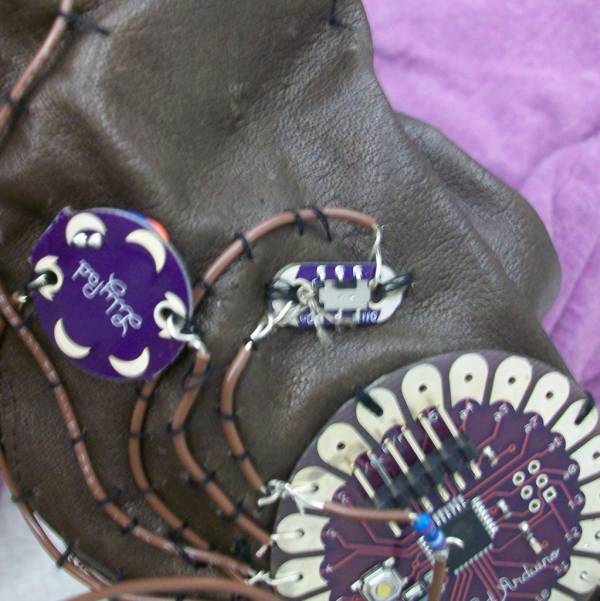
The arduino will be sewn onto the back of the glove. The specific location of the arduino will depend on the length of the glove you use. For the high glove used for this project, the arduino fit comfortably near the end of the glove, in the middle of the forearm. Make sure that you have room to wire on all sides of the arduino. Select a few pins–two is enough–which you do not intend to use and sew through those pins with regular thread to connect the arduino to the glove. This project should only need any analog pins or any of the three pins under the connector to the computer, so one of those three and an analog pin would be good choices. Again, this picture is of the finished product, so you will not at this point have any of the wires connecting to the arduino.
Next, choose the location of your power supply. The lilypad arduino needs between 3.3 and 5.5 Volts, so a 4.5-Volt combination of 1.5-Volt button batteries is a convenient choice. (Three AAA or AA batteries would also work but would be heavier and more difficult to sew on.) For an easy-to-remove homemade battery case, duct-tape the three button cells together with an insulated wire attached to either end of the stack. Connect the proper leads to the + and – power pins on the arduino. Press the little button on the arduino, which is a reset button; the LED on the board should blink once if the power is connected properly. Remove the power leads, sew the power to the desired place on the glove (perhaps closer to the fingers on the back of the hand) then confirm that you can reconnect the leads. You do not need power hooked up for testing or sewing on other components, so it may be easiest to leave the leads disconnected from the arduino temporarily.
For more detail: Smallsword Choreography Shirt


