Summary of Simple Braille Writer (Speech to Braille)
The author built a portable, low-cost speech-to-Braille writer using an Arduino Nano and stepper motors. Inspired by expensive commercial devices, this DIY project converts voice commands into tactile Braille dots via a custom mechanical system featuring linear motion, a servo-controlled pen head, and a paper roller. The entire assembly is Bluetooth-enabled for mobile control, allowing users to print Braille text in just two weeks of development.
Parts used in the Simple Braille Writer:
- Arduino Nano
- A4988 Stepper driver
- Bluetooth Serial Transceiver Module
- CD drive stepper motor slider linear guide micro
- 2 piece 360-degree rotation servo motor
- 1 piece 180-degree servo motor
- 2 piece of injection syringe
- 1 piece of clear acrylic sheet
- Double Sided Foam Tape
- Fevi Kwik
- Male-Female jumper wire
- Cutting tools and screwdriver set
- Gel / Ball Pen
- Mobile Phone with Bluetooth feature
- APP: Arduino Voice Control
Hello everyone,
All this started with doing a simple XY plotter after completing it successfully, I thought to develop a simple speech to braille text converter.I started searching it online and unexpectedly the prices were too high,that boosted me built a small portable and cheap writer.
As we know that whatever we think to build, it may exist or at-least attempted by somebody , so I started looking for such writing machine.I got a video where it was quite big and noisy, so i thought to put my own flavor which is small portable and easy to use.
Honestly I’m new to Arduino and still learning it.I successfully able to build a XY plotter so that time my hopes were high with the same knowledge I can able to pull out my own small braille writer.So in this process I have learnt a lot and I finally could able to developed it in just 2 weeks time.
So here it goes how to build a simple braille writer.
Step 1: Materials for the Project
- Arduino Nano
- A4988 Stepper driver
- Bluetooth Serial Transceiver Module
- CD drive stepper motor slider linear guide micro
- 2 piece 360-degree rotation servo motor
- 1 piece 180-degree servo motor
- 2 piece of injection syringe (In medic store)
- 1 piece of clear acrylic sheet
- Double Sided Foam Tape
- Fevi Kwik
- Male-Female jumper wire
- Cutting tools and screwdriver set.
- Gel / Ball Pen
- Mobile Phone with Bluetooth feature
- APP: Arduino Voice Control
Now let us build it
- The total project can be divided into 4 small parts
- Liner module Setup (using A4988 driver)
- Creating up and down motion for writer’s head
- Roller for paper rolling
- Bluetooth integration
- At the end need to assemble all of the parts which will lead to complete the project.
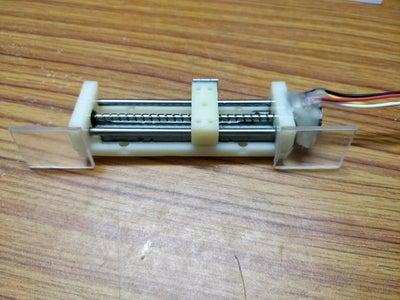
Step 2: Part 1 : Creating Liner Motion for Writer
We need to and fro motion to write the stuff in the paper. There is plenty of videos are out there to create such mechanical motion using different methods. But by using stepper motor we can do it very easily with high accuracy.
So to avoid mechanical stuff creation I used stepper motor which is coming with a slider, you can build it your own, if you are interested building your own then you can follow this link.
Once the mechanical part is done we have to follow steps to do the electrical configuration
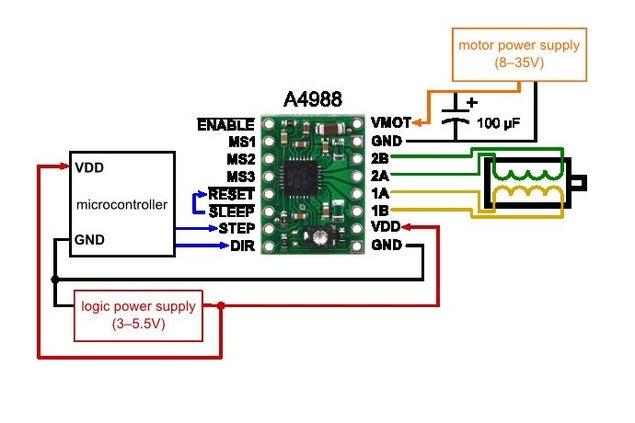
- Follow the image do the circuit configuration.
- Make sure to put
- Pin 6: Enable
- Pin 5: Step
- Pin 4: Direction
- Upload the code of basicMove2 in your Arduino nano and open the serial monitor and use “f” for forwarding and ” “b” backward and test your circuit. check are you able to achieve proper linear motion or not with accuracy.
- You can use series of fbfbffbbfffbbb like command too.
Step 3: Part 2 : Writer Head (Up and Down Motion)
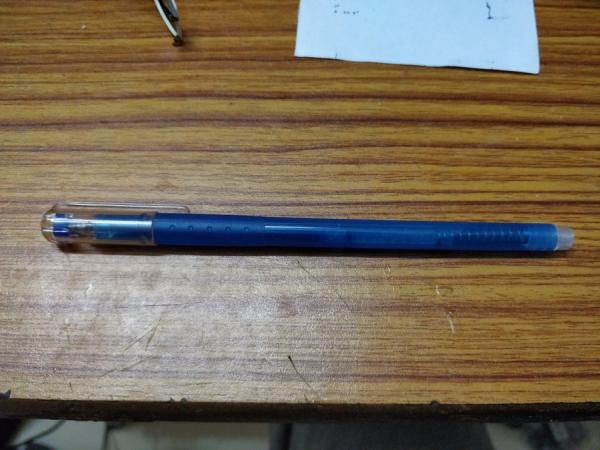
There are different ways of doing up and down motion. You can do it by using a solenoid actuator. But here I’m using a simple pen for it with help of a servo motor.
- Take any simple ball pen having a removable refill.
- Create a hole in the top after pushing the refill inside, make sure your hole should go through both sides of pen and refill.
- Create another hole in the refill and attach a string to it.
- Put the refill back, and create a hole in pen below the refile hole make sure to do it at least 2-3 cm lower than the refile.
- Now tie an elastic rubber on top through pen and refile.
- Use the 180 degrees Servo motor, and set it to 0 degrees and attach the string to the nob.
- Now when the nob rotates anti-clockwise 180, the refill will be pulled out and when it will move back to 0 degrees because of the elastic band on the top it will move back inside.
- Attach the signal pin to pin number 8 in Arduino nano.
- Upload the code of basicMove2 in your Arduino nano and open the serial monitor and use “n” and test your circuit.
- You can use series of nnnnnnnnn command too, and check if it is working or not.
- Increase decrease rotation angle to get desire motion.
Step 4: Part 3: Paper Roller
Now the paper roller, it is the most interesting and challenging part.
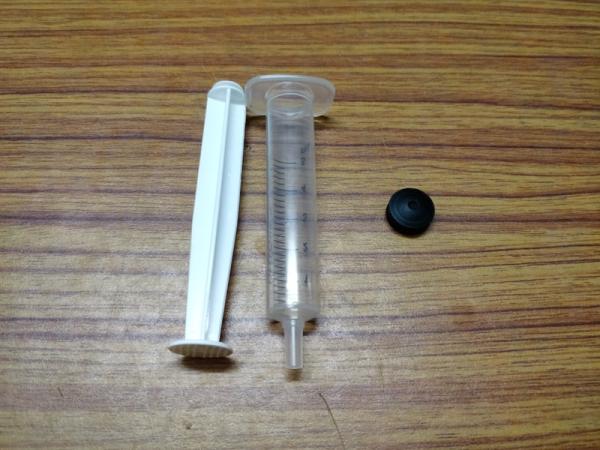
- Remove the injection syringe rubber.
- Cut the plastic gear to circle.
- Put it in the rubber and apply some glue.
- Attach it the servo and secure it with glue.
- Create another one like above.
- Attach the signal pin to pin number 9 and 10 in Arduino nano.
- Upload the code of basicMove2 in your Arduino nano and open serial monitor and use “p” and test your circuit.
- You can use series of pppppppppp command too, and check if it is working or not.
- Increase decrease rotation angle to get desired speed.
- Try to adjust the speed by changing the potentiometer which is present inside the servo.
- Make the rotation in same direction and speed (this is the most important and tedious work).
Step 5: Part 4 : Bluetooth Module Integration
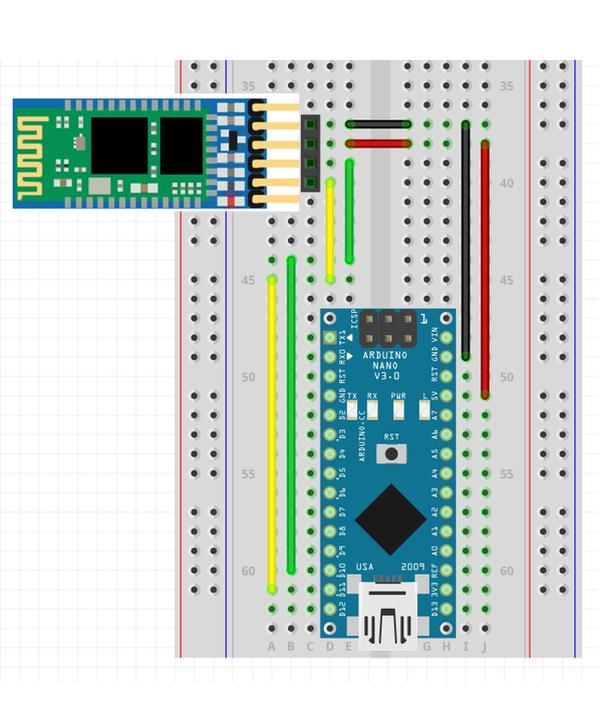
This part is the easiest part.
- Do the above circuit configuration and it is done.
- It will help you to send voice command using the Arduino Voice Control.
- You can search for “Arduino Bluetooth module hc-05” in google you will get cool examples.
Step 6: Part 5 : Assemble All
Now let us assemble all our four parts.
- Clean the sheet.
- Using double tape, add servos motor as shown in the figure.
- Attach extra plastic piece on the linear slider and place it on top of two servos.
- Make sure to put it parallel with the paper roller.
- Now attach the pen head, make sure it should not touch the surface and on servo rotation it should punch a hole on the tape.
- Attach the pin Arduino nano.
- Upload the code of basicMove2 in your Arduino nano.
- Open serial monitor and check all the commands
- f for forwarding
- b for back
- p for paper rolling
- n for moving pen to up and down.
- Once all the function verified now it is ready to for printing Braille.
Step 7: Make the Circuit Compact
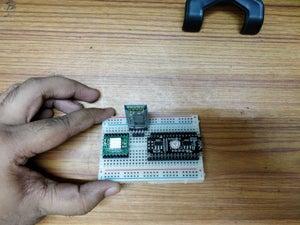
Flow the image to make the circuit in a small and single breadboard.
Step 8: Lets Print Braille
- Open Brallie.ino file, open the serial monitor of Arduino IDE.
- Put the paper under the rolling paper motor.
- Send some space i.e (” “) in the command and click enter.
- Paper will slide inside.
- Do it till it crosses the writer’s head.
- Then you can send your command in the monitor, the actual text.
- Open you Bluetooth app and connect to Bluetooth and send voice command.
- flip the paper to see the braille language.
- I tried few words like hi, hello and welcome you can see the sample output paper.
- You can change below parameters in the code to get the results specific to you.
- Gap between braille columns : int steps = 30;
- Line gap between braille first two dots to next two dots rows : int paperLine = 250;
- Speed of linear slider : int stepperDelay = 500;
- Speed of writer head : int servodelay = 500;
- Number of character per line : int n = 10;
Source: Simple Braille Writer (Speech to Braille)
- How can I create linear motion for the writer?
Use a stepper motor with a slider mechanism connected to an A4988 driver. - Can I use a solenoid actuator for the writer head?
The article mentions solenoids as an option but uses a ball pen refill pulled by a 180-degree servo motor instead. - What is the best way to control the paper roller speed?
Adjust the potentiometer inside the servo motor to change the rotation speed. - Does the device require a specific app to function?
Yes, you need the Arduino Voice Control app on a mobile phone with Bluetooth features. - How do I test the basic movement of the linear module?
Upload the basicMove2 code and use f or b commands in the serial monitor to move forward or backward. - What pins are used for the writer head servo motor?
The signal pin for the 180-degree servo motor controlling the pen head is connected to pin number 8. - How do I assemble the parts to ensure they work together?
Attach servos to the acrylic sheet with double tape, place the linear slider parallel to the rollers, and secure the pen head so it punches holes without touching the surface initially. - Can I customize the spacing between Braille characters?
Yes, you can modify parameters like Gap between braille columns, Line gap, Speed of linear slider, and Number of character per line in the code.