
Summary of Shower Monitor Arduino with LCD display
This article details a senior capstone project at St. Olaf College to build a shower water usage monitor. The device uses a piezo transducer attached to shower pipes to detect vibrations and calibrate water consumption data, displayed on an LCD screen via an Arduino Micro. The guide outlines the assembly process, including circuitry design on a protoboard, code implementation using specific libraries, and final assembly within a Pelican case.
Parts used in the Shower Water Monitor:
- Pelican 1010 case
- Arduino micro
- Protoboard
- LCD display
- 9V battery (or two for extended runtime)
- 9V Snap Connector
- Soldering equipment
- JB Weld SteelStik Epoxy
- Small piezo transducer
- Heat shrink tubing
- Trim potentiometer
- Three 4.7 KOhm resistors
- One MOhm resistor
- One 1K resistor
- Opamp (411)
- Silicone sealant
- Cable ties
- Shower piping
Welcome! For our Environmental Capstone class (senior thesis) for St. Olaf College we built a monitor that would effectively monitor how much water a shower uses. The idea behind this water monitor is that if you attach a piezo transducer (small microphone) to a shower pipe, you can calibrate the average of the vibrations while the shower is turned on, and from there you can see how much water you’re using for that shower. For our project we made four different monitors using the same process. This instructable is written as if you were to make a single water monitor.
Here is all the equipment used for this project. These materials are to make one water monitor:
– One Pelican 1010 case
– One Arduino micro
– One Protoboard (comes in packs of 2)
– One LCD display
– One 9V battery
– One 9V Snap Connector
– Soldering equipment
– JB Weld SteelStik Epoxy
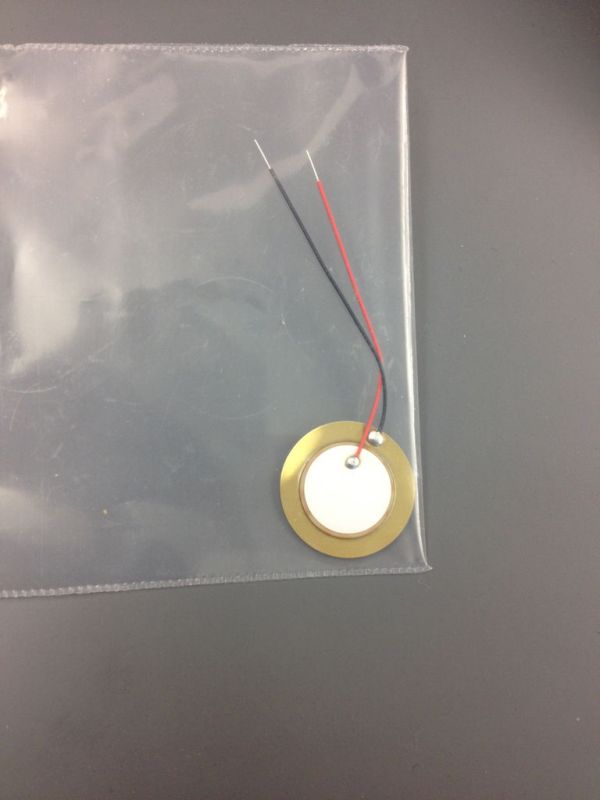
– One small piezo transducer
– Straided wire
– Heat shrink tubing
– Arduino software installed on your computer
– One trim potentiometer (similar to this one)
– Three 4.7 KOhm resistors
– One MOhm resistor
– One 1K resistor
– One opamp (411)
– Access to a drill press/handheld drill
– Silicone sealant
– Leather hole punch
– Shower piping
– cable ties
For most of our equipment, we visited our local RadioShack, Menards, and sparkfun.com. Otherwise we we able to access things from our college’s electronics lab.
EDIT: Our final product was enhanced with two 9 volt batteries instead of just one, so that the monitor would run longer. These changes were soldered on to the Arduino.
Step 1: Circuitry
For the circuitry we started by using a large breadboard, then a smaller breadboard, and then finally a small protoboard. Our design comes from this instructable by stacey K. We took the original idea and tried it out on a large breadboard, and then got smaller and smaller until we were able to fit all into the 1″ square protoboard.
For the connections from the arduino and the potentiometer to the LCD display we followed this Instructable‘s directions.
Pin 1 to GND
Pin 2 to 5V
Pin 3 to wiper
Pin 4 to Arduino pin 12
Pin 5 to GND
Pin 6 to Arduino pin 11
Pin 11 to Arduino pin 5
Pin 12 to pin 4
Pin 13 to pin 3
Pin 14 to pin 2
(Connecting an LCD to the Arduino by crocboy)
Instead of using a wiper, we had Pin 3 connect to the potentiometer.
When you are connecting the battery to the protoboard, you’ll need to cut off the connector so you can solder the wires directly into the protoboard.
After all of the circuitry was soldered, we soldered the LCD display and the Arduino, as well as the straided wire (that had gone through the case, and was attached to the molded piezo) to the circuitry board.
Step 2: Code
Lots of testing and re-checking happened to make the code what it is right now. Things might work differently for your plumbing systems or if you use different equipment throughout the process. This code worked for our project using the equipment and methods that we used.
The picture is purely for demonstration. Image source http://apcmag.com/arduino-masterclass-part-3-tv-w…
For this specific code we downloaded multiple ‘libraries’ of how to program an arduino to our computers.
For more detail: Shower Monitor Arduino with LCD display
-
How does the water monitor determine water usage?
It attaches a piezo transducer to a shower pipe to calibrate the average of vibrations while the shower is on. -
Can I use two batteries instead of one?
Yes, the final product was enhanced with two 9 volt batteries soldered onto the Arduino to run longer. -
What type of board was used for the final circuitry?
The team moved from breadboards to fit all components into a small 1 inch square protoboard. -
Does the code require specific libraries?
Yes, you must download multiple libraries for programming an Arduino to your computer. -
How should the 9V battery be connected to the protoboard?
You need to cut off the connector so you can solder the wires directly into the protoboard. -
Where did the authors purchase most of their equipment?
They visited local RadioShack, Menards, and sparkfun.com, or accessed items from their college electronics lab. -
What software is required for this project?
Arduino software must be installed on your computer to program the device. -
Is the circuit design unique to this project?
No, the design comes from an instructable by stacey K which they adapted and miniaturized.
