We are students from Singapore Polytechnic.
After looking at the famous Necomimi Arduino Cat Ears, we decided to give it a try to help us familiarise ourselves with the accelerometer and the arduino.
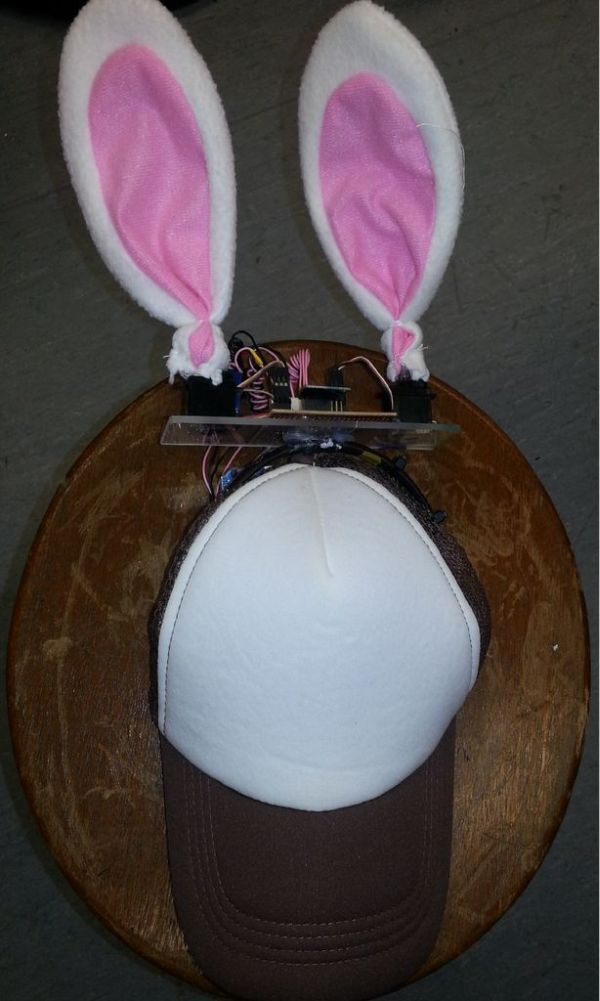
Using the materials that we had on hand, we managed to produce a set of moving rabbit ears that is similar but not as fantastic. 🙂
We made a pair of rabbit ears on a cap that move according to the direction your head turns using an accelerometer, servo motors and an Arduino Uno.
Step 1: Components & Tools & Software
The componets and tools that we used to create the Rabbit Ears on a Cap
(Hopefully we didn’t miss out any thing.)
The rabbit ears and the cap were bought from the shop where everything costs $2, DAISO. Our friend had kindly given us one of her hairbands. The other tools and components were provided by our FYP supervisor Teo Shin Jen.
Components:
1. Arduino Uno
2. MMMA7361L 3-Axis Accelerometer ±1.5/6g with Voltage Regulator http://www.pololu.com/catalog/product/1251
3. Servo motors x2
4. Molex pins ( 2 pin & 5 pin )
5. Cable ties
6. Stripboard
7. Single core wire
8. Rabbit Ears ( bought from DAISO)
9. Hairband
10.Acrylic board
11.Cap ( bought from DAISO )
12. Breadboard ( for testing servo and accelerometer)
Tools:
1.Glue gun
2.Soldering Iron
3.Wire stripper
4.Wire cutter
5.Pliers
6.Molex Crimp tool
Software:
1. Arduino IDE
Step 2: Testing of Motor
We first planned out what we intended to do, which was to have the ears turn to the left and back to the middle repeatedly when you turn your head left , the ears to turn to the right and back to middle repeatedly when you turn your head right and have the ears remain still when you look straight.
Once we gathered all the items we needed, we noticed that there was a single iron wire inside each ear to give it its shape. It will prove extremely useful when we need to mount the ears on the motors.
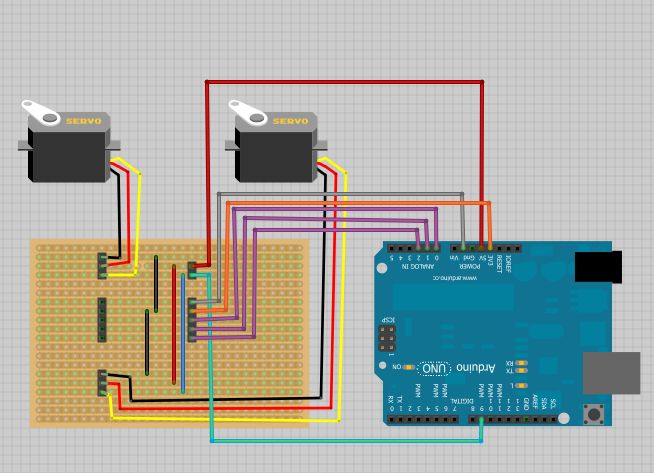
The next thing to do was to test the two servo motors.
This is the code we wrote to test the motors, we fine-tuned the values to have the motors turn to the direction we need it to be.
Using the same setup as the Sweep servo example which can be found here :http://arduino.cc/it/Tutorial/Sweep
—————————————————-
TestingMotor Code:
#include <Servo.h>
Servo myservoLeft;
Servo myservoRight;
int i;
2. MMMA7361L 3-Axis Accelerometer ±1.5/6g with Voltage Regulator
3. Servo motors x2
4. Molex pins ( 2 pin & 5 pin )
5. Cable ties
For more detail: Rabbit Ears on a Cap using Arduino