Update!!!
New version is here!!
I’m really into making Youtube videos for Instructables. Sometimes it is hard to rewind the moment I wanted to pause. So, I thought it would be nice if I had a dial for it.
[ Instruction ]
Manual https://eunchan.me/PREMIERE-PRO-CONTROLLER-DIAL-DI…
Source Code https://github.com/happythingsmaker/PremiereProDi…
3D Printing File https://www.thingiverse.com/thing:2810760
[ About the maker ]
Youtube Channel http://www.youtube.com/EunchanPark
Supplies:
https://eunchan.me/PREMIERE-PRO-CONTROLLER-DIAL-DI…
Step 1: Preparing Materials and Tools
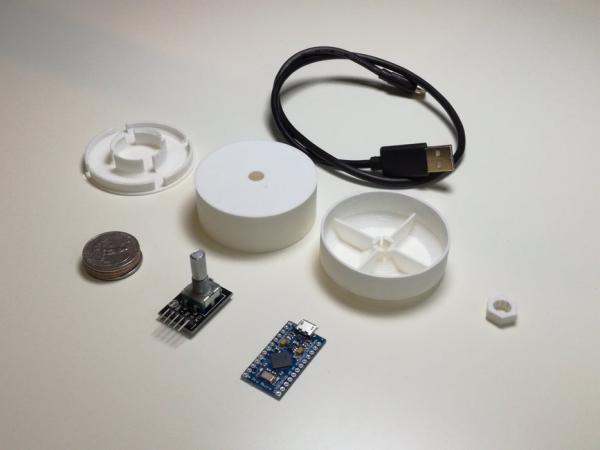
[3d printing]
- First of all, you need to prepare some parts and 3d printing things. 3d parts are on the Thingiverse.
- https://www.thingiverse.com/thing:2810760
Step 2: Assemble the Encoder and the Arduino
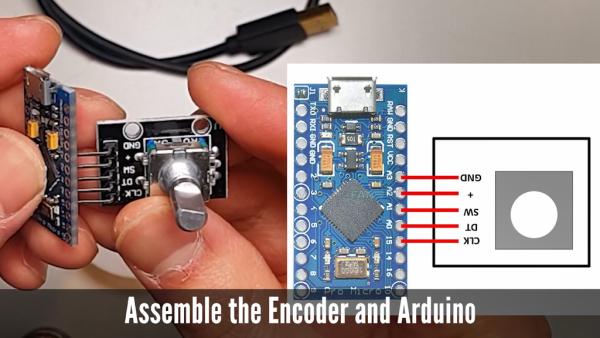
The very first step is soldering.
This weird connection shows that I didn’t want to use any wires for soldering it at all.
I used digital output for giving ground and 5v.
It works well!
Step 3: Solder 5 Pins. It Is All!

Solder all five pins.
It is straightforward.
Step 4: Put the Circuit Board Into the Drum Frame.
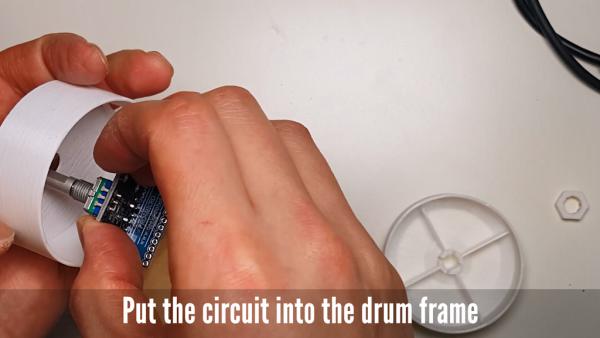
There is a vertical hole on the side wall.
It is for USB terminal
Step 5: Fasten It
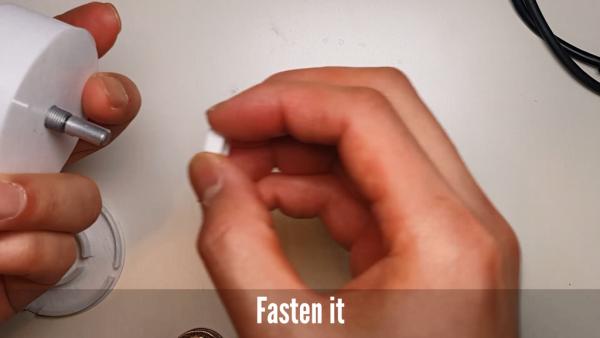
I uploaded a nut shape model on the Thingiverse just in case you don’t have a proper size of nuts.
(Using a M7 nut is better way.)
Step 6: Glue It (Optional)
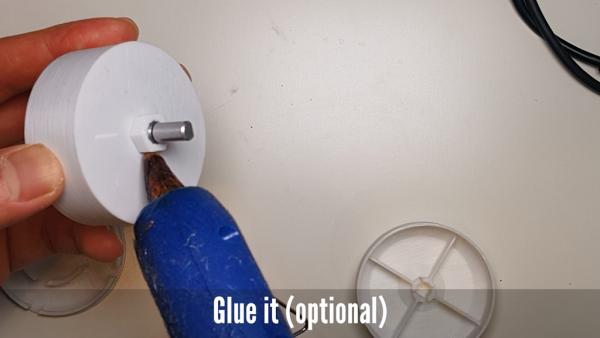
If you want to fix it completely, glue it.
Step 7: Put Coins Into the Bottom Frame
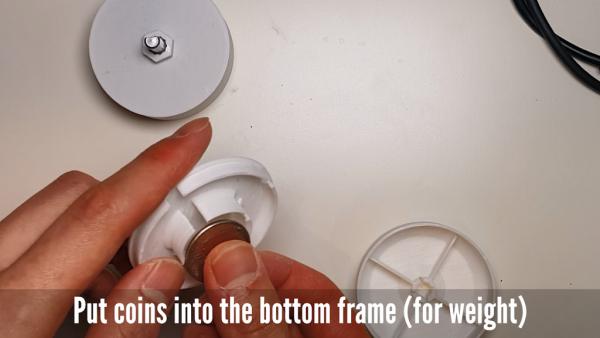
Put 4 quarter into the bottom frame for making it heavy.
Source: Premiere Pro Edit Dial Controller (Seek / Play / Pause) ($6 DIY)